
- Types Of RVs
- Tow Vehicles
- Maintenance & Repairs
- RV Power & Electrical Supplies
- RV Appliances
- Living In An RV
- Travel & Destinations
- RV Gear Buyer’s Guides


6 Best Replacement Flooring Options for Your RV & How to Choose
- Last Updated: June 14, 2024
- 23 minutes read
So, you’re considering replacing the floors in your RV. Maybe it has that old, 90s-style carpet that contains three generations of dirt and grime; or maybe you simply want to update the look and feel of your home on wheels.
Whatever reason brought you here, you are probably wondering: What is the best flooring for an RV?
There are several great materials when it comes to RV flooring. Three most popular camper flooring options include carpet, vinyl, and laminate. Out of those 3, however, the best RV flooring type is undoubtedly vinyl. It’s lightweight, durable and water resistant! Plus it comes in tons of different colors so you can find something to match your camper décor style.
That being said, there are many factors to consider when choosing the best RV flooring for you.
Each flooring option has its advantages and disadvantages; and while vinyl might be a great option for some, it may not be the best for others.
Because of this, we’ve created a comprehensive RV flooring guide to help you decide when to replace your floors AND which material is best for you.
Let’s dive in.
IN THIS ARTICLE
How to Tell When It’s Time to Replace Your RV Flooring

There are many signs to look for when deciding if it’s time to replace the flooring in your RV.
Maybe the current flooring is starting to crack; maybe the carpet is becoming frayed and worn; or maybe you’re like me and randomly decide to start ripping the carpet up by hand like a lunatic (true story!).
Regardless, I think we can all relate to the sudden urge to renovate your space.
So, if you need some validation for your desire remodel, here are some signs that you should consider replacing the flooring in your RV:
1: Your carpet is frayed, worn thin, or feels impossible to clean.
I have to admit, I am biased when it comes to carpet in RVs: I think it’s awful. It’s hard to clean and becomes really ugly when it’s worn. So if you’re here wondering if it’s time to rip up your carpets, I say YES.
But if you want more than just my opinion, look for the common types of wear that come with carpeting.
This can include fraying on areas that have the most use, wearing so thin you can see the netting on the bottom, and becoming so filthy that even the most powerful Dirt Devil fails to adequately clean your space.
As carpets age, they become thinner; thus allowing the fine particles of dirt to fall to the sub-floor.
If you feel like your carpet is filthy no matter how much you scrub and vacuum, this may be the case.
It was definitely the case with the carpeting in our Class A, and once we finally ripped it up, we realized just how much dirt and sand was trapped beneath. No wonder it never felt truly clean!
2: Your vinyl flooring is cracking, breaking off, or worn down .
Because vinyl is essentially PVC, it does not wear the same as hardwood or other types of flooring that contain wood particles.
When vinyl becomes damaged or worn, it tends to crack or even break off. This is especially common with older vinyl flooring.
Time and wear will make the floor thinner and brittle, causing it to be more vulnerable to damage.
Are you beginning to see spots of white on the heavily trafficked areas in your RV?
Certain types of vinyl flooring only have pigment on the top layer of the flooring, and if your flooring has been walked on quite a bit, you might see places where this layer of colorant has worn thin.
3: Your wood-based flooring is swelling, moldy, or warped.
Flooring that is made of wood or wood-composite (such as laminate or engineered-wood flooring) is an attractive option.
For one, it’s gorgeous. And with all the different styles and textures out there, you can make the interior of your RV feel like your own cozy little bungalow.
Nevertheless, this appealing option is susceptible to moisture, temperature changes, and water damage.
Thus, if you’re beginning to find spots that are warped, cupping, or moldy, you may want to consider replacing your wood flooring.
In fact, if you find evidence of water damage with any type of flooring, you’ll want to consider both removing the flooring and finding the source of moisture.
Check around your slides, windows, and along seams in your ceiling. If there’s anything that will throw a curveball into your travel plans, it’s untreated water damage!
Alright, now that we’ve taken a dive into the various signs of floor damage, let’s talk flooring options.
Choosing the Right RV Flooring for Your Lifestyle

When it comes to flooring options for RVs, there are many components to consider. Indeed, RVs are our homes away from home, but they are designed to be driven (or towed) down the road.
Because of this, choosing flooring for your RV is going to be very different than choosing it for your house.
Sticks and bricks homes are stationary, and common materials used in houses may not withstand the shifting and bouncing of an RV.
Therefore, popular flooring options for houses may be unpopular for RVs.
Here are 3 important factors to consider when choosing best replacement flooring material for your RV:
1. You want the flooring material to be lightweight.
This is why hardwood and tile are typically not used in RVs. And while they are both very pretty, they’ll cost you a pretty penny in fuel because they’ll weigh your rig down significantly.
For example, laminate flooring usually only weighs about 1.5 lbs per square foot, while hardwood flooring can weigh 2.8 lbs per square foot or more. That’s the difference of over 300 lbs in the average Class A!
2. You’ll want the flooring to be flexible .
Because your RV is just that: a recreational vehicle, you’ll want flooring that will hold up to the constant shifting that comes with driving down the road.
This is why materials such as concrete, porcelain, marble, and other stone tiles are not the best for RVs. Not only are they heavy, but your beautiful floors will crack in no time!
Think: tough yet malleable (just like us RVers, am I right?).
3. You’ll want the flooring to be durable.
Because of the small space, RV floors get A LOT of use. Think about it: you probably walk around the living/kitchen area at least a zillion times a day, and if you’re a full-timer, times that by 365! (Ok, I know a zillion isn’t exactly a real number, but you get the picture).
For this reason, you’ll want floors that will hold up. This means finding a sturdy material that is resistant to cracking and water damage AND choosing a good quality option (i.e., you may not want to pick the cheapest product you can find).
Now, with all these considerations in place, let’s discuss options for flooring in RVs (including my personal favorite: Vinyl!)

6 Types of RV Replacement Flooring Materials
There are many different options for replacement flooring in RVs and each option has its own list of pros and cons.
Below you’ll find RV flooring types for any budget or lifestyle. Whether you are looking for all-natural, eco-friendly materials or floors that will withstand the next natural disaster, we’ve listed it all.
So grab a pen and some paper (or just open your Notes app), and keep scrolling!
1. Carpet for RVs

I’ll say it again: that dang carpet. When we were in the market for a used motorhome, I found myself constantly asking: “WHY? Why the wall-to-wall carpeting?!”
But as I learned more, I understood the reasons why carpet was (and still is) so popular in RVs: it’s lightweight, inexpensive, and sound-deadening (all of which are very appealing for RV manufacturers!)
Believe it or not, there are actually very good reasons to choose carpet for your RV; and even I, the staunchest of carpet-haters, can agree with some.
- Lightweight
- Sound deadening
- Comfortable
- Can be inexpensive (as low as $0.72/sq ft!)
- Easy to install
- Flexible in a moving RV
Cons :
- Harder to keep clean
- Susceptible to water damage and mold growth
- Typically not as durable
- You’ll need to carry a vacuum
- Shows wear and tear
1. Cheapest option ($): Home and Office Indoor/Outdoor Needlebond Carpet
The Home and Office Needlebond carpeting is your most basic carpeting option (think: libraries and schools) and it is the most affordable at only $0.72 per square foot!
While not very cozy, it is made of polyester and therefore is stain and mildew-resistant. It’s also great if you have a tight budget!
2. Mid-range option ($$): Smartstrand Stain Resistant Carpeting
This carpeting ranges from $1.50 to $8 per square foot, depending on the material and style you choose.
The company, Mohawk Flooring, has created 3 types of carpeting made from polyester, nylon, and polypropylene; giving you several options for moisture and stain-resistant flooring for your RV.
3. Best quality option ($$$): Rec Pro Extreme Duty Indoor/Outdoor RV Carpet
This option is on the higher end at $150 per 10 feet, however, it definitely has its perks. Rec Pro Extreme Duty is tough, yet soft, and easy to install.
It’s made with tightly woven polypropylene and is rubber-backed to further protect your subfloor. No doubt, it’s a great option if you want extremely durable carpeting.
2. Rubber Flooring for RVs

Rubber floors for RVs?! Yeah, that’s what I said too. It’s definitely not the coziest option, but it is completely indestructible! Rubber flooring is especially great for vans, tailers, and toy haulers.
If you’re a weekend warrior who doesn’t want to worry about scratches or dents when you load up your dirt bikes or side-by-sides, this option may be for you.
Rubber flooring usually comes in rolls and can lay over the existing floors for extra protection against damage and moisture.
It comes in a variety of different thicknesses and textures, such as non-slip and ribbed patterns, and is great for any budget.
Without a doubt – if durability is a priority above all else, you’ll probably want to choose rubber.
- Resistant to temperature changes and sunlight
- Protects the floor underneath
- Uncomfortable to walk on
- Not very cozy (unless you feel at home in a garage – no judgement!)
1. Cheapest Option ($): Greatmats Rubber Flooring Rolls
This rubber flooring option is the most economical, at only $1.30 per square foot. It is popular for areas such as gyms, dog kennels, garages, and other utility-type rooms.
It does not have the skid-resistant textures like the more expensive options; nevertheless it is very durable and completely waterproof!
2. Mid-Range Option ($$) RecPro RV Trailer Diamond Plate Pattern Flooring
This Rubber flooring option is found on Amazon for $504.95 per 8.5′ x 25′ sheet (this equates to about $2.38 per square foot).
It is resistant to dents, water, sunlight, and temperature changes, and the diamond plate texture makes it non-skid.
3. Highest-quality option ($$$) RubberCal Rubber Flooring for Vans and Trailers
RubberCal.com is a great website to visit for a variety of rubber flooring options.
There are many products and price points; however, you’re probably going to pay a little over $4 per square foot for basic textured rubber flooring.
In addition to the variety Rubber-cal offers, they also have a 3-year warranty for their flooring and plenty of great reviews to back them up.
3. Hardwood Flooring for RVs

Oh, hardwood flooring – you’re everything a girl could ask for. You get better looking with age, you’re sturdy yet flexible, you have a unique charm all your own, and you don’t even get annoyed when I eat all the ch- wait, what?
Yes, hardwood flooring is the ultimate dream. It adds that authentic style you can only get with real wood and not only that – it adds value to your RV as well.
There are a variety of hardwoods that are used for flooring – some popular types include pine, birch, oak, and maple.
In addition to the unique beauty that real wood floors offer, they can be refinished! Meaning, you won’t have to tear them up just because they’re worn down a bit.
Simply sand them down and refinish them with your favorite wood protectant and voila – you have brand new floors.
Nonetheless, hardwood has its downsides – especially in an RV. First, hardwood can be extremely heavy and it’s not something you should consider unless you know your rig can handle the weight.
Furthermore, hardwood is vulnerable to moisture, mold, and rot. It also expands and contracts with changes in temperatures – something you’ll want to be wary of when traveling through different climates.
To be completely honest, I wish I could say that hardwood flooring is a great choice for RVs; but with all the disadvantages, hardwood should really only be used in limited circumstances.
Let’s take a look at the pros and cons.
- Beautiful styles and finishes to choose from
- Refinishable
- Can add value to your RV
- Makes your RV feel like a home
- Expensive
- Susceptible to water damage
- May warp, cup, or swell with moisture and temperature changes
- Laborious to install
- Dents and scratches easily
1. Cheapest Option ($): Lumber Liquidators New England White Pine Unfinished Solid Hardwood Flooring
At $1.99 per square foot, this is probably the cheapest hardwood flooring you will find.
It is unfinished Pine, meaning you will have to finish it yourself by sanding it to your desired smoothness and coating it with a wood protectant (such as polyurethane).
Pine is also the softest of all the hardwoods, making it extremely vulnerable to scratches and dents.
We actually installed a similar product in our sticks-and-bricks home and we love it – but only after accepting all the dents and dings and embracing the “rustic” look.
2. Mid-range option ($$): Plano March Solid Hardwood Flooring – Oak
Oak is a popular wood for flooring because it’s relatively affordable and much harder than pine.
This hardwood option is $3.89 per square foot and comes in a variety of different stains and finishes for any look.
It’s also completely finished, so you won’t have to worry about sanding or staining it yourself. Just nail it down and you’re done!
But remember: the harder the wood, the denser it will be. This makes oak an even heavier choice for your RV.
3. Best Quality Option ($$$): Hearne Hardwood Flooring
If you’re looking for luxury hardwood, look no further. Hearne Hardwoods has a variety of beautiful flooring options such as Cherry, Hickory, Maple, and Walnut.
These high-quality flooring options are sure to satisfy any taste; and ranging from $5.50 per square foot to $25 per square foot, you’ll definitely end up paying for it!
4. Bamboo Flooring for RVs

If you want the authenticity of hardwood without the price and weight, you may want to consider bamboo.
Bamboo flooring is becoming more and more popular because it is much more eco-friendly than hardwood flooring.
This is because it is actually a grass that only takes 5 years to grow, instead of the 30 years that an oak tree takes to mature.
And while bamboo is actually twice as strong as oak, it is much lighter, making it a great option for RVs.
Pros :
- Eco-friendly
- “Natural” look
- More affordable than hardwood
- Relatively durable
Cons :
- Fluctuates with temperatures just like wood
- May dent and scratch
1. Cheapest Option ($): Lumber Liquidators Strand Natural Wide Plank Engineered Click Bamboo Flooring
At only $2.98 per square foot, this engineered bamboo flooring is both affordable and easy to install.
It is a floating, click-together floor and therefore doesn’t require being glued down. And although it is more affordable than most hardwoods, it is much stronger!
2. Mid-range Option ($$): BuildDirect Sonora Floors Bamboo Collection
You’ll need to pay $4.29 per square foot for this bamboo flooring if you want it in your RV.
BuildDirect’s Sonora bamboo floors come in three different styles which are all stunning.
Because this flooring is solid bamboo (as opposed to engineered), the boards have tongue and groove edges which must be nailed down.
This makes the installation a bit more laborious, however, you’ll have amazing solid wood floors to look forward to!
3. Highest Quality Option ($$$): Cali Bamboo Fossilized Traditional Solid Hardwood Flooring
This is a great option if you’re looking for real wood floors that can stand some wear and tear.
The Cali Bamboo Fossilized flooring has a Janka Hardness score in the 5000+ range. It’s also eco-friendly with low VOCs and comes in a variety of styles and textures.
And while this product is on the pricier end, it still seems like a deal compared to some hardwood floors.
The price range for Cali bamboo flooring is around $5.59 per square foot.
5. Laminate Flooring for RVs

If you’re like me and obsessed with that real-wood look, laminate just might be your favorite.
Laminate is amazing because it mimics hardwood, but without the price tag or heaviness of the real thing.
And with all the options out there for laminate flooring, you can make the interior of your RV look completely stunning (hello, before and after pictures!).
Laminate isn’t all rainbows and unicorns, however. Because it is made with real wood particles, it’s vulnerable to swelling, warping, and mold growth.
Thus, it is far from the perfect option (but I’ll tell you a secret: we used laminate flooring in our RV and loved it!).
Nevertheless, we were very wary of spills and possible water damage; and if you have pets or young kids, you may not want to take the chance.
Pros:
- Looks like real hardwood
- Muffles sound better than vinyl
- Inexpensive
- Fairly easy to install
- Easy to keep clean
- Less durable than vinyl
- Cheaper options may contain formaldehyde (yeah, that’s a whole other conversation).
- May need an underlayment
1. Cheapest Option ($): TrafficMaster 2-strip Laminate Flooring
At only $1.09 per square foot, this laminate flooring is one of the most affordable options.
And while it’s not waterproof, it can at least withstand wet-mopping.
It’s also scratch-resistant and extremely lightweight, making it a decent option for RVs – especially if you’re on a budget.
2. Mid-range option ($$): Pergo Wetprotect 12mm Waterproof Wood Laminate Flooring
According to Lowe’s website, the “Wetprotect technology provides full-coverage technology from surface to subfloor”.
They also claim it has scratch and dent protection as well. But of course, with higher quality products comes a higher price tag – $2.99 per square foot to be exact.
With less floor to cover, however, it may feel easier to pay more for better quality.
Just another perk of living tiny! Less space = fewer materials.
3. Best quality option ($$$): Shaw Repel Water Resistant Laminate
Starting at $5.39 per square foot, Shaw Floors’ Repel Water Resistant Laminate is a much higher quality flooring and comes with its own warranty to prove it.
According to Shaw Flooring, their Repel brand will resist damage from moisture, stains, or sunlight (limited warranty), and will not warp, cup, buckle, or delaminate (lifetime warranty).
This may be a great option if you want all the perks of laminate AND more durability. As always, it’s all about weighing the pros and cons.
6. Vinyl Flooring for RVs

Ah, vinyl; our shining star when it comes to durability, weight, and flexibility. Vinyl is king when it comes to RV flooring because it is so tough.
Since it’s made of PVC, it is completely waterproof, scratch-resistant, and dent-resistant.
It’ll withstand the rocking and rolling of your rig, excited pets and children, and the humidity changes that come with traveling an entire continent.
It’s also fairly affordable and comes in a myriad of faux-wood and -tile looks.
But while vinyl is NEARLY the perfect option, it has a few downsides as well. For one, it doesn’t muffle the sound like carpet (or even laminate for that matter).
It also sits directly on your subfloor and doesn’t provide much cushion, making it seem cold and hard to walk on.
- Scratch-resistant
- Stain-resistant
- Comes in various looks and styles
- Low maintenance
- Potentially high VOCs
- Not environmentally friendly
- Does not muffle the sound
- Not as “cozy” as carpet or laminate
1. Cheapest option ($): TrafficMaster Click-Lock Rigid Core Luxury Vinyl Plank Flooring
At only $1.99 per square foot, this vinyl plank flooring is perfect if you’re on a budget.
It uses the click-lock installation method, meaning it is a floating floor that can go directly on your subfloor.
Because it’s non-adhesive, you’ll be able to remove the flooring with ease (if you choose), and it’s much more “slide-out friendly” (I have personally dealt with adhesive tiles under a slide-out and it was a nightmare – I don’t recommend it!)
2. Mid-range option ($$): SmartCore Pro Burbank Oak Wide Thick Waterproof Interlocking Luxury Vinyl
SmartCore is fabulous if you want an indestructible flooring option and don’t mind paying a little more for it.
I love this brand because it has beautiful faux-wood and -tile patterns AND commercial-grade durability! Unlike cheaper options, it also meets stricter indoor air quality emission criteria.
3. Best quality option ($$$): Shaw Floors Largo Mix Plus Luxury Vinyl
At $9.19 per square foot, this vinyl flooring option is definitely pricier; however, not without reason!
The Largo Mix Plus collection has perks such as extreme durability, low VOCs, realistic embossing, and “Soft Silence” noise reduction.
In other words, pretty much everything you could ever want in a floor! It’s also non-adhesive, which makes for easy installation and less hassle under slide-outs.
Hands down, if you want luxury flooring that you can install and then forget about, high-end vinyl flooring is probably your answer.
Which Flooring Option is Best for Your RV?
Now that I’ve talked your ear off about all the different flooring options for RVs, let’s discuss which option is best FOR YOU.
First and foremost, think about the ways in which you will use your RV and who will be traveling with you:
Are you looking for flooring that will make your RV feel cozy? Will your wheels never leave pavement?
Are you an individual or couple that keeps their space relatively clean? (If you are, tell me your secret!)
If your answer is yes to all of these questions, carpet may be perfect for you and your rig.
It’ll muffle the sound going down the road, add very little weight to your RV, and make your home on wheels feel like just that – a home.
Maybe you’re on a tight budget but still want that beautiful hardwood look.
Maybe you’re not super concerned about moisture and spills, but at least want a floor you can mop. If so, laminate flooring might be a fantastic option for you.
But of course, if you are prone to spilling any and all liquids, have a large family that includes pets, or maybe you simply want flooring that can withstand the next century – you’ll probably want to choose vinyl. As they say: “vinyl is final”.
In Conclusion
Each flooring decision should be made based on the unique living situations and travel styles of the RVers themselves.
Even though we think vinyl is the best option for RVs, it may not be the best option for you! As discussed before, there are many different options for every budget and circumstance.
And most importantly, your flooring should withstand your daily use and make your RV feel like home!
Now we want to hear about your experiences with RV flooring! In your opinion, what are the best and worst types of flooring for RVs? Tell us in the comments below!

About Author / Aaron Richardson
Aaron Richardson is an expert RVer and the co-founder of RVing Know How. Aaron, along with his wife Evelyn, has been living and traveling in their Keystone Fuzion RV since 2017. Their adventures span across the country and beyond, including memorable RVing experiences in Mexico. Aaron's passion for the outdoors and RVing shines through in his writings, where he shares a blend of travel stories, practical tips, and insights to enhance the RV lifestyle.

RVs And Bears: How To Camp Safely In Bear Country
The 4 best travel trailers with a built-in generator.

Dalton Bourne
Thanks for sharing these great options. It’s very useful. I have used this vinyl flooring for my RV. So far, the floor is still looking like new. although we have a lot of traffic in our living room and kitchen.
Leave a Comment Cancel reply
Your email address will not be published.
Save my name, email, and website in this browser for the next time I comment.
You Might Also Like

Locked out of Your RV? Here’s How to Unlock a Camper Door Without a Key
 Don’t Need an RV Dishwasher 23")
7 Reasons Why You (Probably) Don’t Need an RV Dishwasher

How to Install & Secure: Residential Refrigerator In An RV
Start typing and press Enter to search
- Carpet Tiles
- Peel & Stick Carpet
- Commercial Carpet
- Home Theater Carpet
- Outdoor Carpet
- Carpet Rolls
- Waterproof Carpet

- TritonCORE Pro Vinyl
- Vinyl Planks
- Waterproof Vinyl
- Rigid Core Vinyl
- COREtec Vinyl
- Vinyl Tiles
- Vinyl Sheet

- Water Resistant Laminate
- Laminate Flooring
- Engineered Wood
- Bamboo Flooring
- Cork Flooring

- Porcelain Tile
- Ceramic Tile
- Backsplash Tile
- Tile Accessories

- Landscape Turf
- Putting Green Turf
- Schools & Playground Turf
- Sports & Field Turf
- Artificial Plant Decor
- Artificial Grass Rugs
- Turf Accessories

- Playground Flooring & Equipment
- Outdoor Pavers
- Drainage Tiles
- Rooftop Deck Flooring
- Composite Decking
- Court Flooring
- Event Flooring
- All Outdoor Flooring

- Rubber Rolls
- Rubber Tiles
- Rubber Mats
- All Rubber Flooring

- Garage Tiles
- Garage Rolls
- Garage Mats
- Trailer Flooring
- All Garage Flooring
- Garage Cabinets
- Tool Storage & Organization
- Portable Tool Boxes
- Garage Furniture
- Workbenches
- All Storage & Organization

- Martial Arts Mats
- Cheer / Gymnastics Mats
- Wrestling Mats
- Wall Padding
- All Foam Flooring

- Marley Dance Flooring
- Dance Tiles
- Portable Dance Floor
- Dance Subfloors
- All Dance Flooring

- Anti-Fatigue Flooring / Mats
- Kitchen Mats
- Trade Show Flooring
- Entrance Mats

- Commercial Gym Flooring
- Home Gym Flooring
- High Impact Flooring
- Gym Floor Tiles
- Weight Room Mats
- Gym Floor Covers
- All Gym Flooring
- Gymnastics Equipment

- T-Molding & Transitions
- Quarter Round
- Stair Nose & Tread
- Baseboard Molding
- All Trims & Moldings

- Installation Tools
- Floor Heating
- Tile Installation Tools
- Wood Installation Tools
- Adhesives / Glue
- All Accessories

- Foam Underlayment
- Rubber Underlayment
- Rubber Cork Underlayment
- Cork Underlayment
- All Underlayment

- Monthly Promos
- New Arrivals
- Made in the USA

- Vinyl Flooring
- Waterproof Vinyl Flooring
- Rigid Core Luxury Vinyl Flooring
- SPC vs. WPC Vinyl Flooring
- Vinyl Plank Flooring
- Vinyl Tile Flooring
- Sheet Vinyl Flooring
- Laminate vs. Vinyl Flooring
- Linoleum vs. Vinyl Flooring
- Vinyl Installation Cost Guide
- Vinyl Flooring FAQ
- How to Install Vinyl Flooring
- How to Clean Vinyl Floors
- Bathroom Flooring Options

- Engineered Hardwood
- All Engineered Hardwood

- Waterproof Laminate Flooring
- Engineered Hardwood vs. Laminate
- Laminate Flooring Installation Cost Guide
- How to Clean Laminate Floors
- How to Install Laminate Floors
- Floor Tile Buying Guide
- How to Tile a Floor
- Wall Tile Buying Guide
- Backsplash and Mosaic Tile Guide
- How to Install Backsplash Tile
- How to Clean Tile
- How to Clean and Seal Grout
- Floor and Wall Tile FAQ
- Tile Grout and Thinset
- Tile Grout FAQ

- Ultimate Carpet Buying Guide
- Best Carpet Tiles
- Broadloom Carpet
- Berber Carpet
- Carpet Installation Cost Guide
- Carpet Padding

- Outdoor Carpet Buying Guide
- About Artificial Grass
- Landscape Turf Buying Guide
- Playground Flooring Buying guide
- Playground Turf Buying Guide
- Playground Safety
- Playground Flooring FAQ
- Composite Decking Buying Guide
- Best Composite Decking Buying Guide
- Court Flooring Buying Guide
- Court Flooring Installation
- Rooftop Flooring Buying Guide
- All Outdoor

- Gym & Sports Turf
- How to Choose Turf Infill
- All Artificial Grass

- Advanced Gymnastics Mats
- Intermediate Gymnastics Mats
- Beginner Gymnastics Mats
- Roll Out Cheer Mats
- Kids Tumbling Mats
- Folding Mats
- Gymnastics Teaching Tools
- Best Gymnastics Mats

- Rubber Floor Tiles
- Horse Stall Mats vs. Gym Floor Mats
- Pet-Friendly Flooring
- Playground Flooring
- Rubber Flooring FAQ

- Best Garage Flooring Options
- Garage Flooring Buying Guide
- Rubber Garage Flooring
- Create Your Dream Garage
- Garage Theme Ideas
- 10 Ways to Use Your Garage
- Garage Flooring FAQ

- How to Choose a Dance Floor
- Marley Flooring
- Dance Floor Tiles
- Dance Studio Flooring
- Home Dance Flooring
- Portable Dance Flooring
- Ballet Dance Flooring
- Tap Dance Flooring
- Jazz Dance Flooring
- Contemporary Dance Flooring
- Ballroom Dance Flooring
- Dance Subfloor

- Underlayment

- All Buyer's Guides
- Learning Center
Flooring Inc.
We make it easy....
What DIY project are you interested in?

Article , Best of , Carpet , Laminate , Outdoor , Vinyl
The Best RV Flooring Ideas in 2024
By Chelsi Hewitt
| Fact Checked By: Ashley De Zeeuw
Published: December 21, 2023 | Updated: December 21, 2023
After years of use, the flooring in your RV might be worn down and need a refresh! You know you it’s time, but where do you start? For the best RV flooring, you need something durable, stylish, and functional.
There are several RV flooring ideas to choose from, ranging from vinyl rolls to laminate, to carpet tiles, and everything in between. This guide will help you sort through the options to find the best replacement flooring for RVs. You’ll get the pros and cons, and customer reviews so you can make an informed choice.
How to Choose RV Flooring

Before you jump into shopping, there are some essential details RV owners should consider. What kind of flooring will hold up best to the challenges of a camper or RV? Here are a few helpful features to keep in mind.
- Water-resistant: When you’re traveling or camping, it’s always good to prepare for the unexpected. Water-resistance protects your floor from moisture, so it won’t swell up or warp.
- Durable : The great outdoors and the open road can be tough on your floor. You need something that can handle your road trips without tracking dirt and dust in. Plus, your RV won’t be climate-controlled 24/7, so your flooring needs to deal with more extreme hot and cold temperatures.
- DIY-friendly: Why hire an installer if you don’t have to? There are plenty of floors you can install yourself, quickly and easily.
- Weight: Your RV is heavy enough as it is, so it makes sense to avoid spending even more gas money by hauling extra pounds that you don’t need. A lightweight floor is always ideal for a camper or RV.
- Cost: If you’re on a budget, you need flooring that won’t break the bank, but it must be durable enough to last. Keep the value in mind.
Now that you have some insight into what to look for in RV and camper flooring, let’s explore some popular options!
Mannington Realities II 6″ Vinyl Sheet

This durable, versatile vinyl sheet offers a high-definition style in wood look. That beautiful design is protected by a tough wear layer with spill protection and stain guard protection. It resists scratching, scuffing, and everyday wear and tear. The sturdy fiberglass backing ensures you’ll be enjoying this low-maintenance, waterproof floor for years to come.
When it’s time to install, you’ll love how easy it is. You roll it out, tape or glue it down, you’re finished.
“High-quality product. I had ordered a sample and by the feel, I could tell it was going to be durable and it wasn’t cheap looking at all. I redesigned my home office and used this sheet on the floor and I’m very happy, came out well.” – Happy Customer from San Francisco, CA
- Lightweight
- Easy to clean and maintain
- Mold and mildew-resistant
- 10-year limited commercial warranty
- Can be dented or gouged
SHOP MANNINGTON REALITIES II 6′ VINYL SHEETS
12mm Mohawk RevWood Plus Hartwick Waterproof Laminate

Give your camper or RV a waterproof, scratch proof floor with this laminate flooring. The planks offer stunning visuals and embossing for a convincing natural wood look and feel. With an AC 4 wear layer rating, these planks can handle heavy traffic and pets without a problem.
Water damage won’t be an issue either, since these waterproof laminate planks repel water and prevent swelling from moisture. Also, installation is made easy with a click-lock system. Snap the planks together to create a floating floor that isn’t glued or nailed down.
- Affordable
- Realistic wood looks
- Easy installation process
- Scratch and spill-proof
- Not as comfortable or warm as vinyl
SHOP MOHAWK HARTWICK WATERPROOF LAMINATE
Berber Carpet Tiles

Our Berber Carpet Tiles come in several colors that are sure to match any camper or RV decor. The self-adhering peel and stick backing makes installation quick and straightforward.
These carpet tiles are also mold and mildew resistant, which is a plus when you’re tracking dirt and moisture inside. Best of all, this carpet is made from 100% post-consumer polyester fibers, so you can benefit the planet while enjoying the great outdoors.
“Who says two neutrals don’t go together? I purchased the smoke and sand carpet tiles. We laid them in a checkerboard pattern in our basement rec room. I must say along with the freshly painted walls, it all turned out nice!” – Happy Customer from Menomonee Falls, WI
- Soft and comfortable
- Lots of color options
- Easy installation
- 3-year warranty
- Less durability in the long term
- Possible color variations between batches
SHOP BERBER CARPET TILES
Coin Nitro Rolls

These vinyl floor rolls were designed to provide the best value in flooring. They are custom cut to fit your space easily and feature a coin pattern textured surface that reduces the risk of slipping.
Initially designed for garage use, these vinyl rolls are chemical-resistant and waterproof, so you know your floor will be up to the challenge. Plus, they’re easy to clean, so you can spend more time enjoying your travel trailer and less time maintaining the floor.
“Love the Nitro flooring. It was super easy to trim and install. It gave my trailer a finished look, and better yet it is functional, protecting the floor for extended life while also providing excellent grip!” – Blake P. from Reedsburg, WI
- Low-maintenance
- Lifetime warranty
- Limited color options
SHOP COIN NITRO ROLLS
Flex Nitro Tiles

With soft PVC vinyl tiles, you get durability as well as softness and comfort underfoot. The textured tread plate surface allowed for better traction and slip resistance, even when the floor is wet.
Initially designed for garages and workshops, these colorful tiles offer a high-end finished look for your camper or RV. Plus, they’re effortless to install. Snap together the hidden interlocking edges to complete your floor in no time.
“Super product. The tiles are of high quality and very easy to install. With help from my wife, we tiled a 20’ x 20’ foot garage in about 2 1/2 hours, including custom cuts. I had no problem trimming tiles with a jigsaw to fit the gaps near the garage walls. As completed the garage floor looks very professional, finished, and bright. The tiles are very quiet to walk on, unlike my neighbors who purchased a lower-priced hard plastic tile that is very noisy.” – Bob from Lake Worth, FL
- DIY-friendly
- Chemical-resistance
- Soft underfoot
- Durable, warm, and versatile
- Some color variation between tiles
SHOP DIAMOND FLEX NITRO TILES
1/4″ Tough Rubber Rolls

Our 1/4″ Rubber Rolls are a great option for your RV! Rubber flooring for trailers protects the existing flooring from moisture and damage while adding more anti-slip traction. These rolls are also easy to install and maintain, so you don’t need to worry about hiring installers or worry about extensive cleaning.
While often used for home gyms, sheds, and garages, this budget-friendly option can help extend the lifespan of your RV subfloor and add extra cushion and support to your travel living spaces.
- Shock absorbent
- Indoor/ outdoor use
” This product is an excellent choice for a work room, exercise room, laundry room, or just an entertainment/activity room. The flooring installs quickly and easily. If you have a straight edge, know how to use a tape measure, and can manipulate a carpet cutter, you are good to go and your finished product looks great.” – John from Grand Ledge, Michigan
Flooring You Shouldn’t Use in RVs
While there are plenty of great RV flooring options, there are also a few types you should steer away from. While they might be perfect in a standard home, a mobile home has some special needs that you should consider.
So here are a couple of floors that aren’t recommended for RVs or campers.
- Vinyl planks: While you might think this is a great flooring option for an RV, vinyl plank flooring is only meant to be installed in the home. If you use vinyl plank flooring in an RV, your warranty could be voided.
- Porcelain and ceramic tile: While people love how stylish and durable tile can be, it’s just too heavy to haul around as RV flooring. Instead, go for something lighter. Your gas mileage will thank you.
- Hardwood: Real hardwood flooring is gorgeous, but that natural beauty comes with some drawbacks. This is a high-maintenance floor, and the last thing you want is to be worrying about your floor when trying to enjoy your camper. Plus, it’s pretty heavy, too.
Inspired yet? There are a ton of options to pick from to update your RV flooring. Now that you have some more info about our top picks, you can make an informed decision about what works best for you. You’ll be back on the road enjoying your RV (and its awesome new flooring) in no time!
ORDER FREE SAMPLES SHOP ALL RV FLOORING
Top Related Posts
- Dance Flooring Options: Everything You Need to Know
About Chelsi Hewitt

Chelsi Hewitt is a Phoenix-area content marketing professional. She joined Flooring Inc. to teach people about flooring, interior design, home trends, and more.

Mannington Realities II 6' Vinyl Sheet
Mannington Realities is a durable and versatile product available in beautiful high definition wood and tile patterns. This Vinyl Sheet comes with a 10-year limited commercial warranty and are best for high traffic areas.
12mm Mohawk Hartwick Waterproof Laminate
Mohawk Hartwick Maple laminate flooring provides your home with waterproof floors and exceptional wear resistance, all with the appearance of real Maple planks.
Get the ever so popular tread plate design in a tile that is not only durable but comfortable underfoot with our Diamond Flex Nitro Tiles. Available in several colors, this tile is the perfect floor for any garage or workshop floor.
Coin pattern Nitro Rolls were designed from the ground up to provide the best value roll out garage floor covering on the market. Nitro rolls are available in stock and custom cut rolls in various colors and ship the same or next business day.

Our Berber Carpet Tiles that come in several colors that are sure to match any home decor. These floor tiles feature a self-adhering backing that makes for a quick and easy install as well as having 3-year warranty to back your purchase.

Facebook @FlooringInc #FlooringInc

Instagram @FlooringIncCom #FlooringInc

Twitter @FlooringIncCom #FlooringInc
One Comment on “ The Best RV Flooring Ideas in 2024 ”
Yoo-hoo! Hope you’re doing fine. Now, my father-in-law has decided to spend his summer break by travelling across multiple states using his RV. Hence, I’d like to thank you for showing us that nitro rolls are fairly simple to set up and upkeep altogether. I’ll share this tip with him so he could make the right installation later on.
Leave a Reply Cancel reply
Your email address will not be published. Required fields are marked *
Save my name, email, and website in this browser for the next time I comment.
- 1 How to Choose RV Flooring
- 2 Mannington Realities II 6″ Vinyl Sheet
- 3 12mm Mohawk RevWood Plus Hartwick Waterproof Laminate
- 4 Berber Carpet Tiles
- 5 Coin Nitro Rolls
- 6 Flex Nitro Tiles
- 7 1/4″ Tough Rubber Rolls
- 8 Flooring You Shouldn’t Use in RVs
- 9 Conclusion
Replacement Flooring for RVs – 2023 Top Picks
The best replacement flooring for an rv.
Looking for the best RV flooring? Any owner knows that the flooring and seating surfaces are usually the most worn out parts of an RV, and replacing it from time to time is essential.
And whether it's laminate, carpet, tiles, or vinyl flooring for RV floors, it really makes a difference to the interior of your RV or caravan.
Getting the best replacement flooring can be a difficult decision, and with it being expensive, you really need to make sure you get it right.
In this review we've covered what we think are the best types of RV flooring. From carpet to vinyl flooring for RVs, and from tiles to laminate, we've covered it all. Of course, your favorite color or pattern might differ, but each review has a variety of choices, so you'd be able to get that design in your favorite color or pattern.

After the review, we've included a buyer's guide where we discuss RV flooring in more general. We discuss the benefits of replacing your old flooring, and how it should impact the interior environment. We do comparison overviews of the different types of flooring, so you can be sure which is the most suitable for the area you wish to replace.
We've also added a couple of 'How To' guides and videos on installing some RV vinyl flooring, and also installing some in an RV with slide outs . You can skip straight to the RV Flooring Buyer's Guide by clicking the link.
Review of the Best Replacement Flooring for RVs
As mentioned above, choosing the right replacement RV material is often a difficult choice. Following are the detailed reviews of some of the best RV flooring options available to help you make the correct decision.
Best Overall RV Flooring: RV Trailer Diamond Plate Pattern Flooring

- Waterproof feature ensures durability
- Highly resistant to peeling, scratching, and tearing
- Simple installation process saves time and effort
- Floor can easily be cleaned without many complications
- Design might not be favored by all
A highly durable and resistant RV flooring material, this rubber tile is one of the best available options if you don’t care for appearances and are instead looking for something tough, reliable and useful. The diamond pattern not only gives your RV a fresh, decent look but also adds another layer of grip, allowing you to walk freely and safely in the RV, even when it is moving. This non-skid feature ensures that you don’t fall or slip , even when the floor is wet. One of the strongest materials available on the market, the 0.105-inch thickness and rubber construction of these tiles ensure that they last for years. This flooring material is also highly resistant to sunlight, cold, heat, and even several chemicals. The diamond plate pattern is extremely easy to clean as well. Lastly, adding the 8-feet size makes it one of the best options available, suitable for any RV with the proper cuts. Bottom Line The RV trailer diamond plate flooring is one of the best replacement flooring materials available in the market. The material is durable, strong, reliable, and highly resistant to natural elements. However, the appearance and design might not appeal to all.
RV Vinyl RV Flooring for The Living Area Achim Home Furnishing Tivoli II Peel ‘N’ Stick Vinyl Floor

- Easy installation saves time and energy
- Grease and trash stains can be cleaned off easily
- Beautiful contrast and texture gives the RV an aesthetic look
- Can crack and break easily
- Adhesive is not powerful, and the panels might not stick.
The Achim Home Furnishing Tivoli II Peel ‘N’ Stick Vinyl Floor is a flooring material which only needs to be peeled and stuck to a dry and flat surface. With an appearance similar to real wood, the material can be used in any section of the RV. The easy installation also allows you to stick the material on the existing floor, without removing any flooring material. The RV vinyl flooring is also easy to clean, and waterproof, making it ideal for the kitchen, bathroom, but such. a nice finish is nice throughout any interior, so it's nice for the living areas, too. The material is highly durable and comfortable to walk on as well. The adhesive on the planks is also strong and holds it in place. Allin all this is a really tough, aesthetically pleasing, vinyl flooring for RV interiors. Bottom Line The Tivoli II Peel ‘N’ Stick vinyl floor is a durable and comfortable material which can be easily cleaned and installed. However, the weak adhesive might not hold the planks in place for a long time.
Best RV Flooring for the Money: Indoor/Outdoor Carpet with Rubber Marine Backing

- Can easily be trimmed to the size needed
- Extremely easy to clean without many complications
- UV-protection makes the carpet highly durable and long lasting
- Carpet tears easy and the fibers might start falling out
This replacement flooring material can be used in any section of the RV. Designed with polyester fibers, the carpet with rubber marine backing is extremely resistant to stains and mold. Designed with a solid, neutral pattern, the carpet has a pile height of 1/4 in and is easy to clean as well. The carpet is also UV protected and will give your RV a new and fresh look that will last many years. Although the Indoor/Outdoor Carpet with Rubber Marine Backing is affordable, it is only available in a relatively small 6x10ft. size. Consequently, you might have to use several carpets to cover the entire RV. Bottom Line The Indoor/Outdoor Carpet with marine backing is one of the most affordable and beautiful flooring materials available. Designed with UV protection, the carpet is extremely resistant and easy to clean . However, you might need to purchase several bundles if you're replacing the entire RV.
Best Wood Flooring for RV: Virginia Mill Works Burnished Acacia

- Well-built flooring ensures it lasts a long time
- Extremely durable and resistant to dents and scratches
- Extremely easy to maintain due to its resistance to mold and mildew
- Some RV owners might find it difficult to install
- Acacia wood flooring is more expensive than other hardwood floors
Acacia wood flooring is one of the most beautiful and affordable options available today. Due to its stunning color variation and beautiful rustic appeal, this RV flooring is becoming increasingly popular. The Virginia Mill Works Burnished Acacia is a hard material that reduces the effects of wear and tear, making the flooring extremely durable. There are also fewer chances of dents and scratches, making it an ideal choice if you have children or pets. The wood floor is also less susceptible to swelling and warping. Pet hair, dander, dust, and dirt cannot get trapped, making it easier to clean. It is also waterproof and mold-resistant, making it extremely reliable. However, it is slightly difficult to install Bottom Line The Virginia Mill Works Burnished Acacia is a beautiful, sturdy, and reliable material for RV flooring. Its scratch and mildew-resistant features ensure it lasts long. However, you might have to use professional installation services.
Best RV Vinyl Flooring: RecPro RV Coin Nickel Pattern Trailer Flooring

- Easy installation
- Water resistance allows ease of maintenance and cleaning
- Stunning texture and design give your RV a sleek and stylish look
- Very durable and built for wet or work areas
- Vinyl flooring might not ideal for living areas
Our best RV vinyl flooring is really good for many areas of an RV, including the kitchen and bathroom areas, a toy-hauler , trailer , garage, or any area that need an attractive no-slip surface.
This RV vinyl flooring is cross-functional and can be applied to steps, ramps, sills and any other surface where you need a non-skid surface.
Of all our RV flooring picks, this is the most durable, and is designed to take a pounding, making it great for anyone who wants something that isn't going to give way after a few months,
The durable characteristic of the TPO membrane ensures the RV Flooring is resistant to the effects of wear and tear, making it tear-proof and peel-proof. It truly a flooring that will last you, likely longer than your RV
The only downside for us is the pattern. While we like it, it's not aesthetically pleasing for a living area. That said, if you want something as tough as anything for your wetor work areas, this is up there with the best RV flooring materials. Bottom Line The RecPro RV Coin pattern flooring is one of the best options available today. The vinyl flooring is extremely reliable, durable, sturdy, and easy to install. It's made from high-quality industrial rubber and is resistant to cold, heat, UV rays and most chemicals, making it perfect for use in settings such as bathrooms, kitchens, garages, gyms etc.
Best Linoleum Flooring: Forbo Marmoleum Real Sheet

- First CO2 resilient floor covering
- Anti-static; easy to keep dust-free
- Available in sheets, planks, and tiles
- Safe to be used around people with asthma
- Quick and easy installation due to the proven click system
- 70% of raw materials obtained from natural habitat are renewable
- Design is not favored by all
The Forbo Marmoleum real sheet RV flooring features excellent durability, easy cleaning and maintenance, and stunning floor designs, thus making them the best linoleum flooring for your RV. It is manufactured with 97% natural raw materials and contains no mineral oil, plastics, or phthalates. They are made from 43% recycled content, thus making them environmentally friendly. The primary raw materials used in the production of Marmoleum flooring are jute linseed oil and wood flour, which is why they are suitable to be installed around people with asthmatic allergies or similar disorders. Moreover, this is anti-static, which makes it easier to keep it dust-free Bottom Line If you are looking for a linoleum floor covering that is high quality, durable, sustainable, has an innovative design, then the Forbo Marmoleum is the best choice for your RV. It is available in more than 300 colors and designs ranging from concrete to linear to marbled, thus giving you a choice to install the one that you like best.
Best Laminate Flooring: Dream Home 7mm Ebb Tide Oak

- Easy installation saves time and money
- One of the most budget-friendly options available
- Sturdiness and durability make it long lasting
- Might scratch and bubble after a few weeks of installation
- Laminate flooring might lose its varnish and paint after a short while
Dream Home 7mm Ebb Tide Oak is one of the best laminate flooring options available for RVs. It is designed to mimic the texture, color, and grain of real hardwood. Laminate flooring is also very easy to install, clean, and maintain. Remarkably similar to real hardwood, the Dream Home Ebb Side Oak is also extremely resistant to scratches, staining, wear, and fading. This is sturdy and durable as well and is able to withstand kids, pets, and heavy foot traffic. Designed with a synthetic resin, it is able to prevent water damage and other common problems, making it both durable and reliable. This laminate flooring has an easy installation process, and with the right tools, pretty much anyone can do it. Bottom Line The Dream Home 7mm Ebb Tide Oak is one of the most budget-friendly choices available today. Its similarity to real hardwood will give your RV a beautiful look, while its resistance and durability will ensure it lasts long. However, the flooring might start to scratch and bubble only after extended of use.
CO-Z Vinyl Floor Planks

- Sticks within three minutes
- Made of premium quality vinyl
- Can withstand high temperature
- Environmentally friendly and safe to use
- Water-proof and mold-resistant material
- You might need some extra glue for permanent sticking
What Recent Buyers Report They're very easy to install and clean. The price is well worth the quality and durability of the product. They can make a huge difference in your living space and make it more beautiful. It can be installed on pretty much any floor with the easy peel and stick method. Why it Stands Out to Us This RV flooring uses premium-quality material that is waterproof, mold-resistant, wear-resistant, and fire-resistant. So you can install it in any room, whether it’s your washroom or kitchen. It is very easy to install; you just have to peel from the back, stick it, and wait three minutes. Since they are non-flammable and non-slippery, they are very easy to maintain and clean as well. This environmentally friendly product has no Formaldehyde, making it safe for children as well. Bottom Line Overall, this Flooring for RV interior has four different color and pattern options that all maintain the same level of quality and durability. Along with a good design to lift your place up, you get the safety and easy maintenance, and it can stand up to any competitor with its two mm thickness.
Best Tile Flooring: SomerTile Barcelona Decor Montjuic Floor and Wall Tiles

- Beautifully captures the artisanal look of cement tiles
- Durable and long-lasting tiles that will stand the test of time
- Resistant to mold and bacteria makes them for you and your family
- Some people may find the combination of black and grey dull
OK, so not everyone wants tile flooring in their RV. They're harder to install, more costly and they weigh more. That said, tiles make for a very durable flooring and give a feel like you simply can't get from other flooring materials.
If you fancy going all mediterranean and making your RV look like a rustic villa, these SomerTile Barcelona Decor floor and wall tiles are perfect and so nice.
They feature a worn cement appearance, with floral motifs in faded pastel shades of light blue, beige and brown set on a textured antique white base glaze. And with realistic imitations of scuffs and spots, this flooring will have your setting looking like an old rustic, Spanish cottage.
The tiles are impervious, frost-resistant and boast durable features that make it the ideal choice for kitchens, bathrooms, showers, entryways and even outdoor patios . Bottom Line Tiles are a great choice for your RV as they are durable and add value to your RV. If you are looking to make a statement, then use the SomerTile Band turn your RV into a rustic Spanish villa.
Buyer's Guide
Here we look at RV flooring in more general, and discuss the different types of replacement flooring and the impact it should have on the interior setting of your RV. We do comparison overviews of laminate vs vinyl flooring for RV interiors, and compare other floorings, so you can be sure which is most suitable for yours.
There's a couple of guides and videos on How to Install Laminate Flooring in an RV With Slide Outs, and one on How to Install Vinyl Flooring. Neither is as difficult as it may seem, so you should be able to save some money on insatllation if you follow them correctly.
RV Replacement Flooring 101
Nowadays, there are several material options available. The three most popular RV flooring materials include laminate, carpet, and vinyl.
Laminate Flooring
One of the most popular hardwood floorings, laminate is suitable for those who require a strong, resilient material. The material is able to withstand immense pressure but still maintains its aesthetic quality.
Carpet is more suitable for those owners who want their RV to feel more like a home. Replacing the carpet gives your RV a fresh, new look and also gets rid of any old pet odors .
Vinyl plank flooring is an easy to install and affordable option. This material is waterproof, making it ideal for sections in your RV which come in contact with a lot of moisture or water.
What You Can Expect After Replacing the RV’s Floors
Choosing the right quality material is important and can have several benefits:
Resistance to Cold, Chemicals, and Heat
Over time, exposure to the elements and/or corrosive substances can cause serious damage to the floor of your RV. Replacing your RV’s floors with the right material can make them highly resistant to sunlight, cold, heat, and chemicals.
Scratch-Resistant, Tear-Proof, and Peel-Proof
Selecting the right flooring material can also help reduce the effects of wear and tear, making your RV peel-proof and tear-proof. If installed properly, the right flooring material can also give the RV a beautiful, sleek, modern finish.
Laminate vs. Vinyl Flooring - Comparison Overview
Laminate and Vinyl are both alternatives to the expensive hardwood flooring. They serve the same purpose, but there are many differences as well.
To help decide which one is the right choice for you, let's compare the two.
The main difference between these two floorings is that laminate uses 99% wood, whereas vinyl is made of 100% plastic.
Premium-quality vinyl is harder and more durable than laminate flooring. Laminate can also be bought in high quality, but you might have to spend extra. It depends on the kind of wood and construction process
The price range of both these floorings is not too different. It depends on the manufacturer and quality of the product, but overall there is not a huge difference.

How to Install Laminate Flooring in an RV With Slide Outs
When it comes to installing flooring in slide outs, there are various things you have to keep in mind, like the following.
- There are going to be bumps and elevations, so you need to make sure your flooring is on completely flat ground.
- You can use an underlayment to cover a bump or uneven surface and make it flat.
- If your slide-out is a bit raised than the rest of the unit, you should cover that by overhanging the flooring a little.
- For that, first, measure the slide-out from edge to edge.
- It should be just enough that it doesn’t bend.
- If your slide-out has a gap through which you can look below, you can add an outside corner molding to cover it and coat it with the same color as the flooring, so it blends in.
For more details and tips on how to install laminate flooring, have a look at this video!.
Choosing the right replacement RV flooring is often a challenging task due to the vast options available. Each of the materials mentioned above has its own features and benefits; hence it is difficult to choose the best one. However, with our selections of the best replacement flooring materials, you can ensure that you invest in the right product!
People Also Ask
If you want more tips about how to install these floorings in RVs, read the following frequently asked questions.
What is the Best Type of Flooring for an RV?
Vinyl flooring is the most popular, cost-effective, and durable option, not just for RVs but also for houses. It is waterproof, can withstand high temperatures, and is easy to install.
How Much Does it Cost to Replace Your RV Floor?
Depending on how big your RV is, how much work it needs, and what type of flooring you are adding, the price varies a lot. You can spend as little as $600 or as high as $6000.
How Do You Clean Vinyl Plank Flooring?
Use your regular cleaning solution, but instead of a string mop, use a microfiber mop so no water is left on the floor as it can cause damage. Make sure not to use any bleach, ammonia, or corrosive chemicals on it. But you can use isopropyl alcohol for stains.
Share to Pinterest

Hello, fellow wanderers! I’m Alyssia. Since 2008, my husband and I have called an RV our home, journeying through life one mile at a time. Our nomadic lifestyle has led us to over 70 countries, each with their unique tales that have shaped our own.
I share our stories and insights right here, hoping to inspire and guide you in your own adventures. Expect tips on RV living, our favorite camping spots, breathtaking hiking trails, and the joys and challenges of an ever-changing view from our window. Alongside, you’ll also find practical advice on outdoorsy stuff, designed to equip you for any journey. Join us as we continue to explore the vast, beautiful world on wheels!

RV Camping Plus
Revamp Your Ride: The Ultimate Guide to Choosing and Installing RV Flooring for Style, Comfort, and Resale Value

Embarking on the RV Flooring Adventure: Unraveling the Best Solutions
As we venture into the exciting realm of RV living, one key aspect that often shapes our experience is the choice of RV flooring. Like the sturdy bricks of a stationary home, the floor of your moving abode significantly impacts the feel and functionality of your space. In this comprehensive guide, we delve into the various aspects of choosing and maintaining flooring in your RV, providing affordable, durable, and eco-friendly solutions to transform your motor home, fifth wheel, or toy hauler into a unique charm on wheels.
With the new RV flooring under your bare feet, every road trip will take on a new dimension. We explore popular RV flooring options, ranging from the rustic look of real hardwood floors to the easy installation of vinyl plank flooring. Our step-by-step guide will demystify the installation process, making it an achievable DIY project, even for those on a tight budget. We’ll even discuss how a simple change like replacing old flooring can make a huge difference to your RV’s overall appeal and resale value.
From laminate options to wall-to-wall carpeting, each flooring material holds unique advantages. The warmth of carpet flooring is undeniably inviting, while vinyl’s water resistance and durability make it a smart choice for humid climates or high-traffic areas. You’ll discover that your flooring option isn’t just about aesthetic appeal; it’s about your RV lifestyle , from easy clean-up after a long day at your favorite RV travel destinations to the cozy feel of hardwood underfoot as you sip your morning coffee.
But that’s not all. I’ll guide you through cleaning and maintaining your flooring, from real wood to tile, ensuring its longevity. Furthermore, we present solutions for special circumstances, such as pet-friendly options and lightweight solutions. Plus, we explore green flooring materials for those aiming for an eco-friendly RV life.
The Most Durable Types of RV Flooring: A Definitive Guide

The Unbeatable Durability of Luxury Vinyl
First, when discussing durability, luxury vinyl takes the crown. As one of the best replacement flooring options, luxury vinyl is impressively tough, resisting scratches, dents, and stains. These characteristics make it the go-to flooring option if you’ve got kids or pets on board. In a world where pebbles sneak into your RV via shoes, and accidental spills are common, luxury vinyl is a reliable savior.
The Classic Elegance of Laminate Planks
Then there are the laminate planks. Mimicking the look of real wood flooring, laminate is highly resistant to wear, making it a great choice for high-traffic areas in your RV. When replacing flooring, laminate planks offer the perfect blend of durability and aesthetic appeal, adding a cozy, homely feel to your home on wheels. Remember though, laminate might not be your best friend in areas prone to moisture, such as the bathroom or kitchen.
Vinyl Plank and Tiles: The Balance of Strength and Style
Looking for an alternative that’s as sturdy as it is stylish? Consider vinyl plank or vinyl tiles. This flooring material is not just robust and easy to maintain, it also offers a wide variety of patterns and designs. Whether you’re aiming for a classic hardwood look or a sleek modern style, there’s a vinyl plank or tile that matches your aesthetic.
Tile: A Stylish Choice
Tile flooring is another option that deserves mention. It is exceptionally sturdy, with some types, like porcelain and ceramic, known for their hard-wearing nature. Tile’s resistance to moisture and easy-to-clean surface makes it perfect for areas like the kitchen and bathroom. You can even find tiles that replicate the look of natural stone or hardwood for an upscale touch. However, it’s worth noting that tile can add considerable weight to your RV, and it may be more prone to cracking compared to other materials, due to the constant movement of the vehicle.
Carpet: Cozy and Comfortable
While not the first choice for many when it comes to durability, carpet can still be a valid option in certain areas of your RV. It offers unmatched softness and warmth, making it ideal for bedrooms. Moreover, it provides excellent noise absorption, which can add to the overall comfort of your RV. Just bear in mind, carpet requires more effort to keep clean, and it may not last as long as some of the other materials mentioned.
Rubber Flooring: A Practical Pick
Rubber flooring might not be the first material that comes to mind when considering RV flooring, but it’s an option gaining popularity due to its unique benefits. Rubber is extremely durable and resilient, making it an excellent choice for high-traffic areas. It’s slip-resistant and easy to clean, offering a practical solution for those rainy days on the road. Furthermore, rubber flooring can also provide additional insulation and noise reduction. However, while practical, it may not offer the same aesthetic appeal as materials like luxury vinyl or laminate planks.
Cork Flooring: A Unique Blend of Comfort and Sustainability
One flooring option that’s been turning heads recently is cork flooring. Renowned for its comfort and eco-friendliness, cork is a highly sustainable choice as it’s sourced from the bark of cork oak trees, which regenerates over time.
Cork flooring offers a unique blend of features, making it an excellent choice. First and foremost, it’s incredibly comfortable underfoot, thanks to its natural softness and flexibility. This same flexibility also lends cork great durability, as it can recover from impressions more quickly than other materials. This resilience is a plus in an RV setting where heavy furniture and frequent foot traffic are commonplace!
Moreover, cork’s natural insulating properties can help regulate the temperature within your RV, keeping it warmer in cold weather and cooler in hot. This could potentially lead to energy savings over time. Cork is also naturally resistant to mold, mildew, and pests, contributing to a healthier RV environment.
Another key advantage of cork is its sound-damping abilities. The cellular structure of cork effectively reduces noise transmission, making your RV travels quieter and more peaceful.
However, while cork has many benefits, it requires a bit more care than other materials. It may need resealing periodically to maintain its water resistance, and it can be susceptible to sharp objects, so care should be taken with pet claws or high heels.
Lightening the Load: Best Lightweight Flooring Options for Your RV
Whether you’re new to RV life or a seasoned camper, the weight of your RV flooring is a critical factor. Opting for lightweight flooring can help improve gas mileage and ease the strain on your vehicle’s suspension. So, let’s talk about some superb lightweight flooring options for your rolling abode.
Understanding Lightweight Flooring Material
When considering flooring in your camper, you must balance weight with durability. Lightweight flooring should be able to handle heavy foot traffic, pet claws, or accidental spills while still helping to keep your vehicle’s total weight down.
Vinyl: The Lightweight Champion
Vinyl takes the crown as the champion of lightweight flooring options. It’s not just light, but it’s also resilient, easy to clean, and affordable. Bonus? Vinyl flooring comes in an array of styles and colors, so you don’t have to sacrifice aesthetics for weight.
Other Lightweight Options to Consider
Laminate is another option to think about. It’s slightly heavier than vinyl but still falls under the lightweight category. Laminate is durable, scratch-resistant, and mimics the look of real wood.
For those considering replacement flooring, cork is a unique, eco-friendly alternative. It’s remarkably light, has a warm and soft texture underfoot, and it’s a great insulator too.
Selection goes beyond just style and durability. Considering the weight of the flooring is an essential step toward maintaining an efficient, well-balanced RV.
Going Green on the Road: Eco-Friendly RV Flooring Options
As an RV enthusiast, I’m passionate about the outdoors, which includes being environmentally responsible. I’m a big fan of eco-friendly choices. These options are not just good for Mother Nature, but they also add a unique touch to your home on wheels. Let’s explore some of these sustainable options!
Understanding Eco-Friendly Flooring
When it comes to eco-friendly flooring in your camper, the key is to look for materials that are sustainable, have low VOC emissions, and, preferably, are recyclable. It’s a way to ensure your love for the open road doesn’t leave a heavy footprint on the environment.
Cork: Nature’s Gift
Cork is one of the leading eco-friendly flooring options out there. Harvested from the bark of cork oak trees (without harming the tree), it’s not just sustainable but also lightweight, warm, and offers a soft cushioning underfoot. The bonus is that it also has excellent insulation properties, helping keep your RV cozy and energy efficient.
Bamboo: Strength and Sustainability
Bamboo flooring is another excellent green choice. Bamboo is a highly renewable resource due to its fast growth rate and incredibly durable, making it a long-lasting flooring solution for your camper. Bamboo’s sleek, natural look is a chic addition to any RV interior.
Going green doesn’t mean sacrificing style or durability. On the contrary, these sustainable options add a unique and mindful touch to your road-bound home, proving that you can tread lightly on the earth, even in an RV!
Creating a Pet-Friendly Paradise: Best RV Flooring for Your Furry Friends
As a pet-loving RVer, I know the importance of having your four-legged companions along for the journey. However, the wrong replacement flooring can make your road trip messy. So, what are the best flooring options for a pet-friendly RV? Let’s dive in.
What Makes Pet-Friendly Flooring Material?

Vinyl: A Great Choice for Pets
Vinyl flooring is one of the top choices for pet owners. It’s durable, resisting both scratches and stains, and it’s also easy to clean. If your pet has an accident or tracks in mud, a quick wipe down is usually all it takes.
Other Flooring Options for Pets
Beyond vinyl, laminate is another solid choice, boasting similar benefits. Laminate can mimic the look of hardwood without the vulnerability to scratches or damage from pet nails.
If you’re considering replacement flooring, think about rubber. It provides excellent traction, is easy to clean, and offers a soft surface for pets to lay on, making it a comfortable and practical choice.
When your RV companions have four legs, the right flooring can make all the difference. Whether you’re replacing your current flooring or selecting a new vehicle, considering your pets’ needs will lead you to the perfect choice. After all, our pets are part of the family, and their comfort is as important as ours.
Choices boil down to a balance between durability, maintenance, cost, and style. But one thing is for sure: whether it’s the sturdy luxury vinyl, the elegant laminate planks, or the versatile vinyl plank and tiles, there’s a durable flooring option that’s perfect for your RV. Safe travels, and may your adventures be as reliable as your RV flooring!
Understanding the Average Cost to Replace RV Flooring
As an RV enthusiast, nothing thrills me more than the call of the open road. However, just as vital as the journey is ensuring the comfort of my home on wheels. Whether you’re looking to spruce up your RV’s aesthetics or you’re dealing with wear and tear, replacing flooring can sometimes become a necessity. So, what’s the average cost? Let’s delve into the details.
Factors Influencing the Cost of Flooring in Your RV
The cost of new RV flooring installation depends on several variables. The flooring material is, of course, one of the significant cost determinants. From vinyl and laminate to luxury options like real hardwood or tile, prices can vary widely. An economical choice like vinyl could cost as little as $1-$2 per square foot, while higher-end materials might run up to $10-$15 per square foot or more.
Installation: DIY vs. Professional
Another consideration is the installation process. Are you a hands-on DIYer planning to tackle the project yourself? Or do you plan to hire a professional? Naturally, doing it yourself could save you some bucks, but keep in mind that time is also a valuable resource. Professionals might charge anywhere between $1-$10 per square foot, depending on the complexity of the job and your location.
To Sum it Up: A Ballpark Figure
Considering all these factors, the average cost to replace flooring in your RV could range from a few hundred to several thousand dollars. As a rough estimate, you might expect to pay anywhere from $500 to $5000 for an average-sized RV. Remember, though, these are just averages; your actual costs could be lower or higher, depending on your specific flooring option and installation choices.
In the end, it’s all about striking a balance between cost, quality, and personal preference. After all, your RV is your home away from home, and you want it to feel just right.
DIY Guide: Installing New Flooring in Your RV

Choosing the Right Flooring Material
Your first step is to choose the right flooring material. The selection depends on your budget, the look you’re going for, and the use and traffic your floors will see. Each flooring option offers different advantages, from vinyl and laminate to more luxurious options like hardwood or tile. Consider factors like durability, maintenance, and weight – remember, extra weight can affect your RV’s fuel efficiency.
Preparation: Out with the Old, In with the New
The next step involves removing the old flooring. This process can be time-consuming, particularly if the existing material is glued down or there are many nooks and crannies to work around. Be sure to remove any furniture or fittings that might get in the way, and take your time to ensure a smooth, clean surface for your new flooring.
Installing Your Replacement Flooring
Now comes the exciting part – replacing flooring. Start from the center and work your way out to the edges, carefully measuring and cutting your material as you go. Whether you’re laying down planks or tiles, ensure they fit snugly against each other to create a seamless finish.
Finally, replace any trim or molding, reinstall your furniture, and voila!
While the process may require some time and elbow grease, installing your own RV flooring is a project that’s well within reach for most RV owners. Plus, there’s nothing quite like the satisfaction of a job well done, particularly when you can enjoy the fruits of your labor on your next road trip adventure.
Maintaining the Sparkle: Cleaning and Caring for Your RV Flooring
Venturing out on the open road with your RV is a thrilling experience, but taking care of your home on wheels is equally crucial. One essential part is maintaining the new flooring. Proper cleaning and care keep your flooring looking new and extends its lifespan. Let’s explore some practical tips to do it right.
Cleaning Different Flooring Materials in Your RV
The cleaning routine for your new flooring primarily depends on the flooring material.
Vinyl and Laminate
Regular sweeping or vacuuming helps keep dirt and dust at bay for vinyl or laminate floors. A damp mop with a mild cleaner is typically all you need for a deeper clean. Remember to avoid soaking the floor or using abrasive cleaners that could damage the surface.
If you’ve opted for the luxury of real hardwood flooring, it requires a bit more TLC. Use a dust mop or vacuum for daily cleaning, and for a deeper clean, use a specially designed floor cleaner. Even though the material may be water resistant, avoid using water, which can seep into the wood and cause water damage.
Carpeted areas in your RV demand regular vacuuming to remove dust and dirt. Spot cleaning can handle small stains, but consider using a carpet cleaning machine or hiring professional services occasionally for a thorough clean.
Preserving Your Flooring Option
Proper maintenance can extend the life of your flooring. Use doormats at entrances to limit dirt tracked in, and consider using protective pads under heavy furniture to prevent indentations. If you notice any damage, consider replacing flooring sooner rather than later to prevent the issue from escalating.
In summary, maintaining and cleaning your RV flooring depends on the type of material you have. Regular care and timely maintenance can help ensure your RV’s interior continues to be inviting, comfortable, and ready for many more adventures. Here’s to keeping your home on the road in top-notch condition. Happy travels!
Resale Value: What’s the Connection?
I understand that your home-on-wheels isn’t just about the now—it’s also an investment for the future. So, when it comes to RV flooring, it’s natural to wonder how it impacts your vehicle’s resale value. Let’s break down the connection.
The Impact of Flooring Material on Resale Value
The flooring material you choose for your RV can influence its resale value. Higher-end options like hardwood or luxury vinyl may appeal to potential buyers who value aesthetics and durability, potentially boosting your RV’s market worth.
Quality Matters
However, the condition of the flooring in your RV is even more crucial. A beautifully maintained laminate or vinyl floor could be more attractive to buyers than a scratched or damaged hardwood floor. Regular cleaning and prompt replacement flooring when needed can help preserve your RV’s value.
Buyer Preferences: A Key Factor
Different buyers have different preferences. Some might prioritize easy cleaning and durability over luxury, leaning towards vinyl or laminate. Others might be willing to put in the maintenance effort for hardwood’s warm, homey feel. Offering a well-maintained flooring option that appeals to a broad range of buyers can help ensure a better resale value.
While the type of material you choose can influence your vehicle’s resale value, the maintenance and overall condition of the flooring can play an even more significant role. Choosing a floor that suits your style, budget, and maintenance capability and then keeping it in top-notch condition can be a smart strategy for RV ownership. After all, the journey should be as enjoyable as the destination.
Warming Up Your RV: Heated Flooring Options
As an RV camping aficionado, I’ve experienced firsthand the chill of a cold RV floor on a winter morning. This discomfort might have you wondering, “Can I use heated floors in an RV?” Absolutely, you can! Let’s explore the cozy world of heated RV flooring and the best options.
The Feasibility of Heated Flooring in Your RV
Integrating heated flooring in your RV isn’t just a luxury—it’s a game-changer for those cold weather trips. Not only does it provide an extra layer of comfort, but it can also contribute to overall heat distribution within your RV.
Electric Radiant Heating
This flooring option involves installing electric heating elements beneath your floor coverings. It’s efficient, easy to control, and compatible with a variety of flooring materials. Just be aware of your RV’s electrical load when using this system, as it does draw a fair amount of power.
Best Heated Flooring Options
You’ve got choices when it comes to the actual flooring material to pair with heated floors. Ceramic or porcelain tile, for instance, conducts heat effectively and adds a touch of elegance. Luxury vinyl flooring also works well, with durability and easy maintenance as bonuses.
If you’re replacing flooring, why not consider a radiant heating underlay under your existing floor type? This way, you’re adding warmth without changing the flooring you love.
Heated floors in your RV are not just possible, but they’re an upgrade that adds comfort and value. Whether you’re a seasonal RVer aiming to extend your camping season or simply someone who enjoys the comfort of a warm floor, this could be a worthwhile addition to your home on the road. Remember, there’s nothing quite like the cozy feeling of heated flooring on a cold morning in the wilderness.
Navigating Your RV Flooring Journey
The choices ahead might seem less daunting after the journey through the myriad options and considerations for your RV flooring. Be it carpet, vinyl, hardwood, or eco-friendly materials, the perfect flooring option awaits you and your RV. So, grab your tools, slide out the old floor, lay down the new, and breathe new life into your space. Remember, each plank or tile you install isn’t just a part of your RV; it’s a piece of your journey, shaping your RV gear and lifestyle.
Whether you are looking for easy-to-install options, flooring that stands up to your four-legged friends, or materials that lend a unique charm to your tiny home on wheels, this guide is your companion. So, get ready to step onto your new floor and roll into the great, wide open, equipped with the knowledge you need to make your RV feel like a home, no matter where your travels lead you.
What is the most cost-effective RV flooring option?
Vinyl is one of the most cost-effective RV flooring options. It’s easy to install, highly durable, water-resistant, and available in a variety of styles that mimic more expensive flooring like hardwood.
Can I use bamboo as an RV flooring option?
Yes, you can use bamboo for your RV flooring. It’s a sustainable, eco-friendly option that’s quite durable. However, it may require extra care compared to other flooring materials, as it’s susceptible to water damage and may warp in fluctuating temperatures.
How often should I replace my RV flooring?
The frequency of replacing your RV flooring depends on the type of material used and how well it’s maintained. Most RV owners average replace their flooring every 5-7 years. However, some flooring options can last up to 10-15 years with excellent care and less wear and tear.
Can I install heated floors in my RV?
Yes, you can install heated floors in your RV. One popular option is radiant floor heating, which can be used with many types of flooring. However, it’s essential to consider the power requirements, installation process, and impact on your RV’s weight.
Is it possible to use ceramic tiles for my RV flooring?
While installing ceramic tiles in an RV is possible, they might not be the best choice due to their weight and fragility. The RV’s constant movement can lead to the tiles cracking or breaking. Instead, consider using luxury vinyl tiles, which are lighter, more flexible, and can mimic the look of ceramic tiles.

Dutch Petersen
I'm Dutch Petersen, an RV and camping enthusiast dedicated to sharing my expertise and love on the topic. Together with my faithful companion, Ginger, I explore the great outdoors and provide valuable insights on everything RV & camping-related. Let's make lasting memories and experience the joy of adventure firsthand.
More to Explore

13 Best RV Shower Faucets: The Ultimate Guide to Choosing the Top Picks for Your Road Adventure
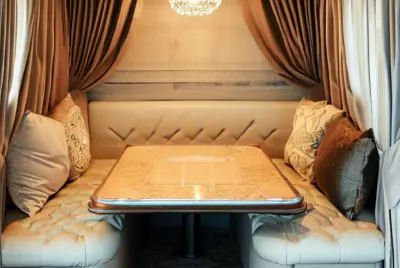
Transforming Your RV Dinette with Style and Functionality
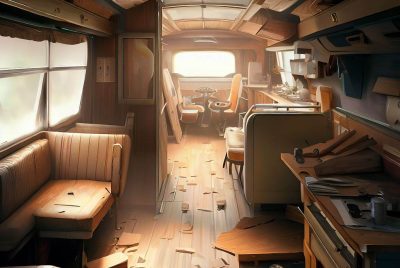
Top 10 RV Remodel Ideas: Transform Your Home on Wheels
RV Flooring Ideas (How To Replace & Install Flooring)
- 26.3K views
- 11 minute read
- November 10, 2019
RV Flooring Ideas – Flooring is the foundation of your interior design. Therefore, when you remodel your RV interior, be it repainting the cabinets or the wall, you can’t leave the floor. However, it not only has to work with your style but also be functional for your needs.
When it comes time to remodel your RV, one of the most significant decisions you’ll have to make is what type of flooring to use. How will the floor feel on your feet, and how will you clean it? And how much the budget?
Furthermore, with a major decision like flooring, it’s best to see it in person because it could look different in online. Choosing the right floor will ensure to enhance your RV lifestyle in every possible way.
What is the Best Flooring for RV

When it’s time to choosing the flooring for RV, there is a lot of options to consider. Not only aesthetically beautiful and trendy, but it also has to be highly durable. Below we write some products that are available and how they apply to RV installation. We hope these RV flooring options will help you decide what will work best for your RV.

Vinyl tile has a similar surface texture as natural products like stale, travertine, and marble. It also has a variety of colors for each pattern. Vinyl tile is less expensive compared to ceramic tile. Moreover, it is constructed with 75% limestone, which gives it high durability. Also, its warmth and softness, making it more comfortable than traditional tile and stone. In addition, vinyl tile is waterproof and lightweight, which makes it an ideal choice for RV owners.

Use oak or harder wood varieties like Maple, Ash, or Brazilian Cherry if you need flooring that will stand up to heavy use. Brazilian Cherry could last for a long time and has a calming deep color wood tone. Or if you want to bring warmth and comfort to your RV, choose hand-scraped Hickory. Since hardwood floors are thick, it may be refinished up to two or three times to remove scuffs and scratches.
Engineered Wood
Engineered wood has all the vibrant colors and wood varieties as solid hardwood. It’s constructed with several layers of wood that are cross-grained, which makes them sturdy and resistant to shrinking. Furthermore, the resin between layers makes the planks resistant to humidity or changes in temperature. Thus, it makes it beneficial for RV application.

Its physical similarities to hardwoods make it an attractive alternative for RV flooring ideas. Bamboo is carbon negative and can absorb more CO2 from the atmosphere than other trees. Bamboo flooring can come in either solid strip form or as planks. Solid bamboo is installed by nailing it to the floor, while plank bamboo is installed as a floating floor. Bamboo has higher durability than wood. It’s also easier to maintain and more resistant to dents. In addition, it will not stain, fade or wear, which makes is highly functional for RV. However, it’s not suitable for bathroom areas due to its sensitivity to humidity.

Laminate flooring is trendy and relatively less expensive. Moreover, it has many color options that are great to coordinate with your furnishings. Also, there is an image layer that is a photograph quality picture of hardwood with an embossed wood grain texture. Thus, you can have elegant flooring trends like textured wood and realistic stone. The topmost layer is a clear coat. The middle layer is made of compressed High-Density Fiberboard. And the bottom layer is a melamine backer that gives the floor structure prevents the planks from twisting.
Vinyl Sheet

If you are on a budget, this may be an excellent option for you. It’s also very versatile flooring and trendy with all the latest printing and embossing technology. You can enjoy the look of more expensive products at less cost. Plus, it’s durable and resistant to stains and scratches, making it perfect for RV flooring.

In RV, carpet is often used in slide outs and bedrooms are. The amount of carpet you use is determined by the pile height and face weight. When you change the carpet, don’t forget to change the pad too because it’s a heat insulator and sound dampener. Also, since it has different levels, choose the one that feels good to walk on. If you are a pet owner, choose a pad with a moisture barrier since it prevents moisture getting into the carpet.
Ceramic Tile

It’s a premium product, and it has a similarity with the natural stone in its pattern and colors. Ceramic is made from clay and porcelain is one of its varieties. In RV, ceramic tile will be great to install on countertops, backsplashes, and bathroom areas.
How Much Does It Cost To Replace RV Floor

Generally, the cost of RV flooring is variable. It depends on how much space you have or what kind of flooring you want to install. Below we write some estimated cost for RV floorings to help you consider.

It’s estimated between $60 and $75% for laminate flooring. It’s about $3 to $3.75 per square foot.

It’s usually cheaper than laminate. However, the price might be lower or higher, depending on how much you want to use. Vinyl flooring is estimated at about $40 to $50.

Since it has many varieties, the cost might be different for each type. However, generally, you could pay between $600 and $650 for carpet flooring.

Linoleum might be more expensive than carpeting. It costs about $500 to $700 if you have 200 square foot of space in your RV. Obviously, it can cost more if you have a bigger RV.

It’s somewhere between $250 and $600 per 200 square feet of space in your RV. You might also pay for additional cost about $200 to $400 if it needs to be sealed, stained, or sanded.

The lower end is between $100 to $150. However, it might cost more if you want a posher and high-quality tile.
How to Replace Flooring in RV Slide-Out

RV slide-out is bonus square footage that conveniently tucks away when you’re on the road. Therefore, a small RV with slide-out can become spacious and comfortable. Below we write some tips to help you replace the flooring inside an RV slide-out.
Remove all the plank flooring

Keep each row separate and in order when removing the floating floors. That way, you could replace the flooring that had already been cut to size when the underlayment in place.
Pick the Underlayment
The screws from the wheel wells are about 8th of an inch. Thus, you might need a piece of underlayment that’s at least the same size.
Cut the Underlayment

Measure the size you’ll need before you buy the new flooring. That way, you’ll have an idea of how you’ll cut it to fit. Also, measure and mark where the wheel wells are. Use drills to create holes for the jigsaw to get in and work. Afterward, you can just cut along the lines.
Paint the Underside

Be sure to paint the underside of the slide-out. You can use a little black chalk paint.
Place down the Underlayment

When placing down the underlayment, cut and place the bigger piece first. Afterward, cut and place the smaller piece.
Install Flooring in the Slide Out

After the flooring is already cut to size, use the spacers along the edges to leave room for expansion and contraction. Afterward, lay it all down.
Add Trim to the Slide Out
Attach the trim back along the edges. Use contact cement to attach the trim.
Additional Tips
Make sure to focus and push forward when pulling out every strand of carpet. Use a piece of outside corner molding as a trim piece. It prevents a size gap between where the flooring came off of the slide and the floor of the main section.
Installing Laminate Flooring in RV

Laminate floors with its floating installation is a solution for the constantly shifting nature of RV frames and subfloors. It’s because floating floors require no adhesive or fasteners. Also, it can shift with the constantly moving RV. Below we write some steps to help you install laminate flooring in your RV .
Use pliers to remove the nails from the back
Use a small, flat pry bar to pry base shoe or quarter round away from the bottom of the baseboard. You can preserve the face of the molding with the pliers to remove the nails from the back.
Remove the existing flooring
Put down a layer of vapor barrier and underlayment. Generally, you need to roll out the material to cover the floor and butting pieces up to each other. Also, cutting pieces to length with a utility knife. However, if you are unsure, you follow the instructions from the manufacturer.
Lay the laminate
When laying the laminate, start with the longest wall. Afterward, attach boards end to end and put the first row using as many full pieces as possible. Then, measure the space for the last piece. To leave an adequate spacing against the wall, cut a plank to fit.
Start the next row with the cutoff from the first
Since most floors lock together and require a tap from a rubber mallet to fit tight, be sure it’s pressed down for proper attachment. Then, lay all the pieces and cut the last piece to fit..
Continue laying the full width rows
Measure the distance from the last row to the wall. Use a table saw or utility knife to cut pieces to width.
Create a template for any odd-shaped or sized pieces
To fit the odd space, cut the cardboard then mark the outline of the cardboard onto a floor plank. Use a jigsaw or other cutting tools, depending on the flooring, to cut out the floor plank.
Replace the base shoe
Finally, to cover the gap at the edge of the floor, replace the base shoe. Use a hammer to nail it in place. Give some color of wood filler to the nail holes.
Replacing Carpet in RV Vinyl

Eventually, the carpet floor will wear out and look outdated. It means you need to replace the flooring with something new. Using vinyl for RV flooring is a great option. Below we put some easy steps to help you replacing the carpet in your RV with vinyl.
Remove the old carpet
Before removing the carpet, you need to remove the furniture first. Cut the carpet into sections that can be easily rolled up and taken out of RV. After all the material is already removed, start to prep the plywood subfloor.
Prep the subfloor

To install the new vinyl smoothly, the subfloor needs to be prepped and repaired. Pull any staples from the wood flooring using diagonal cutting pliers. It’s essential because if there are any staples left, it’ll poke through the new floor.
Cut the vinyl floor
Lay the vinyl in the sun to warm it up and smooth out the sheet. Use thick construction paper to make a template and prevent damages. Use a 4-foot level and utility knife to cut the paper into 2-inch strips. It will save the paper and make it manageable to lay out. Afterward, lay the strips of paper and tap each piece using a quality tape to make the exact outline of the floor. Then roll the vinyl sheet up neat and straight.
Glue the subfloor
Use a non-permanent glue to peel off the sheet of vinyl easily for future replacement. Lay down the sheet of vinyl after the glue has tacked up.
Install the vinyl sheet

Place the roll of vinyl down on the front end of the RV and lining all your cute\s up as close as possible to the walls. Then, roll out and start working the vinyl to push out any air bubbles under the floor. Keep rolling out the vinyl little by little, and make sure it’s straight. Also, make sure it’s as equal as possible by checking the edges on both sides. After the floor is done, you can reinstall the furniture and add some vinyl base trim to make it look brand new.
Slide flooring

This is actually an additional step if you have a slide in your RV. After the main floor is perfectly installed, lay a piece of cardboard to protect the new flooring. Then, uninstall the slide furniture and place it on the cardboard. Repeat steps 1 to 5 for the slide area.
RV Flooring Design Ideas

Although cleaning the floors can improve their looks and extend their lives, however eventually floors have to be replaced. The timing to replace it depends on your floors since it hinges on several factors. Below we put some RV flooring ideas that might inspire you for the next flooring renovation.
Bamboo Flooring
Bamboo is a wonderful flooring option. It’s also highly durable. However, bamboo flooring is a high-quality product that often packs a high-quality price with it. So keep that in mind if you’re considering this option.
The floor used for this RV is perfect with the interior scheme. It makes the room look cohesive. Furthermore, ceramic tile can reduce your energy use by keeping your RV feel cooler in the summer. It’s also highly resistant to chemicals agents, fungi, and bacteria. In addition, ceramic tile is easy to clean and maintain.
Although it can create a very similar look to ceramic tile and hardwood, vinyl tile is relatively less expensive. It’s available in many colors, patterns, and designs. Moreover, it’s easy to install and very low maintenance. It’s also long-lasting under normal conditions.
Wood Flooring
Wood floors become more appealing with age and. With its classic look, this flooring is inviting and can warm up any space. Besides, the warm color of the floor can go with any RV flooring ideas. It’s also very durable with very low maintenance.
Grey Laminate Flooring
It’s an attractive choice of flooring. It’s also fast and easy to install. Furthermore, it’s almost impervious to dents and scratches. The underlayment gives the flooring a slightly springy feeling, making it easier to stand on for a long time.
Carpet
The carpet floor is more comfortable to stand on than tile. It’s also more comfortable to fall on – a potential concern for older people or families with toddlers. In addition, carpet insulates floors as it provides a psychological feeling of warmth. Thus, the softness of the carpet gives a homey feel to RV.
RV Flooring Ideas Before & After

Flooring is a huge part of what determines the look and feel of a room. Therefore, outdated or damaged flooring is the main reason to redo your floors completely. Therefore, your floor needs to be renovated to make your RV feel more like home. Below we put some RV flooring ideas before after to show you what a difference flooring could make.
From Shabby to Chic
The warm wood flooring turns a shabby old living room into a modern and welcoming space. The floor keeps the classic feel with a little touch of modern.

Simple RV Flooring Transformation
The RV flooring ideas in the after sowing a clean and cozy place opting for a timeless design. It makes the room look totally different, without having to spend a ton of cash.

Awesome RV Flooring Transformation
The old carpeted floor gets refinished in dark floors turning the room into chic feel. The new RV flooring ideas also creates more space and light.

Elegant RV Flooring Transformation
The new flooring transforms the space into an elegant living area. It also reflects light, makes the space look warmer and brighter.

Modern RV Floor
The new flooring gives an ode to the cozy and moody design. It elevates the space and provides a unified look.

More RV Flooring Ideas Pictures

Thenna Andersen
Leave a reply cancel reply.
Your email address will not be published. Required fields are marked *
Save my name, email, and website in this browser for the next time I comment.
This site uses Akismet to reduce spam. Learn how your comment data is processed .
You May Also Like

- 86.9K views
- 1 minute read
RV Accessories Ideas (Must Have Accessories)
- October 16, 2019
- No comments

- 76.7K views
- 9 minute read
RV Patio Ideas (Decorating Ideas & Inspirations)
- February 23, 2022

- 72.0K views
20 Approved Murphy Bed Ideas & Designs
- February 22, 2022

- 63.6K views
- 10 minute read
RV Steps Ideas | Best Option For Your RV
- December 21, 2019

- 61.9K views
Best RV Deck Ideas (How To Build & Design Ideas)
- February 4, 2022

- 59.9K views
Pop Up Camper Ideas | What Is Pop Up Camper?
- February 8, 2023
DIY Guide to Replacing RV Flooring for Comfortable Aesthetics Travels

Preparing for open road journey comes with endless adventures in your trusty RV. But before you set off into the sunset, let’s talk about something just as important as your itinerary: your RV’s flooring. Maintaining the floor of your RV isn’t just about keeping up appearances; it’s crucial for the longevity and functionality of your mobile haven. Furthermore, replacing old or worn flooring can dramatically boost your RV’s overall value and enhance its aesthetic appeal, making every mile more enjoyable. Whether you’re looking to sell your RV down the line or just want a more beautiful space to live in while you explore, embarking on a diy guide to replacing RV flooring can significantly elevate your travel experience. So, grab your tools and let’s dive into how you can transform your RV from the floor up—it’s easier than you might think and the rewards are more than worth the effort!
Table of Contents
Flooring Options for RVs
When you think about renovating your RV, flooring might not be the first thing that pops to mind, but it’s a game-changer in both aesthetics and functionality. Whether you’re preparing for a full-time life on the road or just seasonal getaways, choosing the right flooring can transform your space. So, let’s dive into the popular options available for your RV and what might be the right fit for your RV.
- Vinyl is a favorite among RV enthusiasts due to its durability and ease of maintenance. It can mimic the look of hardwood or stone without the hefty price tag and complex installation. Moreover, vinyl is water-resistant, making it ideal for areas like kitchens or bathrooms within your RV. However, it can be susceptible to punctures from sharp objects, so consider this if you travel with pets or sharp gear.
- Laminate flooring offers a beautiful and affordable alternative to wood. It’s relatively easy to install, making it a great DIY project for the weekend warrior. Laminate is also durable but keep in mind it’s not as resistant to moisture as vinyl, which can be a drawback in humid environments or if spills are a common occurrence in your RV.
- Carpet provides warmth and comfort underfoot, a cozy addition for those cooler travels. It’s perfect for creating a homely feel, and newer carpets come with stain-resistant technologies. The downside? Carpet requires more maintenance to keep it clean and isn’t ideal for RVers with allergies or pets.
Choosing a flooring is mostly about enhancing your RV lifestyle. As you weigh your options, consider not only the look and feel but also the long-term maintenance and durability of each material. After all, the road can be tough, and your flooring should be too.
How to Choose the Right Flooring for Your RV
Embarking on the journey of selecting the perfect flooring for your RV is thrilling yet daunting. This choice is pivotal, not only for your RV’s aesthetic but also for its functionality on those long stretches of road adventures.
Durability is paramount when choosing your RV flooring. You need a surface that can withstand the comings and goings of campsite life and the occasional mishaps that happen on the road. Weight is another critical factor; the heavier the flooring, the more fuel you’ll consume traveling from one breathtaking location to another. Thus, lighter materials like vinyl or thin laminate can be more practical than heavier options.
Maintenance should be on your radar too. If you spend a lot of time exploring the outdoors, you’ll need flooring that’s easy to clean and can handle the dirt and grime that inevitably follows you back inside. Aesthetics play a significant role as well; your RV is your home away from home, so choosing a style that reflects your taste and complements your living space is key.
Moreover, consider the installation process. Are you a seasoned DIYer or will this be your first major project? Some flooring options, like RV portable air compressors and RV leveling blocks, might require more intricate installation processes and tools. Understanding the complexity of installation can help you determine whether to tackle the project yourself or hire a professional.
Choosing the right RV flooring isn’t just about finding a style you love; it’s about finding a practical, durable solution that fits your travel lifestyle. Whether you’re parked lakeside or nestled in a mountain retreat, your flooring should be ready to handle it all, making your RV truly a home on wheels.
Tools and Materials Needed for Your RV Floor Replacement
Embarking on your DIY journey to replace the flooring in your RV is exciting, but like any good adventure, it requires some essential tools and materials. Before you dive into the process, gathering the right equipment will ensure your project goes smoothly and results in a professional finish. Let’s break down what you’ll need to transform your RV’s floors from tired to inspired.
Firstly, a utility knife is indispensable for cutting flooring materials precisely. A measuring tape will help you capture accurate dimensions, ensuring you purchase and cut the right amount of material. Adhesive is crucial for most flooring types, particularly vinyl or laminate; it ensures your new floors stay put as you traverse bumpy roads. Don’t forget a chalk line and straight edge to keep everything aligned perfectly.
Specialty items like a floor roller might also be required, especially when installing vinyl flooring to ensure it adheres smoothly without bubbles. For those opting for laminate, an underlayment—which can help with insulation and noise reduction—is a must. Furthermore, consider a jigsaw or circular saw for cutting pieces that need to fit around cabinets and other fixtures.
Having the right RV mechanics tool at your disposal can make the difference between a frustrating experience and a fulfilling one. Ensure you have these items on hand before you begin, and you’re already halfway to a beautifully revamped RV interior.
Preparing Your RV for New Flooring
The key to a successful flooring installation in your RV isn’t just having the right materials—it’s also about proper preparation. Starting with a clean slate is essential. Here’s how you can prepare your RV for a flawless flooring installation.
Begin by clearing out the interior. Remove furniture, detachable fixtures, and anything else that sits on the floor. This includes tables, chairs, and sometimes even built-in features if they obstruct the flooring area. Next, focus on removing the old flooring. Use a utility knife for cutting carpet or a pry bar for lifting old tiles or laminate pieces. Be gentle but firm to avoid damaging the subfloor beneath.
Ensuring a clean subfloor is crucial; any debris or residue can prevent the new flooring from adhering properly. Vacuum thoroughly and, if necessary, clean with a mild detergent to remove any lingering dirt or grease. If you find any damage, such as water damage or rot, address these issues before proceeding. Installing new flooring over a compromised subfloor can lead to problems down the line.
Additionally, checking the level of the subfloor is vital. Use a level to ensure the surface is flat and even. If you encounter uneven areas, consider using a self-leveling compound to correct them. Preparing your RV with these steps ensures a smoother installation process and results in a more durable and visually appealing floor.
Once you’ve cleared and prepped your space, you’re ready to move forward. With everything removed and your subfloor pristine, your RV is now a blank canvas, ready for that new, beautiful flooring to take center stage. This groundwork not only paves the way for a successful installation but also protects your investment, ensuring that your new flooring lasts as long as your adventures do.
Step-by-Step Guide to Installing RV Flooring
Diving into a DIY project to install new flooring in your RV is not just about giving it a fresh look—it’s about crafting a space that feels like home, wherever you park it. Whether you’re a seasoned DIY enthusiast or a first-timer, this guide will walk you through the process, ensuring your flooring is installed perfectly for years of adventures to come. Let’s roll up our sleeves and get started!
Step 1: Measure Your Space
First things first, accurately measure the space where you’ll be installing the new flooring. Use your measuring tape to calculate the square footage, remembering to account for nooks and corners. This step is crucial as it determines how much material you need, avoiding both shortages and costly overages.
Step 2: Acclimate Your Flooring
Before installation, let your flooring material acclimate to the RV’s environment for at least 24 hours. This helps prevent expansion and contraction post-installation, which can lead to buckling and gaps.
Step 3: Cut the Flooring to Fit
Using your utility knife (for vinyl or carpet) or saw (for laminate or wood), cut the flooring according to your measurements. Ensure each piece is precisely cut to fit snugly against the walls and fixtures, which will enhance the final appearance and longevity of your flooring.
Step 4: Apply the Adhesive
If you’re using materials that require adhesive, apply it evenly on the subfloor using a trowel. For peel-and-stick options, this step is skipped—simply remove the backing as you lay each piece.
Step 5: Lay the Flooring
Begin at the farthest corner and work your way towards the door. Lay each piece of flooring down, pressing firmly to ensure good adhesion and alignment. Use a floor roller or a rolling pin to remove any air bubbles under vinyl flooring.
Step 7: Cut and Install Trim
After all the flooring is laid, measure and cut trim pieces to fit around the edges of your flooring. This not only gives a finished look but also holds the flooring down and covers any gaps or rough edges.
Step 9: Seal and Finish
Apply a sealant if necessary, depending on the type of flooring. This step enhances durability and protects against moisture, dirt, and wear—especially important in the high-traffic environment of an RV.
Finally, step back and admire your work. The new flooring will not only revitalize the interior of your RV but also reflect your personal style and craftsmanship. Installing your own RV flooring is an accomplishment that enhances both the function and the aesthetic of your mobile retreat, ensuring that it feels like home no matter where the road takes you. This practical enhancement to your RV isn’t just a step towards a more beautiful living space—it’s a stride towards more memorable adventures on the open road.
Finishing Touches and Maintenance
After you’ve installed your new RV flooring, it’s time to add those finishing touches that elevate the space from functional to fabulous. This stage is crucial not only for aesthetics but also for the longevity of your new floor. Let’s explore how to cap off your renovation project with finesse and ensure it stands the test of time and travel.
Installing Baseboards and Trim in Your RV
Choosing the right baseboards and trim can transform the look of your RV’s new flooring. Select trim that complements both the color and the style of your flooring to create a cohesive look. Lightweight materials are best, as they won’t add significant weight to your RV. When cutting trim, measure twice and cut once to ensure accuracy. A miter saw can be invaluable for making precise cuts, especially for corners. Fix the trim in place using a suitable adhesive or small finishing nails, making sure it fits snugly against both the flooring and the walls. This not only looks great but also protects the edges of your flooring from wear and tear.
Maintaining Your New RV Flooring
Routine maintenance is key to keeping your new flooring looking its best. For general upkeep, sweep or vacuum regularly to remove dirt and debris. For deeper cleaning, use products recommended by the flooring manufacturer to avoid damage. Place mats at entryways to minimize the amount of dirt tracked in. Additionally, consider using furniture pads under heavy pieces to prevent indentations and wear on your new floor. Regular attention and care will keep your RV flooring pristine and extend its life, ensuring it continues to reflect your style and stand up to your adventures.
Common Issues and Tips for Repairing and Upkeeping RV Flooring
Even with the best installation and maintenance, flooring in an RV can encounter issues due to the unique challenges of mobile living. Recognizing common problems and knowing how to address them can keep your floors in top condition for longer.
Common issues include scratches, dents, and moisture damage. For scratches and small dents, many manufacturers offer repair kits that match your specific flooring. For more significant damage, replacing just the affected pieces might be necessary, so keeping spare flooring pieces can be a lifesaver. Moisture is a prevalent issue in RVs, often leading to warping or mold. To combat this, ensure your RV is well ventilated and address leaks promptly. Using RV dehumidifiers can also help manage moisture levels inside the RV.
Routine inspections can help you catch and address these issues before they become major problems. Taking proactive steps to maintain and repair your RV flooring not only keeps it looking beautiful but also enhances your home-on-wheels, making every trip more enjoyable. With these tips, your RV’s flooring will be more than just a surface you walk on—it will be a proof of your care and attention to detail, no matter where your travels take you.
Wrapping It Up!
As we wrap up our guide on replacing RV flooring, let’s revisit the steps that will transform your RV into a more stylish and comfortable home on wheels. Starting with the selection of the right materials, moving through meticulous preparation and precise installation, and finishing with detailed trim work and regular maintenance, each phase is crucial to achieving a professional-looking outcome that lasts.
Investing time and effort into upgrading your RV flooring is not just about aesthetic enhancement—it’s about increasing the functionality and longevity of your mobile home. Durable, well-maintained flooring can withstand the rigors of travel and frequent use, ultimately preserving the value of your RV. Furthermore, it contributes to a healthier indoor environment, free from worn carpets that can harbor dust and allergens.
The benefits of a well-executed flooring update extend beyond the immediate visual appeal. It’s an investment in your RV’s future, ensuring that every journey is more comfortable and enjoyable. So, take the plunge, follow these steps, and remember, the road to a beautiful RV interior is paved with patience and precision.
Related FAQs
What are the right flooring materials for an rv.
Vinyl, laminate, and carpet are popular choices, each offering unique benefits for durability and ease of maintenance.
How Much Flooring Material Do I Need for My RV?
Measure your space carefully; it’s crucial to buy enough to cover all areas without excessive waste.
Can I Install New RV Flooring Myself?
Yes, with the right tools and a detailed guide, you can install new flooring yourself, saving money and customizing your space.
How Do I Maintain My New RV Flooring?
Regular cleaning and immediate attention to spills will keep your new flooring in top shape. Use mats at entrances to reduce dirt.
What Common Problems Should I Watch for With RV Flooring?
Look out for moisture damage, scratches, and wear, especially in high-traffic areas. Address issues promptly to prevent further damage.
As outdoor enthusiasts ourselves, we understand the significance of reliable gear that can withstand the elements and support you throughout your journey. We try to provide as much real life information with our guides and how tos to the readers as possible. Our honest and transparent reviews of essential outdoor gadgets and products are rooted in testing and experience. We take great satisfaction in offering unbiased evaluations, ensuring that you can make informed decisions when investing in outdoor gear. As an affiliate website, we may earn a small commission from some of the products we feature. However, rest assured that our opinions are not influenced by this, and your trust is always our top priority.
Related Posts

Easy Ways of Preventing Rust on Your RV
Owning an RV is an exciting adventure. It gives you the freedom to explore new…

15 Reasons Why People #Vanlife: The Ultimate Guide
Steering away from the traditional norms of living, an enchanting lifestyle trend has been rapidly…

5 Best RV Air Conditioners for Camper Van Life Cooling Comfort Solutions Travels In 2024
Choosing the right RV air conditioner is key to comfortable travel. On long journeys or…

How Air Pressure Affects the Longevity and Safety of Your RV Tires
Whether you’re planning a weekend getaway, a month-long road trip, or just a quick escape…
Leave a Comment Cancel Reply
Your email address will not be published. Required fields are marked *
Save my name, email, and website in this browser for the next time I comment.
- Find a Location
Tips For Updating RV Flooring

Although there are professionals who specialize in installing after-market RV flooring, like the service technicians at your local Camping World , some jobs are small enough—and easy enough— for RVers to attempt on their own. There are multiple videos out there that walk you through the installation process and high-quality products needed to update your RV .
Table of Contents
Speak to an RV Design Expert

However, before you start removing old RV flooring, you’ll need a plan for what to put down in its place. That’s where speaking to a design specialist at a Camping World Design Center comes in handy. Explore your RV flooring options with a specialist today.
Vehicles without slide-outs are best for do-it-yourselfers. We suggest using a special carpet-cutting tool to go along the perimeter of the travel trailer or motorhome to cut the old carpet and make it easier to pull out. If you do this well enough, the piece you cut out can be used as a template when cutting the new flooring.
It’s best to consult a flooring or home improvement expert on the best way to install and keep a new carpet down. Although, some RVers say anchoring it by placing furniture on top of it is a good option as it allows the carpet to be periodically removed and cleaned.
Choose the Right Type of Flooring for Your RV

If you’re looking for new rugs, 100% nylon-constructed rugs are best for RV use. Make sure to check the “remnants” section of your local carpeting store for the best deals. Since you probably won’t need to purchase a significant amount to cover the space desired. On occasion, you can snag a pretty decent deal simply by asking.
When considering new floor options, remember the importance of not adding too much weight to the floor of your RV. For example, try a laminate product instead to get the look of hardwood flooring without the additional weight.
Laminate flooring and stick tiles are also good RV options. They’re easy to clean and maintain; they’re just not as comfortable or warm as some of the other options available. As far as those options go, it’s always best to weigh the pros and cons of each RV flooring type before deciding.
Popular Flooring Options for Your RV

When it comes to choosing your new flooring material, a few options tend to be the most popular among RV enthusiasts both for their appearance and their longevity.
- Carpet . It’s one of the most classic and accessible flooring options for RVers. Often used in slide-outs and bedrooms, carpet can instantly make a space feel cozy and inviting.
- Laminate . It’s the perfect marriage of vinyl flooring and hardwood flooring in that you get the look and feel of hardwood but the benefits of vinyl. It’s easy to install and offers good scratch-resistant properties.
- Vinyl . It’s easily the most popular choice for the RV lifestyle because of its superb water-resistant qualities. It’s the easiest to maintain and keep clean, allowing it to look newer for longer.
A Few Tips for DIYers

These are a few tips on updating and replacing your RV flooring:
- Sketch out your RV and make a diagram of the interior. Include furniture, walls, appliances, etc. This drawing will give you a visual of the best place to start your installation and highlight any potential problem areas so you’re aware of them before you begin.
- Clear furniture and start removing the current floor. You will probably have to use a flathead screwdriver to get the flooring up. Note that most factory-installed flooring runs underneath the cabinets. Most, if not all, renovations (especially the DIY kind) choose to leave the cabinets in place and, consequently, the flooring underneath them as well.
- Clean and level the floors as thoroughly as possible. You want your subfloor as smooth as possible before beginning the installation of your new flooring.
- Install and secure new RV flooring. Depending upon which flooring material is chosen, you’ll need adhesive and a few tools to ensure a smooth installation. It’s worth it to take extra care and spend quality time installing the first piece of flooring as it will serve as the guide for the subsequent pieces. Remember to measure at least twice before making any cuts.
- Let it settle. After successfully installing the floors, wait a day or two before reloading the furniture into your RV. Doing so will allow the floor to settle and any imperfections to reveal themselves. Then you can address them, if necessary, without having to move the furniture around several times.
Note: It’s always wise to wear protective eye gear when working with tools. It is also recommended to wear a mask due to the possibility of mold. Safety first, always.
Like an old boat, if the floor is damp or has mildew or mold, you will need to replace that section of the floor first before installing the new flooring. While you are doing that, check for any other damp or wet spots that may need attention. Addressing them all at once can save you time, money, and a headache further down the road. It is recommended to use plywood you would use for a boat.
Installing new flooring in your RV can be a challenging task, but with patience and a little hard work, you can replace your outdated floors and be back on the road looking and feeling brand new in record time. It’s worth warning you that one upgrade can easily lead to another.
With your shiny, new floors, don’t be surprised if you want to update furnishings throughout the rest of your RV. Take it one project at a time. Your RV is designed to get you from destination to destination, and you should be enjoying every step of the journey along the way.
As always, if you’re looking to sell or trade in your current fifth wheel or travel trailer, look no further than your local Camping World for help with that process.
Updating your RV flooring can dramatically change the way you feel every time you step into your RV. For the best resources, advice, and installation help, visit the Camping World Design Center near you today !
Have you updated the flooring in your RV? Do you have any other tips for a successful demo or installation? We would love to hear about your experience. Leave a comment below!
- Comment (22)

The floor in our Desert Fox Toy Hauler split during the winter after 21 years. A sudden cold snap sent our temperature down to -40 degrees F. I did some research and decided to replace it with vinyl sheet flooring. My question is “Do I glue it down or leave it float?” Glue down just the edges or the entire floor?

I apologize for the delayed reply. I wanted to reach out to our technical service team to get their thoughts. Here it goes:
This is largely a personal choice, but there are pros and cons to each:
Glue down Pros Permanently secure Won’t wrinkle Hard to snag and tear
Glue Down Cons Very permanent, nearly impossible to remove later Cannot stretch as RV flexes over rough terrain or in extreme weather, may result in cracking As traffic presses it down, it will conform to the texture of the subfloor and this will show through
Free Float with Perimeter Glue Pros Flexes and stretches freely as the RV moves over terrain and temperatures vary Subfloor textures remain hidden and don’t show through Softer feel to the foot Easily changed later
Free Float with Perimeter Glue Cons Easier to snag and tear May wrinkle if RV is not perfectly level or if the material settles in or is installed unevenly RV must be perfectly level during install and curing time for glue Harder to patch if repairs are needed
Either way will work, but hopefully these pros and cons can help you determine which way is best for their lifestyle. We very much prefer the free float with perimeter glue method simply because it can be readily changed and doesn’t show wear paths as the subfloor pattern telegraphs through like a full glue down job would.
If you are planning a DIY job, they recommend the following:
1. Remove everything they can to minimize trimming time 2. Carefully and precisely cut around the perimeter with a sharp utility knife(wear leather gloves!) 3. Remove the original material in a single piece if at all possible 4. Lay the new material out on a flat, smooth, and perfectly clean surface overnight to relax 5. Tape the original to the new material with masking tape, lining up the pattern to look it’s best 6. Carefully and precisely cut the new material using the original as a template 7. Reinforce corners with a lot of masking tape to keep it from tearing during installation 8. Roll the new material up long ways, on a tube or PVC pipe if possible and take into RV 9. Roll it out and test fit into place 10. Pull back edges one at a time to apply 6-10″ of glue, not too thick 11. Roll the edges firmly into the glued edges 12. Use foil tape to seal all floor register openings 13. Trim out all edges with their preferred corner moulding such as 1/2″ quarter round
It is important to make all repairs to the subfloor and thoroughly clean it before installation, prep is the most important step Following the manufacturer’s instructions, clean new material and apply protectant as soon as recommended to prevent damage while moving back into the RV.
Hope that helps!

What thickness of laminate should I use on my 5th wheel floor?

We just took our travel trailer out of storage and found that the vinyl flooring had cracked and split. Our trailer is 4 years old. We are assuming it happened due to the extreme cold temperatures we had this past winter. Looking for some advice on what type of flooring would be best. We were thinking vinyl plank flooring but am worried that the same thing will happen. Any thoughts would be appreciated. Thanks.

What type of lightweight, but durable flooring can be used to replace the flooring in the slideouts?

I am looking at the peel and stick vinyl laminate squares for at least the bathroom area. I know I will need to put down a thin smooth plywood first but my concern is will the adhesive backing hold during the temperature changes of extreme hot and cold? I like the durability and feel of the higher quality peel and stick types over the sheet vinyl. What are your thoughts?

We have a 32 ft Fleetwood southwind 2006 we want to replace the carpet with some other kind of flooring any suggestions thank you

Our Keystone 29 foot Springdale had similar vinyl cracks one day after a cold spell. We cut out the vinyl, leaving the simulated trim alone. I was afraid the trim would break because it was so cheap. We did have quite a few staples to pull at various spots. Be sure to get all the staples and thoroughly wash the floor, I did it twice, before laying the carpet. Then I placed peel and stick carpet on the floor. The carpet did not affect the slide out movement in or out at all. What a different the carpet made! Felt nice and warm on the feet. Glad I did it.

We have floating Allure vinyl planks in our unseated sunroom. Had it put down 5 years ago, looks as good as the day it was installed. Has been through freezing winters and hot, humid summers. I know this is not an RV, however the weather conditions are the same. I think the key is to install exactly per instructions, leaving expansion space around perimeter. When we purchased this, they recommended this product for unheated areas. Then the recommendation changed to interior below grade. Must be people put it outside? Regardless, it is, although pricey, beautiful , easy to clean, water proof (pool+grandkids= wet towels and swimsuits on floor)hides dust and dirt.

What is the best type of flooring to use on a 31′ Keystone Travel Trailer. With Slide-out. I have all aluminum frame and have replaced all of the plywood. Should I use stick-on vinyl squares, stick-on wood looking laminate/vinyl, wood looking laminate/vinyl that needs to be glued, wood looking laminate/vinyl that floats. Also any other flooring that you can suggest other than carpet.

We have a 2006 Wilderness TT which we purchased new. It is now 12 years old. It has been sitting at a local RV repair shop throughout December and January getting a small leak taken care of and a couple of other small things done, as we are planning on selling it in the spring to upgrade. However, the service manager just called me to advise they went out to make sure the leak had been taken care of when they found the vinyl flooring had “blown up”. I was not far away and stopped by. Sure enough there were long cracks in the flooring that seemed to be originating from around the floor vents. The manager said he has had this happen before to TT they had on their lot for sale and it was due to extreme cold temps, quality of the flooring, and poor installation techniques. He said ours was the worst he has seen though. My wife thinks the repair shop should be responsible, but I do not. I think it would have cracked regardless if it was sitting outside on the repair shop’s lot, or if it was inside the unheated pole barn we store it in. Any comments, suggestions/advice on replacing, to keep this from happening again would be appreciated.

I redid the flooring in my class c with peel and stick squares about 6 years ago and now being in the Tucson heat the squares are separating leaving gaps for dirt to enter. A few of the squares are coming up from around the bathroom entry and dirt has gotten under them. I am not happy with this situation so I will be taking the floor up again and laying planking in a water proof material. I never considered the squares shrinking, maybe that’s why the original floor was whole like in houses. What a mistake, next time I will research the material for how it behaves in extreme heat. Bebeaz

I’m going with wood looking ceramic tile. Strong, durable, and looks great.

I think you are right.Your wife is wrong. Hi RV did the exact same thing, After the temperature got down to 6°. The floor was already ripped and torn, But now I will have to replace it.

Our camper sets out all winter and one day I went out there and the vinyl had a split in it four foot long, starting at the vent. It was a pretty cold snap when it happened.

What type of light weight tile but durable flooring can be used to replace carpet Rv with slide outs?

We purchased a used camper and want to replace the flooring who ever had it before us removed. The carpet in the bedroom area and then put a 8×8 peal & stick tile over top of the existing linoleum and carpet area. My question is do I remove the original linoleum or just the stick on tiles . How would have the old linoleum been installed ? Should I just remove the 8×8 and go over top of the old or try to remove it all ?

Not sure if you’ve done it yet, I’d suggest for the sub floor to put down in this case would be luan. It will be thin enough to not add a bunch of weight, and will give you a nice flat surface to attach the tiles to. Plywood, I think, would be too course for the tiles to get a good surface attachment. Luan is used in most vinyl flooring jobs.

A high-quality peel and stick vinyl flooring should be up to the challenge. It will likely depend on the product itself. I’d go around to different flooring sites and read the reviews. Focus on products that only have the highest customer review and look for any mention of the adhesive. From what I’ve seen on the web and heard from others, TrafficMASTER makes some quality flooring solutions, though I have not used that specific brand.
I just replaced mine last year in the slide. I pulled all the furniture and laid a tight burber down. Put everything back, and it looks great! Good luck.
It really depends on what you want. If you want to replace your old carpet with new, you have all kinds of options. If you’re looking for something easy to clean and install, many people have found laminate or vinyl flooring options to work well. There are a wide variety of options available.
Where did u purchase this product?? How much ? Have a keystone 5th wheel
Leave Your Comment Cancel Reply
Save my name, email, and website in this browser for the next time I comment.
Shop By RV Type

Your Adventure Awaits
Copyright © 2023 cwi, llc all rights reserved.
- RV Glossary |
- Privacy Policy |
- California Privacy Rights |
- Do Not Sell or Share My Personal Information |
- Targeted Advertising Opt Out |
- Terms of Use

How to Install RV Flooring
Skill level.
Are you beginning a camper renovation and not sure what flooring to go with? There are lots of RV flooring options to choose from when you are replacing your camper flooring. Here is what I recommend plus how to install your new flooring!
The Best RV Flooring Replacement
If you’ve done hours of research like me, you’ll find out that there is no right answer. Some RVers go with laminate, vinyl, tile, or even hardwood.
So let me tell you what I decided to go with and why.
Pros of RV Vinyl Plank Flooring
Vinyl plank flooring is a great choice when you are replacing your camper flooring. I chose TrafficMASTER Luxury Vinyl Gripstrip Planks for 5 reasons:
- 100% Waterproof. In my opinion, you need something 100% waterproof because having water come inside your camper is inevitable. Even if it’s just a slight mist that blows through the screen door during a summer rainstorm.
- Lightweight. Out of all the vinyl plank flooring on the market, this brand is the most lightweight you can find. In a camper renovation, you should always be aware of the weight and be sure to stay under the GAWR (Gross Axle Weight Rating) for safety reasons.
- Durable. I have vinyl plank floors in my home with two dogs and after 5 years, the floor still looks brand new. The vinyl planks have held up even when they get the “zoomies“ and run as fast as they can but just slip on the floor with their nails.
- Glueable. With the flex of an RV while being towed, as well as temperature fluctuations, the flooring should really be glued down to prevent buckling, separating, and cracking. The glue will give it a secure hold. Plus gluing helps alleviate the hollow sound as you walk on it.
- Availability. This vinyl plank flooring can be found at Home Depot. Let’s face it, everyone has a Home Depot relatively close. You can’t beat the convenience of just running to Home Depot and picking up the flooring, or having it shipped right to your home. Most custom flooring stores will take 3-4 weeks to have the product ordered and ready for pickup.
Cons of Other RV Flooring Ideas
Those are all the reasons why I chose vinyl planks. So let me shed some light on why I didn’t go with the other flooring options.
- Click-Lock Luxury Vinyl Planks: Most of these options are thick and heavy. If you winterized your camper and experience below-freezing temperatures, the cold weather makes the click-lock seams brittle and you could risk them breaking.
- Laminate: It’s not waterproof. Any water exposure will cause it to swell.
- Tile: With the flex of the camper while towing, tile and grout are susceptible to cracking
- Hardwood: It’s heavy, prone to scratches, and not waterproof.
- Vinyl Sheet: This is actually a great option to consider. The only reason I swayed from it was that it’s harder to install as an individual DIY’er, takes 3-4 weeks to be ordered, and I fear the slideout tearing it since it’s not as durable as the vinyl planks.
Check out the easy step-by-step instructions for your RV flooring installation.
Shopping List
- TrafficMASTER Luxury Vinyl Planks
- Flooring Adhesive
- Flooring Roller
- Behr DeckOver Paint (optional)
- Quarter Round PVC Trim
- 18 gauge 1 1/4″ Brad Nails
- Dap Extreme Stretch Caulk
How much flooring do I need for my camper?
Check out the complete expense report for the Hornet RV renovation here. For that 30′ camper, 9 cases of flooring and 2 gallons of flooring glue were needed.
- 1/16″ Notched Trowel
- Utility knife
- Finish Nailer
Instructions
Prep the subfloor.
Before installing any RV flooring, you need to ensure that the subfloor is fully prepped.
- All staples removed or hammered in
- Any water damage repaired
- Uneven seams sanded down. If your subfloors are flaking, have glue remnants, or has various cracks and gaps – I recommend applying a coat of Behr DeckOver Paint to unify the surface

After prepping the subfloor, you can begin by applying the glue that will secure the vinyl planks.
Start in the left-hand corner of your camper that has a slide-out or the longest run without obstacles.
Apply a thin layer of flooring adhesive with a 1/16″ notched trowel . Be sure to hold the trowel at a 45-degree angle. You can spread the flooring adhesive as you go for a more permanent hold or apply sections and let it dry for a removable hold.
Install flooring planks
Lay your first plank of flooring and keep a 1/4” gap between the wall and flooring. When applying each plank thereafter, hold at a 45-degree angle, place the left corner in first and adhere the plank.

Roll with a flooring roller
Use a flooring roller to ensure proper adhesion.

Continue installing floor planks
To start another row, be sure to alternate the seams. I recommended cutting the second-row starting plank in half.
To cut a plank, use a T-square , score with a utility knife , and bend the plank at the score line till it breaks. Use the razor to cut through the remaining plank layer.
Repeat this process until complete.

Finish off your RV flooring renovation by adding PVC molding at the base of the wall and flooring. Attach with 1 1/4″ brad nails and caulk the holes.
Frequently Asked Questions About RV Flooring Replacement
Here are some commonly asked questions about RV flooring replacements.
How do you get the flooring underneath the slide?
To run the flooring underneath a slideout you can do it one of two ways:
- Extend the slide fully.
- Remove any gaskets that run along the bottom of the slide opening.
- With bottle jacks and a couple of 2×4s, jack up the slide box a few inches to give you space to slide the new flooring in.
- Install the new flooring, lower the jacks, and put the gasket back on.
If your camper has or needs additional wear bars, I recommend this one: https://store.lci1.com/wear-bar-10ft-117478.html Be sure to install the wear bars on the tops of the new flooring.
- Use a crowbar or hammer to pry up the edge of the subfloor enough that you can slide a block of wood underneath. This way, you have enough room to slide the flooring under the slide subfloor.
- Go as far back with the flooring as you can without pushing past the exterior seal/wiper.
Important: When jacking the slide box up or prying on the subfloor, be mindful of the top as there are only a few inches of space between the top and camper opening.

One method to get your new flooring under the slideout is to lift the slide with a crowbar.
How did you trim the front edge of the flooring on the slide?
Since my slideout was angled, I cut strips of the flooring and glued and screwed them to the front edge with 1/4″ screws. Then, I used caulk to fill the gap between the main slideout flooring and the front strip.

Another method would be to rip a 1″x3″ board at a 12.5-degree angle, then attach it to the angled edge with wood glue and 1/2″ finish nails. This will make the edge square, and then you can add stair nose trim to give you the finished look.

How do you keep the slideout from scratching the flooring?
After spending the time and money to replace your RV flooring, you don’t want it get scratched by the slideout.
On this RV example, it had two 12″ wear bars on each end of the slideout, so I ran an additional 10′ wear bar underneath the entire slideout for an extra lift when retracting in.
I definitely recommend getting a set or two of Slide-Out Slickers for the corners and center of the slideout. The corners typically cause the most wear so that the slickers will prevent any contact with your flooring.

More RV Renovation Ideas
Don’t be intimidated by the idea of replacing your camper flooring. Whether it needs to be replaced because it’s dated or due to water damage, replacing your RV floor is an easy project.
Let’s roll on with your RV renovations. Luckily, Happy Glamper Co is an expert in all things DIY RV renovation and has tons of guides to help with your next project.
Do your RV floors have water damage? Check out this guide to repairing water damage .
Ready to tackle your RV cabinets? Check out this complete guide for painting RV cabinets .
Love the look of shiplap but not the price tag? Try this $1 Sharpie Shiplap for a timeless look.

How to Repair Water Damage on RV Slide Floors

How to Paint RV Cabinets

How to Do Sharpie Shiplap

The Importance of RV Slide Awnings and How to Install
Read this next.

How to Build an RV Trash Can Cabinet

How to Paint Interior RV Walls

How to Winterize Your RV

How to Install a RV Keyless Door Lock

How to Paint an RV Exterior
Find inspiration from our rv renovations.
Check out all the RV renovations that are in progress, or we have completed so far. You can find links to all the products used, paint colors, and other helpful resources.
Find products we've used in our RV renovations
Shop all the products we use in our renovations and other recommended products that work well for RVs.

Guiding Adventurous Souls Through RV Life

Best RV Flooring: RV Replacement Flooring Buying Guide for 2024
Share with a friend
Last Updated on March 31, 2024 by Jessica Lauren Vine
Whether you’re vacationing or living full time in your RV, having the best RV flooring can make it such an enjoyable experience.
Replacing your RV flooring with a newer one is challenging but very doable when you pick the right option. You have many of the same replacement flooring options with your RV as you would with a house or apartment. The main thing is that you choose a replacement flooring that’s compatible with your camper and fits your lifestyle.
If you think that your RV flooring is at its end and its replacement time, you’ve come to the right place. This article will look at how to choose the correct replacement flooring, different types of RV flooring, and some of the best options on the market. Let’s get started!
Table of Contents
Different RV Flooring Materials to Choose From
Like I said before, choosing a replacement flooring for your RV is similar to choosing flooring for your house. While certain types of flooring are easier to install or cheaper than others, you can still choose whatever option you like.
Carpet is one of the most popular replacement flooring options for RVs. It’s fairly easy to install, and its flexibility makes it great for slideouts. However, carpeting might not be the best option if you have pets or tend to drag dirt in from the outside.
Vinyl Plank
Vinyl plank flooring, as with houses, is quickly becoming one of the top flooring options for RVs. While it’s more challenging to install than carpet or peel and stick flooring, vinyl is long-lasting, aesthetically pleasing, and an excellent all-around replacement flooring option.
Laminate is very similar to vinyl flooring but with a few subtle differences. Laminate is the perfect budget-friendly mix between wood and vinyl, as it looks and feels like wood but is similar in composition to vinyl. While it’s fairly tricky to install and somewhat pricy, laminate is another great option for your RV.
Rubber flooring is one of the newer options for replacing your RV flooring. It has the durability of laminate or vinyl and the easy installation and flexibility of carpet, making it the best of both worlds. The downside of installing a rubber floor in your RV is that most people dislike how it looks and feels.
Hardwood or Bamboo
Hardwood and bamboo flooring are the creme de la creme of RV flooring. Only luxury RVs come with this type of flooring installed out the door because of how expensive and time-consuming it is to install. While it’s an excellent replacement flooring option, keep in mind that wood and bamboo are fairly heavy and may not be compatible with all parts of your RV.
Best RV Replacement Flooring Options
Don’t use anything but the best. This list will help you get the right option for your situation.

Best Overall RV Flooring Option – Bare Decor Teakwood Floor Tiles

- Good for indoors or outdoors
- No tools needed
- Easy to install
- A little pricey
- Scratches and may require resanding
If you’re looking for the best RV flooring and have a reasonably sizeable budget to work with, Bare Decor Teakwood Floor Tiles are the way to go. These floor tiles are made of wood and are one of the most luxurious flooring options you can have in an RV. They’re stylishly designed and patterned and surprisingly easy to install and maintain.
You’re sure to be the envy of the campground when you roll into town with this excellent hardwood flooring. While it’s one of the best-looking and most durable options, it has a few pitfalls. Like all forms of hardwood flooring, it’s subject to scratches and has special care instructions. However, with the proper maintenance and care, this flooring can last a lifetime and look great every step of the way.
Runner Up for Best RV Flooring – Co-Z Adhesive Vinyl Flooring

- 24 Square Feet
- 2.0mm Thick
- Fire-resistant
- Scratches easily
- "Spotting" imperfections reported
While not quite as durable or luxurious as the hardwood floor listed above, Co-Z Adhesive Vinyl Flooring is a great option when you’re searching for the best RV flooring. It’s fairly easy to install and work with and lightweight enough to work easily on slideouts. These vinyl planks are tongue and groove and don’t require any adhesives to keep them in place. Therefore, they make less of a mess during installation, and it’s easier to move them around if you change your mind about where you want them.
Additionally, this vinyl flooring is 100% waterproof, fireproof, weather-proof, and easy to clean and maintain. You also have a number of colors and patterns to choose from when you select Co-Z vinyl flooring for your RV.
Best Budget RV Flooring Option – Home and Office Needlebond Carpeting
Editor Note 9/5/2022: This option seems to be difficult to find right now.
Not everyone looking for the best rv flooring wants to spend a chunk of change on vinyl or hardwood planks. If you fall into this category and want an affordable and easy-to-install option, Home and Office Needlebond Carpeting is perfect. Because this carpeting is made of polyester, it’s not the softest or most comfortable option, but it’s resistant to mold and mildew. Weather resistance might be more important than cozy comfort, depending on the type of camping you do.
If you don’t like needlebond carpeting and want a more comfortable option, you can always choose a more expensive option. You can install any type of carpeting in your RV, as some sections of it likely already have carpeting.
Best Unique RV Flooring Option – Diamond Plate Rubber Flooring

- Easy installation
- Resistant to almost anything
- Good for indoor or outdoor use
- Not the most appealing flooring option on the market
Diamond plate rubber flooring isn’t as popular or common as other options on this list, but it’s still good. Rubber flooring meets most of the needs that people have in that it’s durable, affordable, easy to install, and resistant to heat, cold, stains, and chemicals. It’s also compatible with slide outs and very flexible. Unfortunately, because of how it looks, people are very hesitant to install diamond plate rubber flooring in their RVs.
Best RV Flooring for Easy Installation – Achim Peel and Stick Vinyl Flooring

- Looks and feels like plank flooring
- Aesthetically pleasing mahogany-colored flooring option
- Low maintenance and easy to clean
- Not as durable or comfortable as plank flooring
If you want to do the flooring installation yourself but don’t have the tools or experience necessary, Achim Peel and Stick Vinyl Flooring is a great option. Peel and stick flooring of all kinds is fairly easy to work with, affordable, and requires minimal tools. Achim peel and stick vinyl flooring looks and feels like plank flooring, and is surprisingly durable.
How to Choose the Best RV Flooring
When you want to know how to choose the right replacement flooring for your RV, here are some things to think about.
The first and most important thing you should consider when it comes to finding the best RV flooring is choosing an option that fits your budget. RVs are a ton of fun, but they’re also a lot of work and require ongoing maintenance. Depending on how old your camper is, there’s a good chance you’ll have to replace more than just the flooring before too long. It’s essential to choose the flooring you want, but not to blow your entire budget on it.
Durability
Replacing your RV flooring isn’t an unbearable task, but it’s hard enough that you don’t want to do it more often than necessary. Therefore, you should pick a relatively durable flooring option that will match your lifestyle. If you have dogs or cats or do a lot of boondocking , there’s a good chance the inside of your RV will get dirty and muddy. If you fall into this category, you should opt for a hard-surfaced floor rather than carpeting.
Installation Difficulty
One of the best ways to save money on your carpet replacement project is to do the work yourself. Carpet, rubber, peel and stick flooring are the easiest to install, but they aren’t as luxurious as vinyl, laminate, or hardwood. However, if you’re willing to take your time and buy or borrow the right tools, you should have no problem installing any type of flooring in your RV.
Weight isn’t always a factor, especially if you have a larger RV or motorhome. However, in smaller campers that aren’t meant to handle much floor weight, installing hardwood, bamboo, or tile could prove too heavy for it to handle. You also don’t want to add so much weight to your travel trailer that it exceeds your tow vehicle towing capacity.
Top Signs Your RV Needs New Flooring
If you’re on the fence whether or not you should invest in getting the best RV flooring, here are some signs that you might need to invest in RV replacement flooring.
- RV carpet looks/smells gross
- Cracks or tears
- Water damage
- Uneven spots
- A lot of creaking
Editor Add-In – RV Replacement Flooring Tip
One of our followers on Instagram, NomadsonFire2 , said to look out for vinyl planks if you are putting them in the garage of your toy hauler. They put vinyl flooring down in their toy hauler, and it started coming up.
Another follower, carlasantiago5808 , came to the rescue. Her husband installs flooring for a living, and he said you would need to use a latex-based product to float the RV floor by spreading it over the top of the toy hauler’s rough flooring. An alternative would be to pull out the toy hauler’s flooring to reveal the plywood underneath and just put the glue and flooring over the plywood.
Best RV Flooring – Conclusion
As you can see, there are many excellent RV replacement flooring options, and they all have different pros and cons. You can go with fancy and luxurious, or you can opt for affordable and low maintenance. Either way, you should always look for durability and affordability in your RV. You’re sure to pick the right option if you choose a flooring material that fits your needs, budget, and lifestyle.
- Latest Posts

- How Long Do RV Generators Last? 2024 Answer - October 29, 2022
- How Do RV Generators Work? 2024 Answer - October 28, 2022
- How Do You Attach an Awning to an RV? - October 16, 2022
Related Posts

How to Clean Foam Cushions From a Camper

RV Cabinet Ideas for 2024 – Awesome Ideas You Can’t Miss

How Do You Spruce Up an Old RV? [Photos]

Should I Upgrade My RV Mattress?
Leave a comment cancel reply.
Your email address will not be published. Required fields are marked *
Save my name, email, and website in this browser for the next time I comment.
Check our best Vinyl Specials NOW !!!
- HARDWOOD SPECIALS
- VINYL SPECIALS
- LAMINATE SPECIALS
- American Heritage Wood Floors
- Lw flooring
- Lawsonfloors
- BPI Prestige:
- Shaw floors
- Urban floor
- Regal Hardwood Flooring
- Tropical Flooring
- SLCC Flooring
- Hill Country Innovations
- Montserrat Floors
- Hemisphere Flooring
- AAYERS Flooring
- Arimar Wood
- Indusparquet
- Valencia Hardwoods
- Decor Flooring
- Eagle Creek
- BPI Prestige
- Lawson floors
- Lw Flooring
- Lions Flooring
- Lions Floor
- Atletic Textiles
- D&M Flooring
- LW Mountain Flooring
- LW Flooring Story
- BPI Prestige Floors Story
- Bruce Hardwood Story
- American Heritage Wood Floor Story
- American Olean Story
- Eleganza Tiles Story
- Lawson Floors Story
- Valencia Hardwood Story
- Urban Floor Story
- Tropical Flooring Story
- Tarkett Story
- Stainmaster Story
- SLCC Flooring Story
- Shaw Floors Story
- Republic Flooring Story
- Regal Hardwood Story
- Quick-Step Story
- Mullican Hardwood Story
- MSI Surfaces Story
- Montserrat Flooring Story
- Mohawk Story
- Mannington Hardwood Story
- Knoas Flooring Story
- Johnson Hardwood Story
- Inhaus Story
- Indusparquet Story
- Hill-country-Innovations Story
- Hemisphere Hardwood Story
- Earthwerks Story
- Eagle Creek Story
- Daltile Story
- BHW Floors Story
- Arimar Wood Story
- Aayers Flooring Story
- Villa Blanca Collection Story
- DuChâteau's Story
- The Aurora Flooring Story
- Allwood Floors Story
- Voss Floors Story
- Oasis Wood Flooring Story
Finding the Perfect Flooring for Your RV: A Guide to Choosing the Righ
- Finding the Perfect Flooring for Your RV: A Guide to Choosing the Right RV Flooring

Welcome to our blog dedicated to RV enthusiasts! If you're preparing to move into an RV or undergo a major renovation of your current RV space, one of the most important decisions you'll need to make is choosing the right flooring. The correct choice of flooring will not only add beauty and style to your RV but also provide functionality and durability during your travels. In this article, we will guide you through the key factors to consider and provide tips for choosing the perfect flooring model for your RV. Analyze Your RV's Requirements: Before selecting a flooring model, it's important to analyze the specific requirements of your RV. Some key aspects to consider include: Weight and thickness of the flooring: RVs have strict weight limits, so choose lightweight and thin flooring to minimize the impact on the overall vehicle mass. Moisture resistance: Since RVs often face wet conditions, it's important to choose a moisture-resistant flooring model to prevent warping and damage.

Opt for Durability and Easy Maintenance: In a dynamic environment like an RV, it's essential to choose a flooring model that is durable and easy to maintain. Popular options for RVs include laminate or vinyl flooring, as they withstand scratches, stains, and general wear and tear. These materials are also relatively lightweight and can be easily cleaned with common cleaning products. Aesthetics and Style: Last but not least, you should also consider the aesthetic aspect of the chosen flooring. The flooring can add beauty and character to your RV. Choose a model that fits the overall interior design of your RV and matches your personal taste. You can opt for a natural wood look, an elegant stone appearance, or even bold patterns and colors to bring personality to the space. Conclusion: When it comes to choosing the right flooring model for your RV, consider the specific requirements of your vehicle, opt for durable and easy-to-maintain materials, and select a design that enhances the overall aesthetics of your RV. By taking these factors into account, you can find the perfect flooring that combines functionality, style, and durability for your RV adventures. Safe travels and enjoy the comfort and beauty of your newly selected RV flooring! Please note that I provided a general translation. If you have any specific preferences or requirements, feel free to let me know, and I'll be happy to assist you further.
- May 11, 2023
- Category: News
- Comments: 0

Retro Revival: Embracing the Timeless Charm of 1970s Interior Design

Crafting the Perfect Home: Unlocking the Secrets of Interior Design with 7 Key Elements

Finding the Perfect Stain: A Guide to Choosing the Right Finish for Your Hardwood Floors
Join our newsletter.

1500 N Interstate 35E Ste 106 Carrollton, Texas 75006
- Phone : 469-583-7053
- Email: [email protected]
- Return and refund policy
SUBSCRIBE AND GET DISCOUNT!
Request for quote.
TO ADD MULTIPLE ITEMS TO YOUR QUOTE, PLEASE FILL QTY FIELD THEN CLICK ON "ADD TO QUOTE"
- You are here:
- Home »
- Blog »
- RV Interior
- » RV Vinyl Plank Flooring: How to Install Without Problems

RV Vinyl Plank Flooring: How to Install Without Problems
- April 5, 2022 /
- RV Interior /
- By James V.
Flooring materials wear out. This is a fact of life whether you own a traditional home or an RV. Finding the right flooring material that doesn’t add a lot of weight to your trailer is another story though. Many owners go with a vinyl-type floor material that is supposed to last a long time.
When it comes to vinyl installation, you have to leave room for any expansion or contraction that takes place when the temperatures change. If you do that, then your flooring installation should last you a long time and keep your interior looking great day in and day out.
To learn more about this flooring installation option, just continue to read our article. It has the information you need so you can make a good decision when replacing your current flooring in your RV or travel trailer.
Can You Put Vinyl Plank Flooring in an RV?

Yes, this is a very good option to try out as these flooring materials look good and are easy to clean. Many owners have done this over the years without any real trouble. It just takes some time to install.
When you read the box, the makers of the different vinyl plank flooring materials will say that the flooring is not recommended for RVs. Their hesitation comes because of the usual temperature fluctuations that RVs go through throughout the year.
RV and trailer owners have read those warnings and installed the material anyways. Most leave a gap around the edge to accommodate the contraction and expansion that vinyl goes through when the temperature changes.
If you install the flooring right, you should not have any trouble in your RV or trailer. The flooring in most cases is waterproof and should protect the sub-flooring without any problems.
Of course, when you talk to salesmen, they may not mention that warning as they probably want a sale. But if you are careful you should have no problem as some owners have had this material on their floors for years now.
RV Vinyl Plank Flooring Pros And Cons
With every product you buy, there will always be good and bad points which you need to take into consideration before buying the product. Here are a few pros and cons for this flooring material to help you get a better idea about it:
- easy to install
- lots of design choices and colors to choose from
- not very expensive and should fit most budgets
- moisture resistant
- easy to clean and is a low- maintenance product
- some vinyl plank options give off a gas substance
- may fade a little bit when in direct sunlight
- can be dented with enough force
- does not decompose like wood can
- hard to remove once installed.
Not all of the vinyl floor plank systems out there come with the gridlock system of assembly. Many have to be glued down into place making it very difficult to remove the pieces if you want to make a change.
Other than that, the design and color options should make up for any of the cons as your interior will look like you have a million-dollar floor.
Problems With Vinyl Plank Flooring in RVs

Different vinyl flooring systems will have different problems if they have any problems at all. Some, like the Allure brand, seem to withstand lots of cold and rough treatment when placed in an RV or trailer.
One of the problems with bad installation or cheaper products is that the bounce of the road could pop up a flexible tile and you would have to spend time putting it back in place.
Manufacturers have said that the floor may get damaged if exposed to very cold temperatures for a very long time. This could happen but we have not come across any horror stories yet.
One problem with the Allure system is that the company changed the design of its gridlock system. The new design is not compatible with the old one so you cannot buy one or two pieces and slip them into place when replacing damaged old flooring.
You have to buy a completely new floor to use the new design. Other problems have been listed in the con section above. If you drop heavy objects onto the floor, it could dent. Fading may be an issue if your floor is constantly in direct sunlight.
Expansion and contraction will be an issue as well. You have to make allowances for that behavior or you may have problems with the flooring when the temperature changes.
Installing Vinyl Plank Flooring in a Camper
This can go either way. Some owners recommend the gridlock style while others recommend the glue-on style. There are good and bad points for both systems and you have to do your research to see which will be best for your camper.
With the gridlock system, you should leave some space between the floor and the wall to allow for the expansion that does take place with this type of flooring. Plus, you should have a good sub-floor plywood material underneath the vinyl. This helps stop the flexing when the RV or trailer goes down the road.
The problem with the glue method is that if you change your mind 5 years down the road, it can be a real pain to remove the vinyl flooring. The removal will take longer than the installation of the new flooring material.
The floating method is supposed to provide room for the material to expand and it does work for some people. You would have to do your research on this material as there are some very good brand names to use and their systems work much better than the off-brand options that are out there.
Should You Glue Down Vinyl Plank Flooring in An RV?

You can and this is one of the options that you have available to you when you go shopping for this type of flooring material. The key is to make sure you have enough room for the expansion that takes place.
Also, gluing is permanent which means that you are stuck with the flooring material for a very long time. As you already know, removing glued items is very difficult to do and the same situation applies to vinyl flooring.
Once it gets on the sub-floor, you may have to replace the sub-floor material as well. Many owners recommend the floating systems for this very reason. Gluing works well and should hold the panels in place no matter what type of road you go down.
That is if you pace a solid sub-floor underneath it. Nothing less than 1/2 inch plywood will do the trick and possible, nothing less than 3/4 inch plywood is the best measurement to use.
Everyone is going to have their preference and some owners prefer gluing while others prefer the floating system. The key is to buy the flooring that you want and will work best in your RV and with your budget.
Installing Vinyl Plank Flooring in RVs With Slide
This can get a bit tricky as some vinyl floor planks can get to about 3/16 of an inch in size or 5mm. This means that those options may be too thick to fit under the slide-out. You have to plan carefully when installing a new floor in an RV or trailer that has at least one slide.
The vinyl needs to be thin enough for the slide-out to close correctly without damaging the floor or the slide. If you have carpeting inside your RV, etc., then you have to make sure you pull all the staples out.
You can try banging them flush into the sub-flooring but that is not a good idea as the staples can work loose and eventually damage the vinyl. It is going to take some work to get the new flooring to work with the slide-out because of the factors involved.
You do not want to cause problems for the motors operating the slide-outs so you have to measure to see how much room you actually have to work with. Fitting the slide-out with new flooring has its own set of challenges.
One of those challenges will be matching the end of the slide-out flooring with the flooring on your main floor area. It will be tricky but it can be done if you are skilled and patient enough.
Replacing Carpet in RV With Vinyl Plank Flooring

Owners have done this already and the key to this task is to make sure you remove all the staples holding the carpeting in place. This is an essential part of the task that must be done completely or you may have trouble with your new vinyl floor.
To get the staples out you can use a flat-head screwdriver to pry up one end. Then grasp that end with a pair of pliers and pull. Or if the screwdriver is large enough, you can just pry the staple out completely.
If that fails, use a pry bar, crowbar, or nail puller to get the leverage you need. There are a number of tools you can use to remove staples. The key is to get every one before you start laying the new flooring material.
There is nothing wrong with replacing the carpet in your RV with vinyl. The floor will be easier to clean, harder to damage with spills and it is low maintenance so you do not have to do the work you would if a carpet is there.
It should last longer than the carpet will as well. The trouble with doing this task is that it can take quite a few hours just to remove the carpet and staples.
Best Vinyl Plank For RV
The one recommended by most owners was the Traffic Master Allure brand. The word is that most of the owners who installed this option had no complaints, even when the temperatures sank below 0.
This product comes in two styles, TrafficMaster’s luxury vinyl tile (LVT) and luxury vinyl plank (LVP), and there is a basic, good and best levels inside each of these two options. You would have to do some research to see which one will fit your RV or trailer the best.
On another list, the Shaw brand was the one selected to be the best for RVs. It also comes in two styles with the better style having the better warranty. It is easy to install but the thickness of the planks may be too thick for those RVs and trailers with slides. You would have to measure to make sure they would fit.
Plus, you get a wide range of designs and colors to shape your interior any way you want it to look. Off-gassing should not be a problem with this option.
Those are only two of the many flooring options you can choose from. They come highly recommended but the top 5, top 10 lists are full of other brands the reviewer prefers.
Most likely, they will all come with the same warning that they should not be used in RVs but that is a judgment call. Many RVs and trailers do not endure cold winters and are located in regions where the temperatures are fairly stable or do not have wide fluctuations like the mid-west and Canada do.
Some Final Words
If you want to upgrade the look of your RV’s interior or replace hard-to-keep clean carpeting, then vinyl flooring is a good option. It is safe to use, easy to clean, and comes in many designs and colors so you can match the colors perfectly.
Do your research as you need to find the right option for your travels. Grid locking or adhesive styles have their strong and weak points so you need to make a judgment call here as well.
Related Posts
Toy Hauler Add a Room Options (DIY Ramp Tent, Dometic Room)
DIY RV Engine Cover Console Replacement Ideas (Insulation)
RV Cable Pass Through Guide (Electrical, TV, Through Wall)
Leave a Comment:

You are here: Home // RV Upgrades & Modifications // 15 Tips For Tackling The Most Common DIY RV Renovations
This post may contain affiliate links or mention our own products, please check out our disclosure policy .
15 Tips For Tackling The Most Common DIY RV Renovations
Published on December 20th, 2017 by Amanda Watson
Whether you have a shiny new RV or older one begging for updating, chances are you’re in need of some renovations. Try some of these tips for tackling the most common DIY projects, from brightening up boring walls and upholstery to replacing floors and window treatments.
Replacing or upgrading the floor
RV floors are usually the first thing to show wear and tear. If you’re unlucky enough to purchase an RV with carpet, chances are you will want to replace it at some point (especially if you travel with pets ). Even non-carpeted surfaces such as linoleum and laminate tend to break down over time and will benefit from a refresh.
Replacing the floor in an RV is a big job in the scope of DIY RV renovations, but certainly not above the skill level of even mid-level DIYers. Here are a few tips to lead you in the right direction.
DON’T MISS OUT ON DO IT YOURSELF UPDATES
Sign up for the newsletter today.
Please enter a valid email address.
An error occurred. Please try again later.
Thank you for subscribing to the Do It Yourself RV newsletter, keep your eye on your inbox for updates.

1. Choose the right floor material.
- Peel & Stick Vinyl: This flooring comes in a wide variety of colors and patterns. Vinyl tiles are available as squares or long planks that mimic the look of wood.
- Laminate Wood Floor : A popular choice that is simple to install and known for durability.
- Linoleum : Comes in a wide variety of styles and colors. Linoleum is sold in sheets that you cut and staple to the sub-floor. While it is an economical choice, linoleum is also subject to stains and tears over time.
2. Be careful around the slide.
If your RV has a slide, be extra careful when installing new flooring in that space. Because the slide moves in and out you could have issues with scratching on certain floors.
One solution is to carpet the slide-out side (or keep the existing carpet). In general, a lower profile floor is better in the slide, as it is less likely to snag and become damaged.
3. Remove the old floor.
Take a close look at the furniture and cabinets in your RV to determine the best way to remove the floor. Consider what pieces must come out and what can be cut around.
Many furniture items like couches and chairs are simply bolted into place, while bigger items like cabinets and appliances are often attached in multiple areas and removing them can cause a multitude of issues.
4. Install trim for a finished look.
If you can’t get the new floor under the furniture items, try installing molding or trim to cover to the edges and give it a finished look.
5. Area rugs to the rescue!
If this all seems too involved, consider covering the existing floor with area rugs. Not only is this an inexpensive and easy solution, but it allows you to change up the look as often as you want.

Recovering the upholstery
The two most common complaints about RV upholstery are that it’s either too boring (white or beige) or too old fashioned (floral patterns). Since it’s impossible for the RV industry to offer designs that suit everyone, many people choose to reupholster some or all of their RV furniture.
6. Learn by watching tutorials on YouTube.
The thought of re-upholstering furniture can be intimidating, but it’s actually a fairly simple job. Want to know the secret for success? YouTube videos. With a little searching, you can find a YouTube tutorial for reupholstering everything from dinette cushions to a full-size couch.
7. No sewing machine? No problem!
There are several ways to recover furniture without a sewing machine. By getting creative with staples, velcro, or safety pins you can easily give your upholstery a fresh new look with minimal effort.

- How To Make a No-Sew Cushion Cover via In My Own Style.
- No-Sew Cushions & Curtains via Creating with Jessica Perez.
- Fast No Sew Bench Cushion via The Happier Homemaker.
8. Use the existing fabric as a template.
Instead of fussing with the measuring tape and hoping you got it right, simply use the old fabric that you removed as a template for cutting and marking the new fabric.
9. Take the time to find the right fabric.
Beyond the color and pattern, choosing a durable fabric that cleans up easily will extend the life of your upholstery.

Refinish the walls
Are you tired of that gold flower-patterned wallpaper? Or maybe those off-white walls are too bland and you want to add some color? A can of paint to the rescue! Refinishing the walls in your RV is one of the easiest DIY RV renovations.
10. Paint it!
The simplest option for re-finishing RV walls is to apply a coat of paint. Make sure the walls are clean and free of dirt and grime before applying a latex-based paint. For high use areas, a satin or semi-gloss finish paint wipes up easier than a flat finish.

11. Yes, you can paint over wallpaper.
In fact, painting over wallpaper is much easier than trying to remove it and then having to deal with the sticky, uneven mess left behind. First, glue down any loose pieces. Next, clean the surface well and apply a coat of primer. Finally, apply at least two coats of chosen paint color.
12. Have fun with it!
Since RVs typically don’t have much wall space, why not use them as a place to add a pop of bright color? Maybe you want to try your hand at a painted pattern or add some stick-on decals for interest. Paint is relatively inexpensive and simple to change so don’t be afraid to have fun with it.
Upgrade the window treatments
RVs come with a variety of window treatments. Some have fancy night and day shades, some have mini blinds, and some have good old fashioned fabric curtains. Not all these options work for all RVs and sometimes it’s necessary to make a change.

13. DIY fabric curtains.
If you can sew a straight line you can make curtains. Keep it simple by sewing two panels for either side of the window and hanging them on inexpensive rods. Using the old curtains as a template makes the job even simpler.
14. Blackout fabric makes a great curtain liner.
When making new curtains, consider using blackout fabric as a lining. This extra step will add to the cost of materials, but if you’re sensitive to light (or simply want more privacy) it’s well worth it.
15. Upgrade the cornice boards.
Maybe you like your existing blinds or shades but want to change out the cornice boards that surround the windows. No problem! This is one of the easiest renovations that you can tackle.

Simply remove the boards, uncover them and replace the old fabric. The only materials needed are a screwdriver, staple gun, and some fabric. For a step-by-step guide, check out this helpful tutorial from Nina of the Wheeling It blog.
Have you tackled any of these renovations? Tell us about it in the comments below.
Not doing a full renovation? Try some of these other simple ways to make your RV feel more like home .
Share this post:, related posts:.

Cleaning an Airstream: Protect Your Investment with These Expert Tips

Starting an RV Park: Insights from Experienced Owners

Stuck with an Old Travel Trailer? Here’s How To Make It Work
Hi, what are you looking for?

- Death Notice Submission
- May Teacher
- Lewiston Food Truck Night
- General Contest Rules
- Brain Buster Rules
- Commercial That Pays Contest Rules
- Our Digital Work
- Political Advertising
- Why Radio Works
- Hot Country KCLK-FM
- Classic Rock KVAB-FM
- KATW – Cat-FM
- FOX Sports 1430AM
- Fire Relief
Skelton’s Floor Trader Outlet is NOW OPEN

Skelton’s Floor Trader Outlet on the Moscow Pullman Highway is now OPEN!! More than 204,000 Square Feet of flooring in Stock. LVT, Laminate, Carpet, Tile and more available for pickup TODAY. Listen to what Michael Skelton has to say about what amazing products and support Skelton’s Floor Trader Outlet has to offer. 5951 Airport Rd. Pullman, Washington. Open Monday – Friday 7:30AM – 6PM and Saturdays 9AM – 5PM. Visit skeltonsfloortraderoutlet.com to learn more
Death Notices for Thursday, September 5
Sandra Kinney September 5, 2024

Schweitzer Engineering Laboratories Releases 2024 Index of Freedom
August 31,2024

Idaho State News
Idaho fish and game releases, aug. 30.
August, 31,2024

Andy's Custom Wood Floors Your Destination For Exquisite Wood Floors.
At Andy's Custom Wood Floors, we understand the transformative power of quality wood flooring. With a passion for craftsmanship and an unwavering commitment to excellence, we invite you to discover a world where luxury meets durability. We specialize in new hardwood floors finished in place, and refinishing old or worn out wood floors.
Proudly Serving Moscow and the Surrounding Areas Since 2004
What We Offer
Our services.
Consultation and Design: Begin your wood flooring journey confidently with the guidance of our experienced expert. I provide personalized consultation services to help you navigate our wide array of wood flooring options and find the best fit for your space. Whether you need advice on color schemes, grain patterns, or finishes, I'll collaborate closely with you to realize your vision.
Customization: Express yourself with custom wood flooring tailored to your specific preferences. As a skilled craftsman, I can create unique designs to complement any style, from intricate patterns to personalized stains. Enhance your space with distinctive wood flooring that mirrors your individual taste and enriches the ambiance of your home or business.
Installation: Enjoy the convenience of professional wood flooring installation carried out by a skilled technician. I manage every step of the installation process meticulously, ensuring a polished finish that enhances both the aesthetics and functionality of your space. From preparing the subfloor to final touches, I prioritize quality and meticulousness to deliver exceptional results that meet your needs.
Restoration and Refinishing: Renew tired or worn wood flooring with my restoration and refinishing services. As a skilled craftsman, I can breathe new life into aging floors by repairing damage, sanding away imperfections, and applying fresh finishes to restore their natural appeal and shine. Transform your space with beautifully rejuvenated wood flooring that looks and feels refreshed.
See Our Work
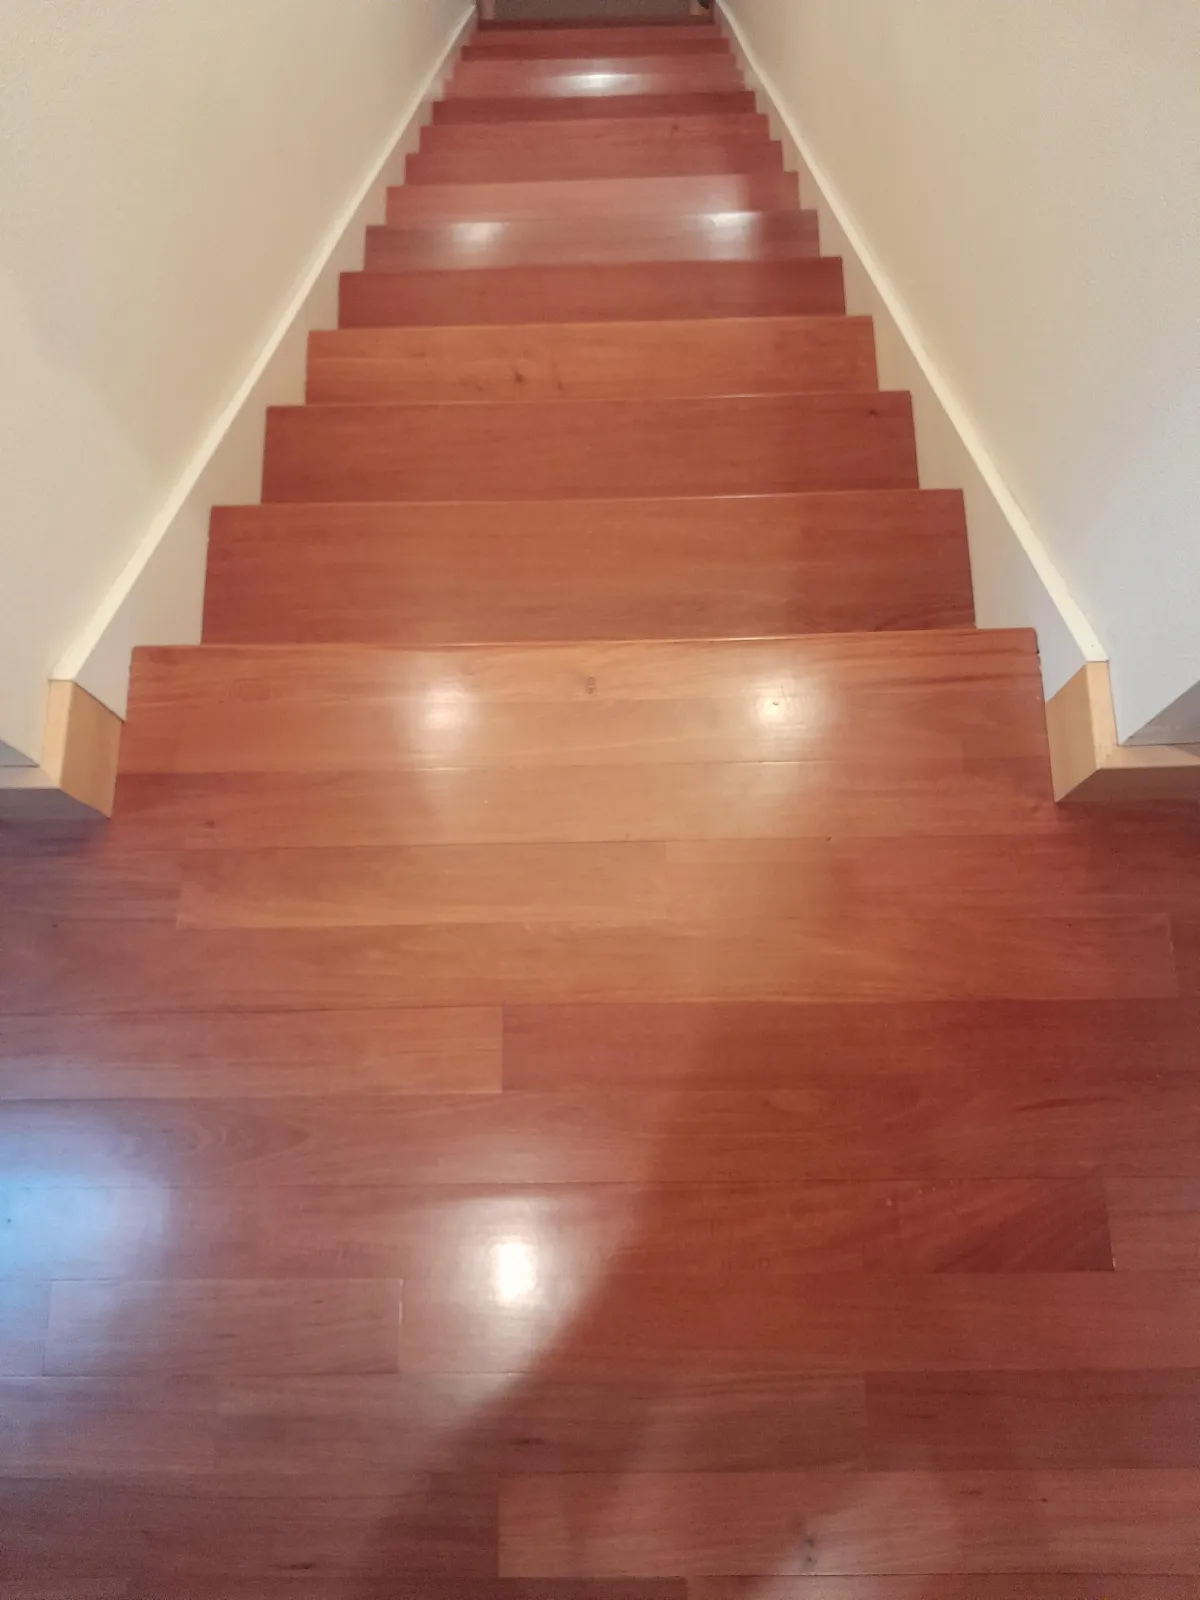
Your Local Wood Flooring Experts
Call or text us for a free estimate in the vicinity.
(208) 669-9152
© Copyright 2023
Ozark 1800QS Floorplan
The 1800QS is well equipped for adventure camping, with roomy queen bed, compact kitchen, chaise lounge with folding sofa, and panoramic window for great campsite views. Cabinets are located throughout for storage, with a bonus pantry for additional kitchen items.

Specifications Definitions
GVWR (Gross Vehicle Weight Rating) – is the maximum permissible weight of the unit when fully loaded. It includes all weights, inclusive of all fluids, cargo, optional equipment and accessories. For safety and product performance do NOT exceed the GVWR.
GCWR (Gross Combined Weight Rating) – is the maximum permissible loaded weight of your motor home and any towed trailer or towed vehicle. Actual GCWR of this vehicle may be limited by the sum of the GVWR and the installed hitch receiver maximum capacity rating; see hitch rating label for detail.
GAWR (Gross Axle Weight Rating) – is the maximum permissible weight, including cargo, fluids, optional equipment and accessories that can be safely supported by a combination of all axles.
UVW (Unloaded Vehicle Weight)* – is the typical weight of the unit as manufactured at the factory. It includes all weight at the unit’s axle(s) and tongue or pin and LP Gas. The UVW does not include cargo, fresh potable water, additional optional equipment or dealer installed accessories. *Estimated Average based on standard build optional equipment.
CCC (Cargo Carrying Capacity) ** – is the amount of weight available for fresh potable water, cargo, additional optional equipment and accessories. CCC is equal to GVWR minus UVW. Available CCC should accommodate fresh potable water (8.3 lbs per gallon). Before filling the fresh water tank, empty the black and gray tanks to provide for more cargo capacity. **Estimated Average based on standard build optional equipment.
Each Forest River RV is weighed at the manufacturing facility prior to shipping. A label identifying the unloaded vehicle weight of the actual unit and the cargo carrying capacity is applied to every Forest River RV prior to leaving our facilities.
The load capacity of your unit is designated by weight, not by volume, so you cannot necessarily use all available space when loading your unit.
Actual towing capacity is dependent upon your particular loading and towing circumstances, which includes the GVWR, GAWR and GCWR as well as adequate trailer brakes. Please refer to the Operator's Manual of your vehicle for further towing information.
Note: Specifications are subject to change without notice.
Please verify you are a human
Click "I am not a robot" to continue
Reference ID:
IMAGES
VIDEO
COMMENTS
Mid-Range Option ($$) RecPro RV Trailer Diamond Plate Pattern Flooring. This Rubber flooring option is found on Amazon for $504.95 per 8.5′ x 25′ sheet (this equates to about $2.38 per square foot). It is resistant to dents, water, sunlight, and temperature changes, and the diamond plate texture makes it non-skid. 3.
Give your camper or RV a waterproof, scratch proof floor with this laminate flooring. The planks offer stunning visuals and embossing for a convincing natural wood look and feel. With an AC 4 wear layer rating, these planks can handle heavy traffic and pets without a problem.
2. Peel & stick. Quite a few RV owners (19% in our poll) are deciding to use peel & stick vinyl as a cheap, easy-to-install flooring option that mimics the look of real wood or tile. You can even use flexible grout between the tiles if you wish to mimic the look of a "real" tile. Photo Credit: Suzanne Taylor.
We hope you enjoy checking out these articles on RV remodels that include a variety of types of flooring replacements - from peel-and-stick to tiles and more. Bus Reno with Cork Square Flooring. 20 Boho RV Remodel with Various Floors. Family Motorhome Reno with Click Vinyl Flooring. 10 Beautiful RV Renovations.
19. Paint your refrigerator with chalkboard paint. 20. Spray paint your stove or sink with colorful appliance paint. 21. Give your ceiling a makeover with inexpensive foam or tin ceiling tiles. Get more ceiling makeover ideas here. 22. Use leftover or reclaimed hardwood flooring to make a countertop.
Laminate flooring might lose its varnish and paint after a short while. Dream Home 7mm Ebb Tide Oak is one of the best laminate flooring options available for RVs. It is designed to mimic the texture, color, and grain of real hardwood. Laminate flooring is also very easy to install, clean, and maintain.
Embarking on the RV Flooring Adventure: Unraveling the Best Solutions. As we venture into the exciting realm of RV living, one key aspect that often shapes our experience is the choice of RV flooring. Like the sturdy bricks of a stationary home, the floor of your moving abode significantly impacts the feel and functionality of your space.
Use a 4-foot level and utility knife to cut the paper into 2-inch strips. It will save the paper and make it manageable to lay out. Afterward, lay the strips of paper and tap each piece using a quality tape to make the exact outline of the floor. Then roll the vinyl sheet up neat and straight.
Step 9: Seal and Finish. Apply a sealant if necessary, depending on the type of flooring. This step enhances durability and protects against moisture, dirt, and wear—especially important in the high-traffic environment of an RV. Finally, step back and admire your work.
The best replacement flooring for RV is vinyl. It's a versatile material, and you can find vinyl tiles, sheets, and planks with simple installation systems. Vinyl is durable and water-resistant. It's easy to clean, which makes a significant difference in high-traffic areas. Carpet is another material worth considering.
Sketch out your RV and make a diagram of the interior. Include furniture, walls, appliances, etc. This drawing will give you a visual of the best place to start your installation and highlight any potential problem areas so you're aware of them before you begin. Clear furniture and start removing the current floor.
Spruce up your RV interior with new flooring - Photo by Crazy Family Adventure, Do It Yourself RV 3. Replace the RV flooring. The floors in a travel trailer or motorhome can get pretty gross, especially if they happen to be covered in carpet. If your floors have seen better days, replacing them might be just the thing you need to do to make ...
Start in the left-hand corner of your camper that has a slide-out or the longest run without obstacles. Apply a thin layer of flooring adhesive with a 1/16″ notched trowel. Be sure to hold the trowel at a 45-degree angle. You can spread the flooring adhesive as you go for a more permanent hold or apply sections and let it dry for a removable ...
Hardwood or Bamboo. Best RV Replacement Flooring Options. Best Overall RV Flooring Option - Bare Decor Teakwood Floor Tiles. Runner Up for Best RV Flooring - Co-Z Adhesive Vinyl Flooring. Best Budget RV Flooring Option - Home and Office Needlebond Carpeting. Best Unique RV Flooring Option - Diamond Plate Rubber Flooring.
Choose a model that fits the overall interior design of your RV and matches your personal taste. You can opt for a natural wood look, an elegant stone appearance, or even bold patterns and colors to bring personality to the space.Conclusion:When it comes to choosing the right flooring model for your RV, consider the specific requirements of ...
Many RVs and trailers do not endure cold winters and are located in regions where the temperatures are fairly stable or do not have wide fluctuations like the mid-west and Canada do. Some Final Words. If you want to upgrade the look of your RV's interior or replace hard-to-keep clean carpeting, then vinyl flooring is a good option. It is safe ...
4. Install trim for a finished look. If you can't get the new floor under the furniture items, try installing molding or trim to cover to the edges and give it a finished look. 5. Area rugs to the rescue! If this all seems too involved, consider covering the existing floor with area rugs.
We offer a wide variety of RV repairs and services. Call 800-306-4016 to learn more or to schedule an appointment at your preferred location! Need Parts Information? Contact us. Let the RV interior specialists at Lazydays bring the interior of your dreams to life. Lazydays can help improve the comfort & functionality of your RV.
You'll save a fortune! Now this service is available to you and your RV Dealership. Contact us at (800) 933-2656 to learn more about our restaurant restoration services. Free estimates are available! We Offer Repairs on-Site to Leather, Vinyl, Carpet, Fabric and Plastic on the Interior of RV's. We Can Fix That!!
More than 204,000 Square Feet of flooring in Stock. LVT, Laminate, Carpet, Tile and more available for pickup TODAY. Listen to what Michael Skelton has to say about what amazing products and support Skelton's Floor Trader Outlet has to offer. 5951 Airport Rd. Pullman, Washington. Open Monday - Friday 7:30AM - 6PM and Saturdays 9AM - 5PM.
At Andy's Custom Wood Floors, we understand the transformative power of quality wood flooring. With a passion for craftsmanship and an unwavering commitment to excellence, we invite you to discover a world where luxury meets durability. We specialize in new hardwood floors finished in place, and refinishing old or worn out wood floors.
2015 Jayco White Hawk 29REKS, <p>The White Hawk 29REKS travel trailer by Jayco offers double slides and a rear entertainment center.As you enter the travel trailer, to the right is a bedroom with a queen bed and wardrobes on either side of the bed.The side aisle bath offers a toilet, shower with sliding door, and a sink.In the kitchen and ...
YEARS EXPERIENCE. Masters of Design: Our proficiency in Interior Design, Architecture, and Lighting is the hallmark of our success. With a passionate commitment to our craft, we turn your dreams into reality by harnessing our expertise in these fields to create spaces that are not just functional, but truly exceptional.
Hitch Weight 410 lb. GVWR 4,810 lb. UVW 3,789 lb. CCC 1,021 lb. Exterior Length 23' 0" Exterior Height 10' 2" Exterior Width 90" Fresh Water 39 gal. Gray Water
2096 Moscow Road, Moscow, IA 52760 | Ph: 800-321-3494 | Fax: 563-724-3408 | www.HWH.com ML23034.PU (Page 1 of 2) 05JAN18 Features & Benefits of "HWH® Slide-Out Systems" HWH® has been manufacturing products (mainly hydraulic leveling systems) for the RV industry since 1967. We entered the hydraulic slide-out market in 1993 and have enjoyed designing and manufacturing an extensive line of ...
Zillow has 46 photos of this $649,000 4 beds, 2 baths, 1,795.85 Square Feet single family home located at 1026 Moscow Rd, Stone Mills, ON K0K 3N0 MLS #40632849.
2312 White Ave #2384-201, Moscow, ID 83843 is an apartment unit listed for rent at $1,275 /mo. The 677 Square Feet unit is a 1 bed, 1 bath apartment unit. View more property details, sales history, and Zestimate data on Zillow.
1572 Driftwood Ln, Moscow Mills, MO 63362 is pending. Zillow has 1 photo of this 3 beds, 3 baths, 2,059 Square Feet single family home with a list price of $337,898.
1307 Maple Grove Rd, Moscow, PA 18444 is a 1,300 sqft, 3 bed, 3 bath home sold in 2005. See the estimate, review home details, and search for homes nearby.