How To Uninstall And Reinstall Safari On A Mac

- Software & Applications
- Browsers & Extensions


Introduction
Safari, the default web browser for Mac, is known for its sleek interface, speed, and seamless integration with Apple's ecosystem. However, there are instances when users may encounter issues with Safari, prompting them to consider uninstalling and reinstalling the browser. Whether it's due to performance issues, corrupted files, or the need to troubleshoot persistent glitches, the process of uninstalling and reinstalling Safari on a Mac can help resolve these issues and restore the browser to its optimal state.
In this comprehensive guide, we will delve into the steps for uninstalling and reinstalling Safari on a Mac , providing a clear roadmap for users to navigate through this process with confidence. By following these steps, users can effectively troubleshoot Safari-related issues and ensure a seamless browsing experience on their Mac devices.
Uninstalling and reinstalling Safari is a strategic approach to troubleshooting common browser-related problems, and it can serve as a valuable tool in maintaining the overall performance and functionality of Safari on a Mac. Whether you're a seasoned Mac user or a newcomer to the platform, understanding the process of uninstalling and reinstalling Safari can empower you to take control of your browsing experience and address any challenges that may arise.
Now, let's embark on this journey to explore the intricacies of uninstalling and reinstalling Safari on a Mac, equipping ourselves with the knowledge and expertise to overcome potential obstacles and optimize the performance of this essential web browser .
Uninstalling Safari from a Mac
Uninstalling Safari from a Mac involves a series of steps to ensure the removal of the browser from the system. Before proceeding with the uninstallation process, it's important to note that Safari is deeply integrated into the macOS operating system, and as a result, it cannot be uninstalled in the same way as third-party applications. However, users can disable Safari and remove its associated data to achieve a similar effect.
Here's a detailed guide on how to disable Safari and remove its data from a Mac:
Disable Safari :
- Open the "Safari" app on your Mac.
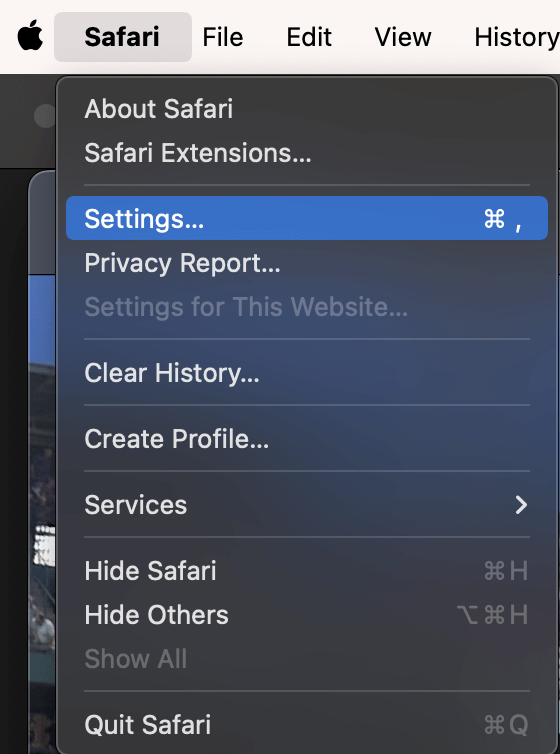
- In the top menu, click on "Safari" and select "Preferences."
- Navigate to the "Advanced" tab and check the box next to "Show Develop menu in menu bar."
- Close the Preferences window and click on the "Develop" menu in the top menu bar.
- From the dropdown menu, select "Disable Local File Restrictions."
Remove Safari Data :
- Open Finder and click on "Go" in the top menu.
- Select "Go to Folder" and enter "~/Library" in the dialog box.
- Locate the "Safari" folder and move it to the Trash.
- Next, navigate to "~/Library/Preferences" and find the file named "com.apple.Safari.plist." Move this file to the Trash as well.
Clear Safari Cache and Cookies :
- Open Safari and click on "Safari" in the top menu.
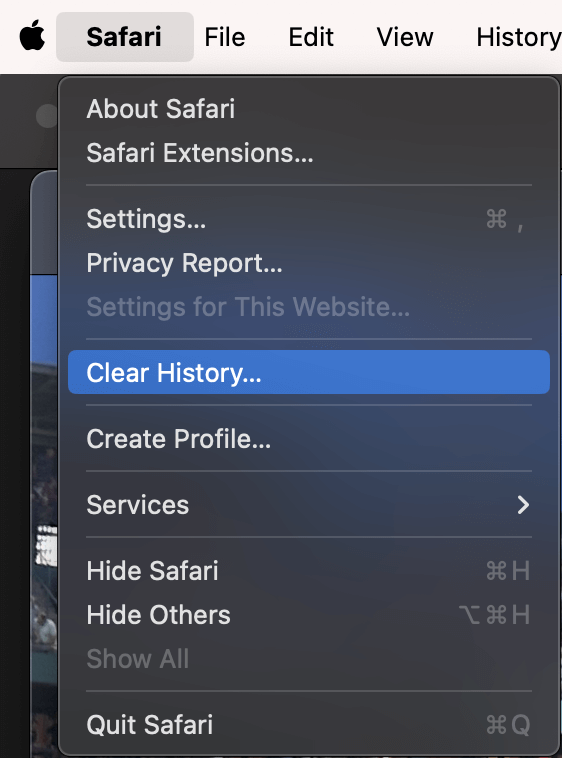
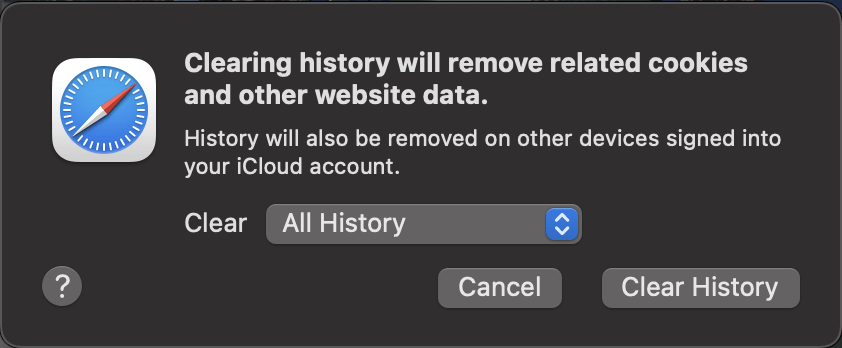
- Select "Clear History" and choose the desired time range.
- Click on "Clear History" to remove the browsing history, cache, and cookies associated with Safari.
Reset Safari :
- Select "Reset Safari" and choose the items you want to reset, such as history, top sites, and saved names and passwords.
By following these steps, users can effectively disable Safari and remove its associated data from their Mac, achieving a result similar to uninstalling the browser. It's important to exercise caution when making changes to system files and folders, as improper modifications can impact the stability and functionality of the macOS environment.
With Safari disabled and its associated data removed, users can explore alternative web browsers or reinstall Safari to address any underlying issues and restore the browser to its default state. In the subsequent section, we will delve into the process of reinstalling Safari on a Mac, providing users with a comprehensive roadmap to restore the browser and optimize their browsing experience.
Reinstalling Safari on a Mac
Reinstalling Safari on a Mac involves restoring the browser to its default state, which can help address performance issues, corrupted files, or persistent glitches. While Safari is deeply integrated into the macOS operating system, it is possible to reinstall the browser using a strategic approach. Here's a detailed guide on how to reinstall Safari on a Mac:
Method 1: Using Terminal
Open Terminal : Launch the Terminal application on your Mac. Terminal can be found in the "Utilities" folder within the "Applications" directory.
Enter Command : Type the following command into Terminal and press Enter:
sudo rm -rf /Applications/Safari.app
Provide Administrator Password : You will be prompted to enter your administrator password. Once entered, press Enter to execute the command.
Reinstall macOS : If Safari is not functioning properly, consider reinstalling macOS to ensure a clean installation of Safari along with the operating system. This can be done by restarting your Mac and holding down Command + R to enter Recovery Mode. From there, you can select "Reinstall macOS" to initiate the process.
Method 2: Time Machine Backup
Restore from Time Machine : If you have a Time Machine backup that includes a functional version of Safari , you can restore your Mac to that backup to effectively reinstall Safari. This process involves entering Recovery Mode, selecting "Restore from Time Machine Backup," and following the on-screen instructions to choose the backup containing the desired Safari version.
Complete the Restoration : Once the restoration process is complete, Safari will be reinstalled on your Mac, reverting to the version included in the selected Time Machine backup.
Method 3: macOS Reinstallation
Download macOS Installer : If Safari issues persist and a Time Machine backup is not available, consider reinstalling macOS to ensure a fresh installation of Safari. Download the macOS installer from the App Store and follow the on-screen instructions to reinstall the operating system.
Verify Safari Functionality : After reinstalling macOS, verify that Safari is functioning properly. If the reinstallation process was successful, Safari should be restored to its default state, free from the issues that prompted the reinstallation.
By following these methods, users can effectively reinstall Safari on their Mac, addressing any underlying issues and restoring the browser to its optimal state. Reinstalling Safari can serve as a valuable troubleshooting tool, enabling users to overcome performance challenges and ensure a seamless browsing experience on their Mac devices.
In conclusion, the process of uninstalling and reinstalling Safari on a Mac is a strategic approach to troubleshooting common browser-related issues and ensuring the optimal performance of this essential web browser . By following the detailed steps outlined in this guide, users can effectively address performance challenges, corrupted files, and persistent glitches, empowering them to take control of their browsing experience and maintain a seamless workflow on their Mac devices.
Uninstalling Safari, while not a conventional process due to its deep integration into the macOS operating system, can be achieved by disabling the browser and removing its associated data. By following the steps to disable Safari, remove its data, and clear cache and cookies, users can create a similar effect to uninstalling the browser, paving the way for a clean reinstallation or exploration of alternative web browsers.
Reinstalling Safari on a Mac involves restoring the browser to its default state, which can help address underlying issues and ensure a fresh start for the browser. Whether through the use of Terminal commands, restoring from a Time Machine backup, or reinstalling macOS, users have multiple avenues to reinstall Safari and resolve any performance challenges they may encounter.
It's important to note that before proceeding with the uninstallation and reinstallation of Safari, users should consider backing up their important data to prevent any potential loss during the process. Additionally, exercising caution when making changes to system files and folders is crucial to maintaining the stability and functionality of the macOS environment.
By leveraging the knowledge and expertise gained from this guide, users can navigate the process of uninstalling and reinstalling Safari with confidence, effectively troubleshooting browser-related issues and optimizing the performance of Safari on their Mac devices. Whether it's enhancing browsing speed, addressing compatibility issues, or restoring the browser to its default state, the ability to uninstall and reinstall Safari serves as a valuable tool in the arsenal of Mac users, empowering them to overcome challenges and maintain a seamless browsing experience.
In essence, the journey of uninstalling and reinstalling Safari on a Mac is a testament to the adaptability and resilience of users in the face of technological challenges. By embracing these processes, users can harness the full potential of Safari and ensure a smooth and efficient browsing experience, aligning with the ethos of innovation and optimization that defines the Mac ecosystem.
Leave a Reply Cancel reply
Your email address will not be published. Required fields are marked *
Save my name, email, and website in this browser for the next time I comment.
- Crowdfunding
- Cryptocurrency
- Digital Banking
- Digital Payments
- Investments
- Console Gaming
- Mobile Gaming
- VR/AR Gaming
- Gadget Usage
- Gaming Tips
- Online Safety
- Software Tutorials
- Tech Setup & Troubleshooting
- Buyer’s Guides
- Comparative Analysis
- Gadget Reviews
- Service Reviews
- Software Reviews
- Mobile Devices
- PCs & Laptops
- Smart Home Gadgets
- Content Creation Tools
- Digital Photography
- Video & Music Streaming
- Online Security
- Online Services
- Web Hosting
- WiFi & Ethernet
- Browsers & Extensions
- Communication Platforms
- Operating Systems
- Productivity Tools
- AI & Machine Learning
- Cybersecurity
- Emerging Tech
- IoT & Smart Devices
- Virtual & Augmented Reality
- Latest News
- AI Developments
- Fintech Updates
- Gaming News
- New Product Launches
OpenStack Backup and Recovery Software
- Apple Wallet Availability in the PocketGuard App Sync your Apple Card Apple Cash and Savings from Apple Card Accounts
Related Post
Ai writing: how it’s changing the way we create content, how to find the best midjourney alternative in 2024: a guide to ai anime generators, unleashing young geniuses: how lingokids makes learning a blast, 10 best ai math solvers for instant homework solutions, 10 best ai homework helper tools to get instant homework help, related posts.

How To Uninstall Safari From Mac

How To Remove Safari From Macbook

How To Reinstall Firefox

Why Has Safari Disappeared?

How To Remove A Web Browser

How Do I Reinstall Google Chrome?

How To Turn Off Grammarly

Why Does Hulu Keep Freezing (Troubleshoot Guide)
Recent stories.

Apple Wallet Availability in the PocketGuard App: Sync your Apple Card, Apple Cash, and Savings from Apple Card Accounts

5 Ways to Improve IT Automation

What is Building Information Modelling?

How to Use Email Blasts Marketing To Take Control of Your Market

Learn To Convert Scanned Documents Into Editable Text With OCR

Top Mini Split Air Conditioner For Summer

Comfortable and Luxurious Family Life | Zero Gravity Massage Chair
- Privacy Overview
- Strictly Necessary Cookies
This website uses cookies so that we can provide you with the best user experience possible. Cookie information is stored in your browser and performs functions such as recognising you when you return to our website and helping our team to understand which sections of the website you find most interesting and useful.
Strictly Necessary Cookie should be enabled at all times so that we can save your preferences for cookie settings.
If you disable this cookie, we will not be able to save your preferences. This means that every time you visit this website you will need to enable or disable cookies again.
How to uninstall, reinstall, or reset Safari on Mac

Are you constantly trying to fix Safari on Mac?
Users who are plagued by Safari issues usually want to uninstall and reinstall the app to resolve them. While this might work for a lot of apps out there, it doesn’t quite solve Safari problems. In fact, you can’t simply click and delete the app since it is an in-built feature of the macOS and a permanent part of it.
Try Kingpin Private Browser for Free »
How do I uninstall and reinstall Safari?
If you are keen on fixing Safari just get the latest version of macOS and reinstall it on your computer to get rid of Safari bugs. If you are working with the newest edition of your macOS, you are automatically using the most recent version of Safari. This also ensures that user data like passwords and extensions are protected. Of course, if all else fails, you might consider using a different browser like Kingpin for high browsing speeds and incognito browsing .
How do I fix Safari on my Mac?
The very basic thing you can do is force quit the browser and hold the shift key when Safari is starting. This will make it start in safe boot. The safe mode is more stable than the regular one.
But this doesn’t always work. So you might need to tweak Safari settings to fit your usage . Resetting Safari on Mac clears the pile of cookies, caches, redirects, ad preferences, and a lot more. As we wrote in the previous article, it is possible to reset Safari browser even without opening . On the other hand, changing the settings may also cause you to permanently lose any data that does not have a back-up.
You can modify the settings easily after you’ve launched the browser on Mac. Here is a step-by-step guide to help you improve browser performance:
1. Delete Safari cache
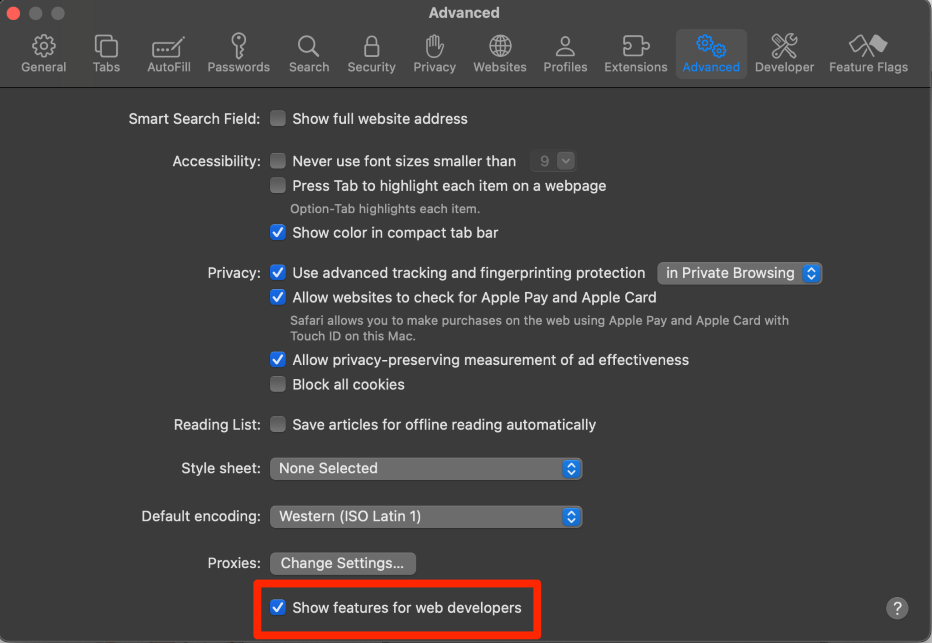
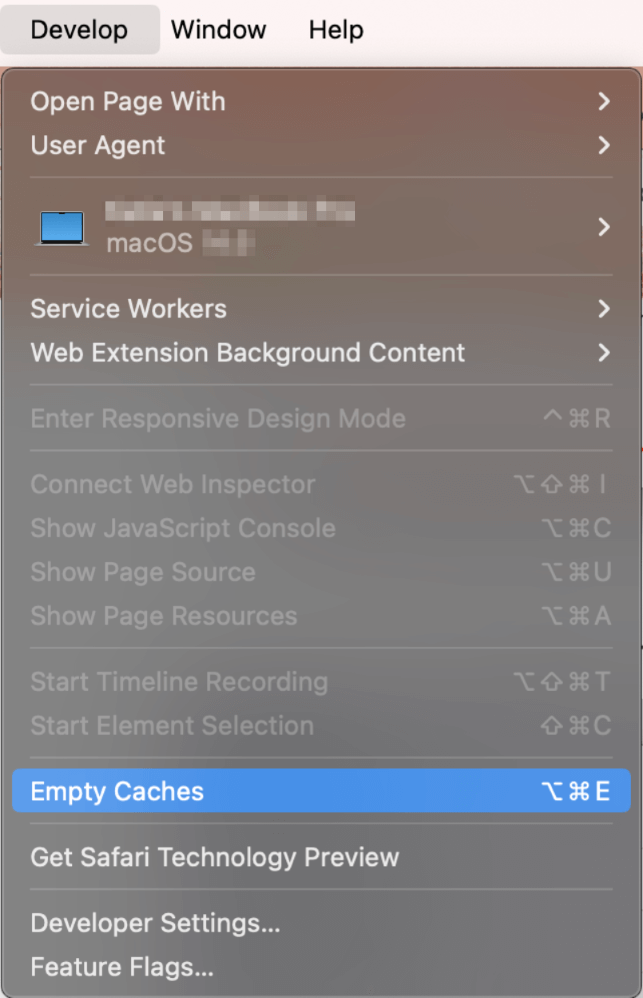
Cache files weigh down your system like nothing else. You can find the ‘Delete’ option in the Preferences section of the Safari toolbar. Then go to the ‘Advanced’ tab and scroll down to the ‘Show Develop menu in the menu bar. Check the box in front of it. This will display the ‘Develop’ tab on the toolbar. Click on ‘Develop’ and then click on ‘Empty Caches’.
In short, here are the steps:
Safari > Preferences > Advanced > Show Develop menu in menu bar > Develop > Empty Caches
2. Delete website data
Every website you visit leaves some amount of data on your system. And all users visit a huge number of websites over some time. So, you can imagine the total data load that gets stored on your Mac. It is easy to adjust the browser in such a way that all this data is removed and the browser malfunctions are removed.
Detailed steps:
- Launch Safari
- Click on Preferences to open a new window and then click on Privacy.
- Select the button named ‘Manage Website Data’.
- Click on the ‘Remove All’ button. You will be asked to confirm your choice.
- Click on ‘Remove Now’.
Safari > Preferences > Privacy > Manage Website Data > Remove All > Remove Now
Erasing website data from all websites you’ve ever visited might check the tracking issue. However, there is a potential problem of sites loading slower. Prioritize your needs and change the settings accordingly.
3. Delete Safari history
Safari settings on Mac make it easy to delete history files from the Safari toolbar.
Just do the following things. Launch Safari and click on the ‘Safari’ tab in the toolbar. Now click on ‘Clear History’. When the drop-down menu opens, choose ‘All History’ and finally, click on ‘Clear History’.
Like so: Safari > Clear History > All History > Clear History
4. Delete Safari extensions and plug-ins
To restore Safari settings and fix performance issues it is sometimes best to remove all extensions and plug-ins from the browser.
What to do:
- Open Safari on your system.
- Click on Preferences
- Head over to the ‘Extensions’ tab on the menu
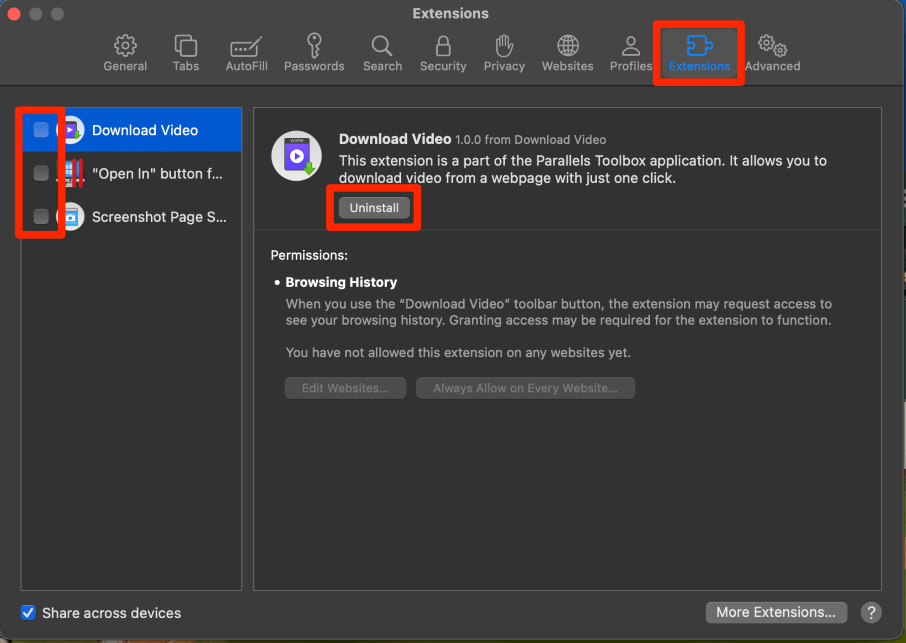
- Here you will find the full list of active Extensions on the browser. You can choose to delete either a few selected ones or the entire list all at once.
- Click on ‘Uninstall’ to finish deleting them.
This is what it looks like:
Safari > Preferences > Extensions > Uninstall
Deleting plug-ins may be more tiresome than you think. They get saved in two separate places. Use your Finder window to locate them.
Here’s the outline:
- Launch Finder and move to the ‘Go’ option and select ‘Go to folder’
- In the search list that gets displayed, type ‘ ˜ /Library’ and click on ‘Go’.
- The Library folder opens and now it’s time to look for Internet Plug-ins saved in a different folder.
- Drag and drop them in the Trash.
- Next, go back to the ‘Go’ icon and type ‘Go to folder’ once again.
- This time you type ‘/Library’ and click on Go.
- Now you can look for the Internet Plug-ins folder once again.
- Drag and drop plug-ins in the Trash one final time to remove them from Safari.
Finder > Go > Go to folder > ˜ /Library > Go > Internet Plug-Ins > Trash > Go > Go to folder > Library > Internet Plug-Ins > Trash
With all such small modifications, you can reset Safari whenever you want. Once the browser is free of all this weight, it will not only become faster and lighter but also more secure than before. Some website data or extensions often download malware in your system.
Choosing an additional browser
Of course changing settings over and over again gets tedious. You might want to pick another browser like Kingpin that doesn’t store cookies or other site data . This saves you from having to tinker with its settings. Kingpin also forgets your browsing history and caches once your session is over. Moreover, the browser lets you access restricted content in private.
Having an alternate browser doesn’t hurt, especially when you can use it to perform highly-sensitive online activities like bank transactions or shopping for gifs without worrying about data leakage to other sites. Its tabs are PIN protected so no one can spy on you. With this browser, the chances of being tracked are minimized, which is a great thing since your browsing session won’t be broken up with ads.
Summing it all up
Safari is part of the MacOS and hence can’t be uninstalled or reinstalled. To get the maximum efficiency out of it what you can do is change Safari setting to suit your purpose. Remove extensions, caches, cookies, history, and all such files of little use. Keep your OS updated to enjoy the benefits of the newest version of Safari for Mac . As an alternative, switch to a safer, faster, private browser like Kingpin to fix all browsing issues once and for all. It is available for Mac and makes for an uninterrupted browsing experience.
Related Posts:


How to Easily Remove & Reinstall Safari on Mac OS
Safari is the default web browser for Mac users. It’s fast, secure, and easy to use. But sometimes you may want to uninstall Safari from your Mac and reinstall it. This can be due to performance issues, or you may simply want a clean slate. Whatever the reason, here’s how to remove Safari from your Mac and reinstall it.
First, make sure you have a backup of all your data before you start making any changes. Deleting Safari can cause damage to your operating system and could lead to data loss if something goes wrong.
To delete Safari from your Mac, open the Terminal app by searching for it in Spotlight or navigating to Applications/Utilities folder. In the Terminal window, type cd /Applications/. You will be asked for your device password; enter it and then type sudo rm -rf Safari.app/. This command will delete all files related to Safari from your Mac.
Once you have deleted Safari, you can reinstall it by going to the App Store on your Mac and downloading the latest version of Safari from there. Make sure that the version being downloaded is compatible with the OS version currently installed on your Mac.
That’s it! You have successfully removed Safari from your Mac and reinstalled it with the latest version available in the App Store. If at any point during this process, you come across an issue or error message don’t hesitate to contact Apple Support for help resolving it quickly and safely so that you can continue using your favorite web browser without any issues.

Reinstalling Safari
To uninstall Safari and install it again, you will need to use your Mac’s Terminal. First, launch Terminal from the Spotlight or Applications/Utilities folder. Once in the terminal window, type in “cd /Applications/” followed by your device password when prompted. Then enter “sudo rm -rf Safari.app/” to remove the Safari application from your system. After that, visit Apple’s website at https://www.apple.com/safari/ and download the latest version of Safari for Mac OS X. Once downloaded, double-click on the disk image (.dmg) file and follow the instructions provided to complete installation on your machine.
Consequences of Deleting Safari From Mac
If you delete Safari from your Mac, it could cause serious damage to the operating system and the overall stability of your device. It is not recommended to delete Safari, as it is deeply embedded in the OS, and deleting it could lead to unexpected errors and performance issues. Additionally, without Safari, you will not be able to browse the web or access any websites. If you are having trouble with Safari, it is recommended that you reset it or reinstall the app instead of deleting it.
Resetting Safari on a Mac
To completely reset Safari on your Mac, you will need to follow these steps: 1. First, open Safari and click the Safari menu in the upper left corner of your screen. 2. Select Preferences from the dropdown menu to open the Preferences window. 3. In the General tab, click the Reset button at the bottom of the window. 4. A confirmation dialog box will appear – make sure to select Remove All Website Data and then click Reset in this dialog box to confirm that you want to reset Safari on your Mac. 5. Finally, close out all Safari windows and reopen them for your reset changes to take effect.
Reinstalling Safari on Mac
Yes, you can reinstall Safari on Mac. To do this, go to the App Store and search for “Safari” in the search bar. Select the latest version of Safari and then click “Get” or “Download” to install it. Once the installation is complete, open Safari from the Launchpad or Finder to start using it. Alternatively, you can also use Software Update (in System Preferences) to update Safari if you already have it installed.
Can Safari Be Uninstalled From a Mac?
Yes, Safari can be uninstalled on Mac, but it’s not as straightforward as uninstalling other applications. To do so, you must first disable System Integrity Protection which is a security feature built into the macOS operating system. This can be done through the Console or with the help of third-party apps. However, we don’t recommend disabling System Integrity Protection unless you have a good understanding of computer systems and are confident in making these changes.
Reinstalling macOS to Start Fresh
Yes, you can wipe your Mac and start over. To do so, open the System Settings by selecting it from the Apple menu. in the corner of your screen. Click General in the sidebar and then click Transfer or Reset on the right. Finally, click Erase All Content and Settings to begin wiping your Mac and starting over. Please note that this will erase all content, settings, and apps from your computer, so please be sure to back up any important files before proceeding.
Troubleshooting Safari Issues on Mac
It’s possible that Safari isn’t working on your Mac because your version of Safari or macOS is out of date. To check for available updates, go to Apple menu > System Preferences, click General in the sidebar, then click Software Update on the right. If there are updates available, install them and then restart your Mac.
Another possibility is that a system file related to Safari has become corrupted and needs to be replaced. You can try repairing disk permissions using Disk Utility (located in Applications/Utilities). If this doesn’t help, you may need to reinstall Safari from the App Store or from an installation disc.
If none of these steps resolve the issue, you may have a more serious hardware or software problem on your Mac that needs to be addressed. Consider taking it to an Apple Store or authorized service provider for additional assistance.
In conclusion, Safari is a powerful and versatile web browser that is an essential part of the Apple OS. It is highly secure, with built-in privacy features and a range of customization options to make sure your browsing experience is as safe and efficient as possible. It also offers a rich suite of tools for developers, including support for the latest web technologies and tools for creating modern web applications. While it can’t be deleted or individually installed, Safari is an important part of the Apple OS experience, so it’s best to keep it updated to get the most out of your experience.
Our Tech Essentials:

HP Newest 14" Ultral Light Laptop for Students and Business, Intel Quad-Core N4120, 8GB RAM, 192GB Storage(64GB eMMC+128GB Micro SD), 1 Year Office 365, Webcam, HDMI, WiFi, USB-A&C, Win 11 S

Amazon Kindle Paperwhite Case (11th Generation), Thin and Light, Foldable Protective Cover - Leather

6 Pack Floral Engraved Bands Compatible with Apple Watch Band 44mm 40mm 38mm 41mm 45mm 49mm 42mm Women, Soft Silicone Cute Flower Pattern Sport Strap for iWatch Bands Series Ultra Ultra 2 SE 9 8 7 6 5 4 3 2 1

Epson Perfection V19 II Color Photo and Document Flatbed Scanner with 4800 dpi Optical Resolution, USB Power and High-Rise, Removable Lid

VISIONHMD Bigeyes H1 USB-C Video Glasses,Personal Movies Cinema,Video Goggles with Type-C Input,Easy Connect to iPhone 15 / Pad/Android mobile phone directly, Plug and Play, no need APP.Not VR HMD
Related posts:.

Sanjeev Singh
- Apple Watch
- Playstation
- Digital Marketing
- WooCommerce
- Tips & Tricks
- Troubleshooting
New Google Chrome Version 128.0.6613.85: With Powerful Google Lens Integrated
Understanding the differences between ntfs and ext4 in ubuntu file system, comparing the best file editors for ubuntu: features, pros, and cons, securing your ubuntu system with proper file permissions, how to change or lock the screen orientation on iphone 15, 7 essential tips to extend your iphone 15 battery life, “from overheating to overachieving: iphone 15 journey unfolded”, qick steps to transfer music to iphone 15, how to implement the cross-origin opener policy (coop) header through cloudflare, how to upgrade phpmyadmin on a linux web hosting server, how to add a custom currency and its symbol in woocommerce, eliminating $0.01 or $0.02 minor tax calculation errors in woocommerce, the nintendo wii: a classic console still worth playing in 2024, fix logical date selection in contact forms 7: a guide for…, 5 must-try google play features for poetry lovers, how to disable ads in windows 11- updated 2024, 10 chinese drama to watch this summer 2024, netflix’s badland hunters movie trailer is a thrilling mix of earthquakes,…, 10 popular korean series to watch this season, 10 korean movies to watch this july 2023, tenacious d delays newcastle show due to controversial trump joke backlash., trump chooses ohio’s jd vance as vice-presidential running mate, zara mcdermott discusses ‘distressing’ experiences on strictly come dancing show., jack black halts tenacious d tour after kyle gass’s controversial remark., jack black halts tour due to kyle gass’s controversial trump remark., xbox app compact mode upgrade: jump back in & enhanced friends…, how to unlock all king shark costumes and cosmetics in suicide…, the apex legends digital issue is now live, 5 games to play on android tablets and foldable phones, how to get xbox game pass ultimate for free, how to reinstall safari on my mac – a definitive guide.
Safari: Safari is the default web browser that comes with your Mac OS X designed by Apple based on the Apple’s WebKit engine. It was first released in 2003 with Mac OS X 10.3 – Panther, then a mobile version was included in iOS devices since the introduction of the iPhone in 2007. A Windows version of Safari was also released in the year 2007 , which Apple discontinued in 2012. The first version of Safari for Mac was named Safari 1 and now the current version as of writing is Safari 12.0.2 , released for macOS 10.14 Mojave . It got some new features like Favicon or website icons in tabs and more. For more information, read What’s new in macOS Mojave . Apple claims that the new version of Safari is more secure and reliable but as we know that nothing is perfect in this world. Just like other browsers, Safari also gets infected with Malware, Spyware or Adware. Sometimes new updates from Apple are rolled out which makes Safari unstable or even remove it from the system. In order to deal with such situations you should know how to reinstall safari .
Here in this article, I would be explaining to you about some major issues with Safari along with their solutions and if none of the solutions works, the last resort to you is reinstall Safari which I have covered in the end.

Issue / Error With Safari
Safari was recently in hot search trends due to Apple’s latest software updates to the Safari web browser issued on 3rd December, 2015 which reportedly failed and removed Safari from users’ systems. There was another update to Safari which made it incompatible with the OS and changed the safari logo to a crossed out circle. If you would try to open Safari it would show an error message that reads “The version of safari installed on this Mac is not compatible with the current version of OS” . You may also get one of the following error messages.

- “This version of Safari is no longer supported. Please upgrade to a supported browser.”
- Safari crashes as soon as you open it and shows error message Safari quits unexpectedly.
- Can’t connect to the server
- Safari loads partial webpage”
- Safari may become corrupt and may not run at all or runs very slow like a snail, it takes ages to open a web-page, while other browsers run perfectly fine. So if it is not working or having problems to browse websites, you may need to reinstall it.
As per the Apple there is no way to reinstall Safari except reinstalling OS X. Reinstalling OS X does not delete any user’s files, however, its a lengthy process and require so much time and care. But before we reinstall the OS X, I would suggest you to try the following troubleshooting which may fix the issue with Safari. We could also install Safari as a standalone app using a third party software called Pacifist , which is explained in the end.
Troubleshooting the issues with Safari
#1. check to see if safari is running in 32 bit mode..
Apple introduced 64-bit version of Safari with the release of Snow Leopard (OS X 10.6), but it was still possible to run Safari in 32-bit mode for backward compatibility. At the time of release so many JavaScript application and Safari extensions were not designed for 64 bit version of Safari so users had to run Safari in 32-bit mode. After Mountain Lion( OS X 10.8) , Apple removed option to change the bit mode of Safari as all of the extensions and JavaScript Applications were already upgraded to run in 64 bit mode.
Check if Safari is running in 32 bit mode
Right or control click the Safari icon in your Applications folder then click Get Info. If the box next to: Open in 32 bit mode is Checked, Uncheck it, quit then relaunch Safari.
2. Reinstall Flash Player Plug-ins.
Safari has a long term issue with Flash Player which was also published in an article written by Steve Jobs- Thoughts on Flash . Check safari by Uninstalling flash Player . After the safari is uninstalled delete its left over files from the following locations if available.
3. Restart your computer.
4. reinstall and enable flash player for safari..
Install Flash Player directly from Adobe . If you are having trouble with web installer, download the standalone Flash Player version for Safari and Firefox – NPAPI directly from https://fpdownload.macromedia.com/pub/flashplayer/latest/help/install_flash_player_osx.dmg
5. Remove incompatible Flash Extension
Remove ClickToFlash extension if it is installed, it can prevent Flash based videos from streaming. It can be found as a plugin in /Library/Internet-Plug-Ins .
6. Make sure the JavaScript and plugins are allowed in Security settings of Safari Preferences window.

Also check the Safari Develop Menu to make sure “ Disable JavaScript ” is not checked. Learn how to enable Develop Menu in Safari .

7. Check Safari after Turning Off the IPv6 Support.
On February 4, 2008 , IANA adds AAAA records for the IPv6 addresses of six root name servers. With this transition, it became possible to resolve domain names using only IPv6.
On August 28, 2009 , OS X 10.6 Snow Leopard was released to manufacturing worldwide and reported to have issues with safari if using IPv6.
On June 6, 2012, the Internet Society together with many other big companies and organizations held World IPv6 Launch Day, a global permanent deployment of IPv6.
On July 25, 2012, Mountain Lion- OS X 10.8 was released and had a known issue with ipv6 and dns implementation and people started using Chrome and firefox until Apple admitted there was a bug and fixed it. The Same bug chased OS X 10.10 Yosemite too.
To fix this issue, first make sure your Mac is up to date by installing all Software updates. If its already updated and you still have the same issue then turn off the IPv6 as mentioned below.
For OS 10.6.8 and earlier
a.) Go to System Preferences > Network > Advanced > TCP/IP > Configure IPv6: Off. Click “OK” then Apply and then test after restarting the Mac. You could also use the following command in terminal to do the same.
Turning off IPv6 support for ethernet: networksetup -setv6off Ethernet
Disabling IPv6 for wireless: networksetup -setv6off Wi-Fi

Note: Disabling IPv6 may also stop you from using some of the core OS X system services, like the discovery service Bonjour, AirDrop, because they use IPv6. Accordingly, disabling IPv6 may render AirDrop sharing unusable, certain print services configured on Bonjour will become unavailable, and some other convenient Mac features may turn inoperable as well.
For OS X 10.7 and above
b.) Go to System Preferences > Network > Advanced > TCP/IP > Configure IPv6: Link-local only. Click “OK” then “Apply” and then close preferences. Check Safari after Logout and log back in, it should be working fine.

Re-Enabling IPv6 for Wi-Fi & Ethernet in OS X
Of course, reversing the above change is also possible, and you can re-enable IPV6 support with the following command strings entered into the terminal:
For Wireless Interface networksetup -setv6automatic Wi-Fi
For Ethernet Interface networksetup -setv6automatic Ethernet
8. Flush the DNS Cache
OS X keeps a local cache of resolved DNS queries for a time defined by the DNS server. Sometimes it might be necessary to reset the cache immediately and re-query a DNS server if an entry on your DNS server has recently changed. To Flush (Reset) DNS Cache, use the terminal commands below for the version of OS X you’re using.
OS X Yosemite and later
Use the following Terminal command to reset the DNS cache in OS X v10.10.4 or later: sudo killall -HUP mDNSResponder Use the following Terminal command to reset the DNS cache in OS X v10.10 through v10.10.3: sudo discoveryutil mdnsflushcache
OS X Mavericks, Mountain Lion, and Lion
Use the following Terminal command to reset the DNS cache in OS X v10.9.5 and earlier: sudo killall -HUP mDNSResponder
Mac OS X Snow Leopard
Use the following Terminal command to reset the DNS cache in OS X v10.6 through v10.6.8: sudo dscacheutil -flushcache
9. Try Open DNS

For, “can’t connect to server” issues, Apple suggests using Open DNS or Google DNS. If you are using Safari 5.0.1 or later and you are facing issues like Slow or partial webpage loading, or webpage cannot be found. Try open DNS server mentioned below. Open System Preferences > Network > Advanced > DNS Click + and type: 208.67.222.222 Click + again and type. 208.67.220.220 Click ‘ OK’ . Quit and relaunch Safari to test.
If that didn’t help, go back to the DNS tab. Select the 208 addresses then click ➖ under the DNS Servers panel to delete. Then click + to add Googles’ DNS Server. 8.8.8.8 8.8.4.4 Then click OK and try Safari.
10. Scan the Computer with Malwarebyte Anti-malware
Your Safari might be infected with Malware, Spyware or adware which is causing Safari to crash. I have created a list of Common Malware and Adware , check to see if your Computer is infected with any of these.Scan your computer with Malwarebyte -Anti-malware for Mac . Remove all the found items as they are harmful to your computer.

Look into the following folders and browse their contents for any third-party add-on files. Move the third party add-on files to trash.
11. Reset Safari
If all the above methods have been tried and Safari still does not work. Reset the Safari by deleting the following files.
Delete Keychain entry named “ Safari Extensions list ” from Keychain Access located in /Application/Utilities folder.

Clear the NVRAM variables by typing the following command at terminal. sudo nvram -c
Why will you have to Reinstall Safari ?
If all the above mentioned steps have been exhausted and safari still doesn’t seem to be working then it might be a possibility that “Safari.app” application file has become corrupted. And the final resort to you is either clean reinstall Safari or Reinstall the OS X.
How would you Uninstall Safari?
Uninstalling Safari from Mac is not as easy as uninstalling any third party apps. To uninstall safari you must either reinstall the operating system or use a third party app to uninstall the application for you and again to reinstall Safari, you either reinstall the whole Operating system or use a third party software to extract it from OS X installation file.If you normally try to move safari to trash you will see following error message. “Safari can’t be modified or deleted because it’s required by OS X.”
Follow the below mentioned steps to uninstall Safari.
1. uninstall safari using terminal command.
Launch the Terminal, located in / Applications/Utilities/ folder. Type the following command and hit enter to change the current working directory(CWD) to the Applications directory. cd /Applications/
Now that you are in the Applications folder, you can start deleting apps. You will not get a confirmation of the removal, the app will simply be uninstalled completely. The following commands will only work when used in the /Applications/ directory.
sudo rm -rf Safari.app/
2. Uninstall Safari manually.
Go to the /Applications folder and Right-Click or Control-click on Safari icon and select Show Package Contents.

This will open a new folder called contents and it will have other bundled software and info.plist files inside it. Simply select all the package contents and delete them to uninstall safari.

After deleting the package contents you also need to delete other supporting configuration and preferences file for Safari exactly as mentioned above in Step 11-Reset Safari . Restart the computer now and Safari is uninstalled completely.
3. Uninstall Safari using a Third party App.
CleanMyMac 3 is a free application that can be used to uninstall Safari on macOS. In OS X El Captian, you cannot remove Safari with CleanMyMac 3 and will run into this message: “Safari.app” couldn’t be removed because you don’t have permission to access it.”
Reinstall Safari on my Mac
How would you reinstall safari.
There are multiple ways of reinstalling Safari. If your OS X version has got a new Combo update released and you haven’t installed it, Look into the details of Combo update and see if it contains Safari. If it has Safari then installing the Combo will bring Safari back as a fresh new updated version. If your OS X is already updated then follow one of the steps below.
#1. Safari can also be downloaded from Softpedia and reinstalled – http://mac.softpedia.com/get/Internet-Utilities/Safari.shtml
Download it from the Softpedia and reinstall it as usual.
#2. Use Pacifist to extract Safari out of the original OS X installation file.
Pacifist is a shareware application that can extract the contents from Mac OS X .pkg package files, .dmg disk images , and .zip, .tar, .tar.gz, .tar.bz2, and .xar archives. This is specially used when a native OS X application becomes damaged and needs to be reinstalled without the hassle of reinstalling all of Mac OS X.
Pacifist is compatible with Mac OS X 10.8 or higher, including Mac OS X 10.11 “El Capitan”. Pacifist requires a 64-bit Intel™ processor.
Download the latest version of Pacifist in zip or disk image format. For users using versions of Mac OS X older than 10.8, download older versions of Pacifist here . Now to Reinstall Safari you need the source image to extract safari from.
You can extract Safari from the following sources.
- Original OS X installer dmg file.
- Hidden Recovery Partition on any Mac.
A.) Extract Safari from original OS X installer DMG file.
90% of the times your Mac keeps a copy of the complete OS X installer that you downloaded to upgrade your system. This download is by default saved in /Application folder. Go to the /Application folder and see if you have OS X El Capitan or the current running version of OS X on your Mac, usually named as “ Install macOS Sierra.app “. if you do not see it in Application folder, download it from the App store.
1. Open Pacifist and select the first option “Open Package”. 2. Choose the original OS X installer.dmg or macOS Installer.app file from /Application folder. 3. Then browse through the contents and expand the Application folder inside the extracted .dmg or .app file to go to the Safari or you can simply type safari in the search box on the top right corner of the windows.

4. Right-Click or Control-Click the Safari.app and select install. It will install Safari to its default location /Application/Safari.app .
B.) Extract Safari from Hidden Recovery Partition on your Mac.
Recovery Partition is a small (650MB) hidden partition on your Mac’s internal hard drive which is reserved for common utilities such as Time Machine, Terminal, Disk Utility and other built in set of utilities as part of the Recovery System. It even has Safari. We can extract Safari from this partition using Pacifist , if the partition is accessible. There might be a possibility that your Mac does not have a recovery partition or the recovery partition is corrupt. You can check if your Mac has a recovery partition .
To access the Recovery Partition , you will have to first turn on the debug menu in “ Disk Utility ” as mentioned below:
defaults write com.apple.DiskUtility DUDebugMenuEnabled 1
3. This command enables the hidden Debug menu to appear in Disk Utility. Open Disk Utility and look for “ Debug ” alongside ‘ Help ’. 4. Click on the new Debug menu and select “ Show every partition “. 5. Now you should see the ‘Recovery HD’ in the left-hand pane of the Disk Utility window although it will be grayed out.

6. Select ‘ Recovery HD ’ and click the Mount icon, at the top of the Disk Utility Window, to make it active. After it is mounted, It will show up on desktop as a drive icon. 7. Now use Pacifist to extract Safari.app from Recovery Partition as mentioned below.
- Open Pacifist and click Open Package then select recovery HD.

- Once the BaseSystem.dmg is loaded you would see all of its contents. Select safari under Applications folder and then click on “ Extract To ” on the top and install it in /Application Folder.

#3. Reinstall OS X to Reinstall Safari.
If all the above steps have been tried out and it still does not fix the Safari issue. The last resort to you is Reinstall OS X to reinstall Safari, it will install a fresh copy of both your operating system and Safari and will not loose any of your files or document they will remain as is. Follow the step mentioned below for Reinstalling OS X .
Restart your computer and hold down “Cmd+R ” together until you see gray Apple Logo. Make sure you’re connected to the Internet, select “Reinstall OS X” and click “Continue.” Follow the onscreen instructions to install OS X.
Hope you found it helpful and it helped you reinstall Safari on your Mac. In case you still have the same issue and it does not fix the Safari problem, then write to us in the comment section below.
You may also like these:
- Safari Wants to Use Your Confidential Information Stored in ‘website’ in Your Keychain
- Install firefox without any browser using FTP command in terminal on a Mac
- How to find your Mac Model?
- installation
- Reinstall Safari Mac
- Reinstallation

Latest From Hawkdive
You may like these related articles, mastering ubuntu virtualization with virtualbox, apple unveils record-breaking financial results and teases exciting product announcements, apple’s secret project acdc: developing ai chips for data centers, monitoring server load in linux: a comprehensive guide, a beginner’s guide to understanding the ubuntu file system, mastering ubuntu commands: a detailed guide lession – 2.
Comment was meant for this article.
I am so relieved to have found this blog entry. I was about to go on a mission to beat up some Apple "Geniuses" until i got a positive result here. Thank you Nasir.
LEAVE A REPLY Cancel reply
Save my name, email, and website in this browser for the next time I comment.
This site uses Akismet to reduce spam. Learn how your comment data is processed .
- Privacy Policy
How To Reinstall Safari on Mac

Are you facing an issue with the default Safari browser on your Mac? If so, you can troubleshoot the app simply by reinstalling it.
To reinstall Safari on your Mac, navigate to the “Applications” folder > “Utilities” > “Terminal” and type cd /Applications/ I , enter your password, and type sudo rm -rf Safari.app/ to uninstall the app. Now, open a browser, head to Apple Developers Program, sign in with your Apple ID, download the app, and click the installation file.
Below, we have written a step-by-step guide on reinstalling Safari on Mac to help you with the entire process.
Step #2: Renstalling the Safari App
Step #3: selecting the drive to install os, step #2: reinstalling safari, frequently asked questions, reinstalling safari on mac.
If you are wondering how to reinstall Safari on Mac, our following 3 step-by-step methods will help you do this task effortlessly.
Method #1: Using the Terminal
To reinstall the Safari application on your Mac using the Terminal, do the following steps.
Step #1: Uninstalling Safari
In the first step, open the “Applications” folder from the Finder, click “Utilities”, open Terminal, and type cd /Applications/ .

Provide your device’s password and type sudo rm -rf Safari.app/ . Now, head back to the “Applications” folder , and you will see that the Safari app is uninstalled.
In the final step, launch a browser on your Mac, visit the Apple Developers Program website, use your Apple ID to sign in, and get the Safari installation file.

Locate the installation file in the “Download” folder and click it to install Safari on your Mac.
Method #2: Reinstalling macOS
You can also reinstall the Safari app on your Mac by reinstalling the macOS X in the following way.
Step #1: Backing Up Your Data
In the first step, ensure you have backed up all your data. Next, power off your Mac and back on while holding the Command + R keys on your keyboard and release them when the Apple logo appears on the screen.
Step #2: Accessing the Utilities Menu
In the next step, type in the admin password on the prompt, click “Next”, and the “macOS Utilities” folder will appear on the screen.
Now, select the “Reinstall macOS” option from the menu, click “Continue”, and follow the on-screen prompt.

In the final step, choose the partition you want to install the macOS and wait for the installation process to complete. Next, log into the system after the final boot, and the Safari browser will now be reinstalled along with the new macOS.

Method #3: Using Third-Party Tools
CleanMyMac 2 is a third-party tool that can help you reinstall the Safari application on your Mac in the following way.
Step #1: Installing the Software
In the first step, open a browser on your Mac, head to the MacPaw website , download the CleanMyMac 2 , and install it. Launch the software and select “Uninstaller” from the left menu panel.
In the next step, launch the Finder and drag the Safari app into the CleanMyMac 2. Click “Select” in the pop-up window and choose the “Uninstall” option.
Finally, download Safari from the Apple Developer Program website, and browse for “Safari”. Download the installation file, access it in the “Download” folder, and install the app on your Mac.

Summary
In this short guide, we’ve discussed how to reinstall Safari on your Mac by uninstalling it from the Terminal, getting it back from App Store, reinstalling macOS, and using a third-party tool.
Hopefully, your issue is resolved, and you can now use the default browser again with full functionalities and features.
To clean the Safari app cache on your Mac, launch the application from Dock and click the “Safari” option in the file menu. Select “Preferences”, go to the “ Advanced” tab, and checkmark “Show Develop Menu in Menu Bar”.
Close the “ Preferences” menu, click the “Developer” menu and click “Empty Cache” from the Developer menu. Click “Empty” to confirm the action and restart Safari afterward.
To clear Safari browser history on Mac, launch the app, tap the “Safari” option in the toolbar, and click “Clear History”. Now, select “All History” and click “Clear History”.
The latest Safari version for macOS 10.15 Catalina is 15.6.1 , for macOS 10.14 Mojave is 14.1.2, and for macOS 10.13 High Sierra is 13.1.2 .
Related Posts

How To Install Qt on Ubuntu 22.04

How To Hide Recently Used Apps on Android

How To Print Out Cash App Transactions

How To Open a Second Cash App Account in 5 Minutes

How To Set Up Voicemail on VTech Phone

Fixing Bluetooth Connection Issues in Ubuntu 22.04
About the author, eric buchanan, leave a comment cancel reply.
Your email address will not be published. Required fields are marked *
Save my name, email, and website in this browser for the next time I comment.
Eric is a writer and editor for DeviceTests. His favorite subjects are the how-tos of everyday life: from programming apps to building a gaming computer.

How To Access Grub Menu on Ubuntu 20.04

How To Blur Backgrounds in the Photoshop Express App
 Failure Writing Output To Destination&Quot; Error On Ubuntu 20.04 15")
Fixing "curl: (23) Failure writing output to destination" Error on Ubuntu 20.04
How to download and install macOS
Download and install current or previous versions of the Mac operating system on compatible Mac computers.
To maintain your computer's security, stability, and compatibility, Apple recommends using the latest macOS that is compatible with your Mac. macOS updates and upgrades also include the latest features and built-in apps such as Safari.
Use Software Update
Use macos recovery, use the app store.
Use a web browser
Use a bootable installer
If you need help.
Software Update is the fastest and easiest way to get macOS updates and upgrades, and it can use less storage space to download and install them.
Software Update shows only software that is compatible with your Mac. If Software Update says that your Mac is up to date, then no new software is currently available for your Mac model.
How to update macOS using Software Update
If you want to reinstall macOS, or your Mac doesn't start up all the way because it doesn't have a working operating system, you can use the built-in Recovery system to reinstall macOS.
How to reinstall macOS from macOS Recovery
To download macOS from the App Store, you must download from a Mac that is compatible with that macOS. If your Mac isn't compatible, the App Store dims the Get button, says that the macOS is not compatible with this device, or says that the requested version of macOS is not available.
Use these links to find macOS in the App Store. If these links don't work as expected, try again using Safari, which is in your Applications folder.
Monterey 12
Catalina 10.15
Mojave 10.14
High Sierra 10.13
Click the Get button in the App Store to begin downloading. Software Update might open and ask you to download from there.
After downloading to your Applications folder, the installer opens automatically. Follow the onscreen installation instructions. Or quit without installing to leave the installer in your Applications folder for later use.
Use a web browser for older versions
These older macOS versions are available as disk images that you can download using your web browser. To get the installer from the disk image, you must use a Mac that is compatible with that macOS.
Use these links to download a macOS disk image (.dmg) file. If these links don't work as expected, try again using Safari, which is in your Applications folder.
Sierra 10.12
El Capitan 10.11
Yosemite 10.10
Mountain Lion 10.8
Double-click the .dmg file to open it and see the package (.pkg) file within.
Double-click the .pkg file, then follow the onscreen instructions to install the macOS installer into your Applications folder.
Open your Applications folder and double-click the macOS installer, named Install [ Version Name ]. Follow the onscreen installation instructions.
A bootable installer can be useful if you want to install macOS on multiple computers without downloading the installer each time, or when you can't install using macOS Recovery or the other methods.
To download an installer suitable for creating a bootable installer, use the App Store or use a web browser to download from a compatible Mac. The Mac must also be using macOS High Sierra or later, the latest version of macOS Sierra, or the latest version of OS X El Capitan.
How to create a bootable installer for macOS
If an error occurred while updating or installing macOS
If you need more storage space to download or install
If your Mac doesn't start up all the way

Related topics
Explore Apple Support Community
Find what’s been asked and answered by Apple customers.
Contact Apple Support
Need more help? Save time by starting your support request online and we'll connect you to an expert.
How To Fully Reset Safari On Mac
This article explains how you can fully reset Safari on your Mac. You might need to do this if Safari on your Mac runs very slowly, crashes often, acts bizarre, or functions incorrectly.
See also: Your System Is Infected With (3) Viruses
Safari is included with the macOS operating system.
How to reset Safari
1-Remove site history
There are two ways to do this. If you want to remove particular web sites (e.g., a web site is giving you problems whenever you visit) then try the second option. Please also note that if you are using other Apple devices (iOS devices or other Macs), if you turn on Safari in iCloud preferences with the same Apple ID, your site browsing history will be removed from all of them.
See also: How To Change Default Search Engine in Safari
When you do this, you will be removing history of web sites you visited, recent searchers, list of download items, frequently visited sites list, web sites that asked to use your located and to send you notifications.
- Open Safari
- Click Safari located in the menu bar in the top left hand corner of your screen
- Click Clear History

- Click the Clear History button
- Click Preferences
- Click the Privacy tab
- Click the manage Website Data button
- Here you can remove everything, or you can remove specific web sites. You can also search to find a specific web site.
2-Clear web caches
Here is how you can clear Safari’s caches. Caches are images and videos, or the layouts for entire web pages you browsed.
- In the Safari app, click Safari
- Click the Advanced tab

- Close the Preferences window
- Now you will see a new menu bar item called ‘Develop’
- Click Develop

Disable Safari extensions
Extensions are small programs that extends your Safari’s functionalities. They add new features to let you enhance and customize your browsing experience. But some may have bugs and thus cause problems. And you may want to turn them off. Here is how:
- Choose Safari from the Safari menu bar
- Click the Extensions tab
- For each extension, you can use the checkbox to enable or disable that particular extension.
- You can also uninstall extensions.
Disable Safari plugins
Please note that Safari is no longer supporting most plugins. You can however view and manage the plugins you have installed. Here is how:
- Click Safari
- Click the Websites tab

- When you are done, close the window
See also: How To See The Full Web Site Address In Safari URL Bar
Dr. Serhat Kurt worked as a Senior Technology Director specializing in Apple solutions for small and medium-sized educational institutions. He holds a doctoral degree (or doctorate) from the University of Illinois at Urbana / Champaign and a master’s degree from Purdue University. He is a former faculty member. Here is his LinkedIn profile and Google Scholar profile . Email Serhat Kurt .
Similar Posts
Iphone video stuttering problems fix.
Are you experiencing too much video stuttering, flickering, dropping frames and/or lagging issues on your iPhone? If you are encountering similar video stuttering with in fullscreen mode (whole screen) or not, then do not…

How to Get a Still Photo from a Video on iPhone
When you want to record an event or some cute thing your children or pets are doing, you have a choice: photos or video. If you have chosen to take a video, you…
How To Install Apps On Older Devices Running Older Versions Of iOS and iPadOS
So you own an older iOS or iPadOS device. You are very happy with your device because it still works like new, and you can do pretty much anything you want with it….
How to Use iPhone Camera Modes when Taking Photos
If you’re like many people, you use your iPhone camera often – but you haven’t explored all of the various modes and effects available. The different iPhone camera modes and lighting effects can…
“APL*ITUNES/BILL”, What Is This?
Do you see a charge that starts with “APL *” (like APL*ITUNES/BILL) in your billing or bank statement? This is an Apple purchase such as iOS or macOS apps, songs, movies, TV shows,…
How to Stop Apple News Emails
If you are the owner of an Apple device, chances are you also have one (or more) Apple IDs. With each Apple ID, Apple kindly sets you up to receive the Apple News…
I Have been having this for about a week now. I Have tried getting rid of the Cookies and what not, restarted Safari, everything still doesn’t work. Did Apple do something to Safari? Like I Can use Chrome and everything is fine, but I go to Youtube on Safari and login and I get a blank screen. I am not logged in I Can see the page it’s only when I login is when I can’t see anything. Again not the case with Chrome. Does anyone one know what is going on?
I have the same problem
Safari 14 I cannot attach photos into facebook, its takes forever to open any websites, i have cleared the history and still takes forever, its like something is running in the background making my computer run slow. We don’t even use this computer very much as we do most surfing on our iPad, we have att wifi which shows 4 bars on the wifi icon. Can the problem be to many files on the computer or in the iCloud?
No facebook or youtube since updating to Big Sur 11.0 Safari is not working properly.
Safari not working at all…i couldn’t even open http://www.google.com
Hi, I have done all steps recommended, YouTube still does not play on MacBook Air. YouTube opens alright, but when I try playing a video, it won’t play, just that circle on the screen that keeps rotating. Can you please help me solve this problem. I am not computer savvy. Thank you, Liviu
Leave a Reply Cancel reply
Your email address will not be published. Required fields are marked *
Categories:
- Apple Watch
- Accessories
- Digital Magazine – Subscribe
- Digital Magazine – Info
- Smart Answers
- Back To School
- Apple Watch 2024
- New AirPods
- M4 Mac mini
- 11th-gen iPad
- Best Mac antivirus
- Best Mac VPN
When you purchase through links in our articles, we may earn a small commission. This doesn't affect our editorial independence .
How to reinstall macOS

There are a few reasons why you might want to reinstall macOS (or even Mac OS X). Perhaps your Mac is working erratically and you think that a clean install of the operating system might fix the issue.
Alternatively, you might be planning on selling your Mac, or passing it on to a member of the family (in which case, you need to wipe it first and return your Mac to factory settings ).
It is even possible to reinstall the version of the macOS that your Mac shipped with – which might enable you to revert to an older version of the operating system if the latest version is upsetting you.
Whatever your reason to reinstall macOS, we will show you one of the simplest ways to do so below.
Our method involves using the Recovery partition via which you can reinstall the latest version of the macOS you installed on your Mac. Because macOS is normally installed via Software Update (or previously the Mac App Store) there are no physical installation disks, therefore Apple has made it possible to install the operating system over the internet using the Recovery HD.
An alternative option would be to create a bootable macOS install on an external drive . If your Mac doesn’t boot in Recovery mode, read this: Mac can’t access Recovery mode .
You might also find this useful: How to do a clean install of macOS using a bootable drive .
How to reinstall macOS via Recovery
- Tools required: A back up (if you will be wiping the Mac), an Internet connection, a network with WEP or WPA security
Back up your Mac

You don’t have to wipe you Mac, but if you are trying to fix a problem, or you are intending to pass on, or sell, the Mac, then you will need to wipe your Mac as part of this process. If that’s the case you should back up your important documents first.
How you do this will depend on whether you want to recover your Mac into the same version of the Mac operating system, or if you were hoping to do a clean install and start again from scratch. For example, if you want to revert to an older version of macOS you don’t want to back up using Time Machine. For more advice read: How to back up a Mac and Best Mac back up software .
Note, if you tend to use iCloud Drive to sync all your Documents and Desktop in the cloud you may find you don’t need a backup, but make sure that everything is in iCloud before you delete!
Erase your drive (M1 and M2-series Macs)

If you are planning to sell or pass on your Mac, or you want to do a clean install of macOS to solve issues with your Mac, you will want to erase your hard drive before reinstalling the operating system. (If you don’t want to erase your data skip this step).
If you are running macOS Monterey or a later version of macOS on a Mac with an M-series chip, or an Intel-powered Mac with a T2 chip (some Macs since 2018), there is a very simple way to erase your Mac that doesn’t require you to use Recovery mode and Disk Utilities. If you have an Intel Mac you will need to work through the steps below to erase your disk before you can begin.
We detail how to erase your Mac using this method in a separate article, but here is a summary:
In Ventura or later:
- Open System Settings.
- Click on General.
- Choose Transfer or Reset.
- Select Erase All Content and Settings.
- Enter your password
In Monterey:
- Open System Preferences.
- Click on System Preferences in the menu bar at the top of your screen.
- Click on Erase All Content and Settings.
- Enter your password.
The rest of the process is the same:
- You’ll be reminded to do a backup with Time Machine before you begin deletion–but you can skip that step.
- A window will show you what will be deleted, including Apple ID, Touch ID, accessories, and Find My settings.
- Finally you will need to log out of your Mac and all related services using your Apple ID.
- Before your Mac is erased you receive a final warning, so if you have second thoughts at least you can stop at this point!
- Having clicked the second Erase All Content & Settings your Mac will restart. Eventually you will see a black screen while it restarts.
- Once your Mac restarts you can go through the steps to set it up as new, or you can leave it at this stage for the next owner to set up. Just turn the Mac off first.
Unfortunately if your Mac doesn’t have Monterey installed or doesn’t have a T2 or M-series chip then you need to use Disk Utility to delete your Mac. Follow the next two steps to do that…
If you have already erased your Mac the next step will show you how to enter Recovery mode.
Enter Recovery mode

The process for entering Recovery mode depends on the Mac you are using.
On a Mac with an Intel processor you need to press and hold the Command and R buttons during start up until you hear the startup chime and see either a spinning globe or Apple logo.
On a Mac that use Apple’s own processors, such as the M1 or M2 chip, you enter Recovery mode by pressing and holding the power button while your Mac starts up and continue to press and hold the button until you see a startup options window appear with an Options icon. Then select Options and click Continue.
A macOS Utilities window will open, like the one above, on which you will see the options to Restore From Time Machine Backup, Reinstall macOS [version], Safari (or Get Help Online in older versions) and Disk Utility. Your next step depends on whether you need to wipe the Mac before reinstalling the operating system. If you want to wipe your disk click Disk Utility (otherwise you can skip the next step).
Erase your hard drive (Intel Macs without T2 chip)

If you have a Mac with an Intel processor that doesn’t also have a T2 chip and you want to delete the data on your Mac’s hard drive you need to use Disk Utility accessed via Recovery mode (you have to access the drive via Recovery because it’s not possible to delete the drive when you are accessing it).
- Select Disk Utility from the options in Recovery mode.
- Now select the volume you wish to Erase. You may need to click on View > Show All Drives before you can see the volume. Note that the process here is slightly different if you are running macOS Catalina or Big Sur. If you aren’t running Catalina then you only need to delete the Macintosh HD volume. If you are running Catalina or later there will be two volumes probably called Macintosh HD and Macintosh HD-Data (or possibly Home and Home – Data). You’ll need to delete the Data volume first and then Macintosh HD. We cover how to do this here: How to wipe and reformat your Mac . Remember this is going to delete all your data so make sure you have your important data backed up or stored in the cloud or on an external drive.
- The next step also depends on the version of macOS you are running. In Catalina, Mojave, Big Sur, Monterey, and potentially High Sierra (depending on your Mac) this will be APFS. But on older Macs running older macOS versions the format needs to be set to Mac OS Extended (Journaled). You will also need to have GUID Partition Table selected as the Scheme. (You won’t see the Scheme option if you only have the volume selected).
- Click Erase and wait. (There are options under Security Options that allow you to erase the disk securely).
- Now choose Disk Utility > Quit Disk Utility. Or just Command + Q.
Reinstall macOS

Follow these steps to reinstall the latest version of macOS installed on your Mac:
- In Recovery mode choose Reinstall macOS from the list of options.
- Click on Continue.
- Enter your Apple ID if required and wait while macOS is reinstalled. Expect this to take a while.
- If you are intending to sell or pass on the Mac so that the next owner can enter their own details, when the setup wizard starts up quit. Otherwise follow the instructions to continue setting up your Mac.
How to reinstall an older version of macOS
If you want to revert to an older version of macOS, perhaps because you aren’t keen on the newest version you have installed there are a few ways to reinstall an older version. We cover them separately here: How to install older versions of macOS or OS X .
How to connect to the internet in macOS Recovery mode

To reinstall macOS using Recovery mode you have to connect to the internet. Follow these steps to connect to the internet in Recovery mode if your Mac hasn’t automatically connected:
- Click the Wi-Fi menu in the upper-right corner of the screen.
- Select a Wi-Fi network.
- Enter the Wi-Fi password (if required).
Recovery mode should now be connected to the internet and be able to download the macOS installation software.
If you are using Internet recovery you’ll need to be using a network with WEP or WPA security. This shouldn’t be an issue as most home Wi-Fi networks do, but if you’re on a proxy network or PPPoE then you will have problems.
Author: Karen Haslam , Managing Editor, Macworld

Karen has worked on both sides of the Apple divide, clocking up a number of years at Apple's PR agency prior to joining Macworld more than two decades ago. Karen's career highlights include interviewing Apple's Steve Wozniak and discussing Steve Jobs’ legacy on the BBC. Having edited the U.K. print and online editions of Macworld for many years, more recently her focus has been on SEO and evergreen content as well as product recommendations and buying advice.
Recent stories by Karen Haslam:
- Apple Events 2024-2025: Apple’s event plans
- macOS 15 Sequoia superguide: Everything you need to know about the Mac update
- Every new Apple product coming in 2024

We do not use any AI writing tools. All our content is written by humans, not robots. See our editorial process .
How to Uninstall Safari on Mac
Uninstalling Safari can seem necessary if you are encountering browser issues , slowdowns, or crashing . However, unless you have an older Mac, it might be more trouble than it is worth. So, is it even possible?
Safari is one of the applications that come preinstalled on your Mac. It is also one of the applications that is managed and updated through macOS.
This means that it is subject to protection from what Apple calls the System Integrity Protection (SIP) . SIP is one of the security features implemented on your Mac to protect from unauthorized alterations to the software or unauthorized executions of new codes that could damage your existing software.
SIP is one of the security features that we all know and love. We may not understand how they do it exactly, but this is one of the many reasons why Macs are considered so secure.
But if you’re keen on uninstalling Safari on your Mac, let’s get into it and see what we can do!
Table of Contents
Key Takeaways
What you need to know first, uninstall or turn off extensions, delete all data – clear history, delete all data – clear cache.
Disable SIP
Delete Safari Application and Associated Files
Re-enable sip, reinstalling macos (big sur and previous macos), switching to a different web browser, final thoughts.
- Macs that still have macOS Big Sur and earlier installed can uninstall Safari on Mac. However, this requires disabling System Integrity Protection (SIP) . SIP is designed to keep your Mac safe from malware or other changes to software.
- Macs with more recent software, such as the latest Sonoma , Ventura , or Monterey , are not able to uninstall Safari at all, even with disabling SIP.
- There are still options to help clear the storage space taken up by Safari and to increase the speed, such as disabling extensions and clearing browsing data.
- Oftentimes, switching to another browser, such as Google Chrome or Firefox , is a better idea than trying to uninstall Safari completely.
Some of the older macOS do allow you to uninstall Safari, but even if you have the ability, I would recommend proceeding with caution. However, if Safari has become corrupted, then trying to uninstall it may be the correct course of action for you.
Note : Even if you have Big Sur or previous macOS on your computer, removing any application that is under protection from SIP can be detrimental to your Mac. For the best results, you should try to clean up Safari first, by removing extensions and clearing your browsing data.
For Ventura, Monterey, or Newer macOS
Apple changed Ventura, Monterey, and their newer macOS to no longer allow you to uninstall Safari and other applications that are preinstalled on your Mac even if you disable SIP .
If you have one of these macOS’ or you find yourself (rightfully) hesitant to fully uninstall Safari, these are items that may help you to speed up Safari or still clear some storage that is related to Safari.
Extensions, while they can be fun and helpful, can significantly slow down the speed of your web browser. If you are finding that Safari is running extremely slowly, and that is why you were originally thinking about uninstalling it, then I would suggest trying this method!
Step 1: With Safari Open, click the Safari Menu and Settings… .
Step 2: Click the Extensions tab at the top. Use the checkboxes on the left to enable or disable each extension (mine are all disabled – when they are enabled, you will see a checkmark in the box). Or, if you would like to uninstall the extension completely, click uninstall under the individual extension.
Disabling the extensions will prevent them from running in the background, which will help the speed of your Safari, especially if you have a lot of extensions or have some that may have some that require a lot of processing power or RAM to run properly.
If you were looking to save storage space on your Mac by uninstalling Safari, then this might help. Safari itself does not require a lot of storage on your Mac. The related data, however, is where you begin to start to see that storage build-up.
By deleting all of your data, you are deleting history, Cookies, saved passwords, and other saved information on Safari. These items will be over the next few sections.
With Safari open, click the Safari menu at the top of your screen and select Clear History from the drop-down menu .
Choose Clear All History (or only more recent history if you prefer) and hit Clear History again to confirm.
Under Safari settings (reachable using the same steps as above), in the Advanced Tab, make sure Show features for web developers is checked.
With the above checked, you should see a Develop menu. Click Empty Caches from the drop-down .
For Big Sur and Previous macOS
Just because you have Big Sur or older macOS, doesn’t mean that you should immediately decide to uninstall Safari. The other options above may be more worthwhile if you are only seeing performance problems with Safari.
If there is some sort of corruption with your Safari, then this may be a valid option. Either way, be sure to backup your Mac prior to following these steps . Although losing data is unlikely if all goes correctly, there is a possibility of damaging your OS through these steps. Please proceed with caution.
First, you’ll need to disable SIP. To do so, take the following steps:
Boot in Recovery Mode – Apple Silicon Macs only
- Start with your Mac turned off completely.
- Press and Hold the power button until the startup options appear
- Enter your administrator password as required and follow the onscreen instructions
Boot in Recovery Mode – Intel Macs only
- Turn off or restart your Mac
- When your Mac is turning back on, press and hold the Command-R keys.
- When your Mac starts, you can release the keys and enter the administrator password as required.
- Open the terminal in Recovery Mode
- Enter the Command: csrutil disable
- Press Enter
- Restart your Mac as Normal
In Finder, find the Safari application, and drag and drop it into the trash.
Delete the Safari system files by using Finder to navigate through the folders and find any files that have Safari in the name. Be sure to check the following folders (and others):
/Users/ YourUsername /Library/
/Users/ YourUsername /Library/ApplicationSupport/
/Users/ YourUsername /Library/Caches/
/Users/ YourUsername /Library/Preferences/
/Users/ YourUsername /Library/Saved Application State/
/var/folders/
- Boot in Recovery Mode as described above
- Open Terminal
- Enter the Following Command: csrutil enable
- Restart your Mac
If you find yourself running into problems after uninstalling Safari or deciding that you would like to reinstall it, then you will need to completely reinstall macOS.
We recommend backing up the information on your Mac prior to a reinstall of macOS. While data loss is rare, it can occur, and it is better to be on the safe side than accidentally lose all of your information.
Boot in Recovery Mode as described above.
Choose the Reinstall macOS option. Follow the instructions onscreen.
If Safari is not working properly, you can skip the hassle of uninstalling it and simply switch to an alternative web browser. If you don’t use Safari, you can leave it alone, untouched in your Applications folder. The good news is that there are plenty of options for different browsers.
Google Chrome is an extremely popular browser, and it is the one I use personally. You can download it for free and connect it to your Google account to sync your favorites, contacts, calendar, and other Google apps. The sync feature allows you to use the same bookmarks and saved information across multiple computers.
Conversely, Firefox is another popular browser. You can download it for free, and it offers much the same functionality as Safari and Google Chrome.
No matter which browser you choose, switching away from Safari is much easier and less time-consuming than uninstalling it entirely.
This article explained why Safari is a difficult application to uninstall from Mac, if it is even possible at all. The latest macOS releases protect you from altering the software and don’t allow you to uninstall Safari at all. The others, allow you to do so when you disable SIP.
Disabling SIP can be very dangerous, so be careful if this is the path that you ultimately decide to take. Be sure to have your computer backed up to prevent any problems.
Ultimately, it is typically easier to just switch to using another web browser like Google Chrome or Firefox.
Did you uninstall Safari on your Mac? How did it go? Let us know in the comments below!
Submit a Comment Cancel reply
Your email address will not be published. Required fields are marked *
How to troubleshoot a Mac that won’t boot
If you can’t get into macos, there are a few tricks to try..
By David Nield
Share this story
:format(webp)/cdn.vox-cdn.com/uploads/chorus_asset/file/23952310/HT016_macOS_0004.jpg "reinstall safari on mac os")
If your Mac suddenly refuses to boot up properly, it can be frustrating — but you don’t have to immediately head to an Apple Store. There are a number of simple tricks you can try to get everything up and running again. I’ll take you through them here.
First, I’ll cover what to do if your computer starts but you only get a blank screen. Later, I’ll talk about some possible actions to take if you see a symbol on the screen or if the Mac doesn’t start at all.
(Problems like this are a reminder to keep everything backed up on macOS at all times. You’ll be thankful for it if you eventually need to replace your system drive or your entire computer.)
Your computer starts but shows a blank screen
Try a restart.
If your Mac is showing signs of life at the start of the boot process but only displays a blank screen, then first, try a restart.
- Press and hold the power button until the Mac turns off. (This may take up to 10 seconds.)
- Press and release the power button to start up the system again.
If you’re in luck, your system was just experiencing a temporary blip. If that doesn’t work, your next port of call should be the macOS Recovery console.
Try the macOS Recovery console
How you get to this depends on how old your Mac is.
On newer Macs with Apple Silicon chipsets:
- Press and hold the power button until your Mac turns off. (This may take up to 10 seconds.)
- Press and hold the power button until you see the startup options screen, which should show a startup disk icon and a settings icon.
- Select Options and then Continue .
:format(webp)/cdn.vox-cdn.com/uploads/chorus_asset/file/25584651/01_startup.jpg "reinstall safari on mac os")
On older Intel Macs:
- Press and release the power button to boot the system again.
- As soon as the boot starts, press and hold Cmd + R until you see the Apple logo or a spinning globe.
- On some systems, you may be asked to connect to a Wi-Fi network or an ethernet cable.
Whatever route you’ve taken, you should now see a list of utilities onscreen, including the option to reinstall macOS or restore from a backup.
Let Disk Utility help
From here, choose Disk Utility , a comprehensive disk checking and repair tool that may save you a reinstall.
When you have Disk Utility open:
- Choose View > Show All Devices .
- Select your startup disk on the left — it should be called “Macintosh HD,” unless you’ve changed it. If there are several volumes for the same disk, choose the lowest one in the list ( see here for more on file systems).
- Click First Aid and then Run .
- Repeat the process for each volume on your disk.
:format(webp)/cdn.vox-cdn.com/uploads/chorus_asset/file/25584654/02_fixing.jpg "reinstall safari on mac os")
If your startup disk doesn’t show up to be selected, turn off your Mac, remove all peripherals, and go back into Disk Utility. If the system drive is still not showing up, a professional repair might be needed: the official Apple support page for the Disk Utility has more on this.
Assuming your disk is showing up, when you’re done, open the Apple menu and click Restart . If the repair worked, your Mac will boot up as normal. If not, the next step Apple recommends is a full reinstall.
Boot up in safe mode
You also have the option of loading up macOS safe mode , which starts the operating system with a limited number of apps and background processes. However, safe mode is more for investigating software and macOS crashes, rather than boot-up problems. You can try it if you’re not having any luck with Disk Utility, but Disk Utility is the more comprehensive option.
Do a full reinstall
This can be done by going back to the list of utilities using the methods above and then choosing Reinstall macOS from the list of options rather than Disk Utility . Follow the onscreen instructions. If the reinstall is successful, macOS will be reset and working again and all of your apps and data should still be in place.
For an even more comprehensive reinstall, you can wipe the system drive completely (including apps and data) and then put a fresh version of macOS on top. This process is also done through Disk Utility; Apple provides separate instructions for Apple Silicon Macs and Intel silicon Macs .
Your computer shows symbols onscreen
With some boot-up issues, you’ll see a symbol instead of a blank screen, all of which Apple has support documents for. You might see a question mark , or a circle with a line through it , or a globe with an alert symbol on it , or the Apple logo .
These symbols reflect different problems, like an incompatible Mac operating system, but the fixes are mostly the same as those covered above. You’ll need to check the support pages for full instructions, but you may want to try a repair via Disk Utility first.
:format(webp)/cdn.vox-cdn.com/uploads/chorus_asset/file/25584660/03_question.jpg "reinstall safari on mac os")
Your computer doesn’t start at all
If you’re not even getting to a blank screen or any kind of symbol when your computer boots up and there are no signs of life (no lights and no whirring), then you might be looking at a more fundamental problem with your hardware.
Apple’s advice is to run some basic checks: make sure your Mac is connected to power and that you’re using a working power cable. (Try a different one or try the one you’re using on a different computer.)
With that done, remove all the peripherals that you don’t absolutely need to have connected to make sure they’re not interfering in some way. Press and hold the Mac’s power button until it turns off (which may take up to 10 seconds), then press the power button again to restart.
Should you still have problems, Apple suggests resetting the SMC (System Management Controller) chip as one last troubleshooting step. The steps are quite involved and vary depending on the Mac you have, but the full instructions are here .
If you’ve worked your way through all of that, you’re at a point where you need to contact Apple Support directly. You can get assistance over live chat or via a phone call, book an appointment at a local Apple Store, or schedule a repair — and hopefully find a way to get your Mac working again.
Starlink has a pricey new plan to stop scalpers
European iphones are more fun now, french authorities arrest telegram’s ceo, elon musk says x staff can get their stock — if they prove they deserve it, no one’s ready for this.
More from Tech
:format(webp)/cdn.vox-cdn.com/uploads/chorus_asset/file/25585307/VST_0823_Site.jpg "reinstall safari on mac os")
The Pixel 9 is great — and a problem
:format(webp)/cdn.vox-cdn.com/uploads/chorus_asset/file/23954043/VRG_Illo_STK427_Podcasting_playbars.jpg "reinstall safari on mac os")
ElevenLabs’ AI Reader app can now narrate text in 32 languages
:format(webp)/cdn.vox-cdn.com/uploads/chorus_asset/file/25584867/20210408_BaxTowner_Cruise_CamA_GOLDENGATE_DETAIL_A9_904736.jpg "reinstall safari on mac os")
Uber teams up with Cruise to deliver more autonomous rides next year
:format(webp)/cdn.vox-cdn.com/uploads/chorus_asset/file/23935558/acastro_STK103__01.jpg "reinstall safari on mac os")
DC’s antitrust suit against Amazon is back from the dead
- Home New Posts Forum List Trending New Threads New Media Spy
- WikiPost Latest summaries Watched WikiPosts
- Support FAQ and Rules Contact Us
Critical Focus Loss Issue Across All Applications in macOS
- Thread starter Manfred05
- Start date Today at 8:03 AM
- Tags macos sonoma
- Sort by reaction score
- macOS Sonoma (14)

macrumors newbie
- Today at 8:03 AM
- Right-click on the desktop.
- Left-click on the desktop.
- Right-click on Safari in the dock.
- Double left-click to bring Safari back to focus.
- Try interacting with the webpage (hover/click).
- Open Safari, then switch to another app while keeping Safari visible.
- Right-click on Safari without switching back to it.
- Left-click on Safari to regain focus.
- Restarting macOS.
- Booting into Safe Mode.
- Resetting PRAM/NVRAM and SMC.
- Repairing disk permissions.
- Testing in a clean user profile.
- Reinstalling macOS.
- Disabling non-essential startup items.
- macOS Version: Sonoma
- Affected Apps: Safari, Notes, and others

Contributor
- Today at 10:20 AM
Mac model and year? Latest Sonoma on 2019 MBP i9 here and I can’t reproduce. I have Stage Manager turned off.

FreakinEurekan
Macrumors 603.
- Today at 11:05 AM
Not happening with my M1 Max MacBook Pro macOS 14.6.1 either. Also not using Stage Manager.
Home > How to Tips
How To Fix Netflix Keeps Freezing On Mac? [A Comprehensive Guide]
Updated on Wednesday, August 21, 2024

Approved by
English Français Deutsch やまと Español Português
Summary: It's a bad viewing experience when you open Netflix to watch an exciting movie or video on a browser, only to encounter the trouble that Netflix keeps freezing on Mac. Luckily, this post tells you how to fix that issue by reinstalling the problematic browser with iBoysoft MagicMenu and other workarounds!

Download
iBoysoft MagicMenu
Netflix is a streaming service that offers a wide variety of award-winning TV programs, films, anime, documentaries, and more – on thousands of internet-connected devices. It is a browser-based service so you can visit it on any Explorer or browser to watch your favorite video without installation.
However, the trouble appeared as so many users reported experiencing Netflix not responding or freezing when it plays a video on a Mac machine, which definitely leaves a bad viewing experience. Even more, it causes your Mac to be frozen sometimes, dragging it out from its normal working state.
Take it easy, however, as this post lists all possible culprits that cause Netflix to get stuck when playing a video. Moreover, it offers basic yet effective checks or solutions to fix Netflix getting stuck on Mac . For an incomparable viewing experience, let's begin to get this issue addressed now!
Case 1: Poor network connection
Netflix is well-known for its production, which has exciting frames and splendid plots, so viewers always bring expectation and emotion to enjoy a movie or video. This incomparable experience, however, can be broken by the lagging or hold-on state of Netflix on Macs.
This issue can be caused by sorts of reasons, while the first one that you should take into consideration is the network. Once the Wi-Fi connection or Ethernet connection goes wrong, Netflix gets frozen for sure.

To further verify the internet, you can even start a download task to see if it proceeds well. If not, it's a priority to check if the network server works normally. You can log into the administrator account of your Wi-Fi to see what's going wrong after all. If this way is out of your reach, call network personnel for help.
For the users who run an Ethernet connection, checking the Ethernet cable is the first step to address this trouble. If everything goes well, ask for advice from professionals.
Join me to share this post with more people if you find it informative!
Case 2: An unknown error generated from Google, Safari, or Firefox browser
As mentioned before, Netflix is a streaming service that relies on browsers. In other words, you needn't download and install a Netflix separate app but visit it on any browser. When Netflix gets frozen, it might be a fault of the browser. To make the browser functional, please try the following methods:

Method 1: Clear caches, cookies, history, or junk
With too many caches, cookies, history, junk, or other associated files accumulated on a browser, it's quite normal that the browser misbehaves sometimes, while this action impacts the Netflix page, resulting in Netflix being stuck on Mac. So you'd recommended cleaning the cookies of browsers on your Mac .
Although the browsers are different, the steps to clean cookies are similar in a large part. You just visit the Settings tab of each browser and switch to its Privacy or Security section, and then you can implement the cookies cleaning mission without a hitch!

Method 2: Relog into your account
Sometimes, an account relog helps a lot in addressing strange errors or trouble generated in the Google, Safari, Firefox, etc. browsers. Go to log out of your account and then log into again with your password to see if the Netflix video plays smoothly!
Method 3: Reinstall the browser
If cookies cleaning or account relog fails to make Netflix video play normally, browser reinstallation is the final solution that deserves your try. An app uninstall not only brings all accumulated yet useless files or folders away but also completely cleans all possible culprits from your machine, especially the factors that lead to Netflix working abnormally!
To free you from loads of file or folder cleaning - which are scattered in different folders and directories, we recommend iBoysoft MagicMenu - a professional app uninstaller here to carry out the browser removal!
It executes your uninstall order effectively as long as you click the Uninstall button! Once you launch it, it automatically scans every file and folder scattered on the hard drive for you to choose what to delete along with the app uninstall!
With all culprits being removed, you can reinstall the browser and open the Netflix page to have a wonderful and incomparable viewing experience!
Case 3: An unknown error occurred on the OS
Some users mentioned that Netflix freezes with vertical orange/pink lines across the whole screen when it plays a video, well, this issue seems to originate from the OS layer. Trapped in this case, you can try the method below:
Method 1: Boot into macOS Safe Mode
macOS Safe Mode is a diagnostic feature that isolates all errors and troubles but only leaves the crucial part of running your Mac. When Netflix gets frozen with strange lines across the screen, try to boot into this mode to see if everything goes weirdly still:

Boot an Intel-based Mac in Safe Mode:
1⃣️ Shut down your Mac computer and wait for 10 seconds.
2⃣️ Press the power button to restart your Mac and simultaneously hold down the Shift key.
3⃣️ Release the Shift key when seeing the login window.
Start a Mac with an Apple Silicon chip in Safe Mode:
2⃣️ Press down the power button until the startup options and the Options gear icon appear on the screen.
3⃣️ Choose your startup disk.
4⃣️ Hold down the Shift key and click Continue in Safe Mode. Then, release the Shift key.
If Netflix keeps freezing on macOS Safe Mode also, we guess a macOS reinstall is necessary to fix this trouble.
Method 2: Reinstall macOS
macOS reinstall is the ultimate way to fix Netflix being frozen with vertical orange/pink lines, it takes all troublemaking factors generated from the software root level and brings a brand-new OS for normal working in the future.
Please back up your Mac before the macOS reinstall or you might suffer from data loss if any accident happens!
Why not leave your comment and share it to help more people if it fixes the Netflix getting stuck issue?
Case 4: Netflix server works abnormally
It's rare but possible that Netflix doesn't work well when its server goes wrong, leading to Netflix's failure in playing a video. Facing this, you can file Netflix team a report to describe the issue you run into. More details are recommended if possible so that the Netflix team can give you more suitable and available solutions!

Case 5: Mac screen is broken
Exclude all the cases and factors below, the final factor you should consider is the hardware defect - the Netflix being frozen with vertical lines is caused by a broken Mac screen.

Switch to another page or window to see if the line exists still. If yes, bring your Mac local Genius Bar to have a repair or screen replacement. If not, scroll up and try the solutions we discuss above!
Vain Rowe is a new technical editor at iBoysoft. She spares no effort to learn tech knowledge during the training and after training. She has shared dozens of articles across iBoysoft website and other websites, providing solutions and information about file restoration, disk cleanup, work efficiency, and data security.
Jessica Shee is a senior tech editor at iBoysoft. Throughout her 4 years of experience, Jessica has written many informative and instructional articles in data recovery, data security, and disk management to help a lot of readers secure their important documents and take the best advantage of their devices.
No. 308, 3/F, Unit 1, Building 6, No. 1700, Tianfu Avenue North, High-tech Zone
Copyright© 2024 iBoysoft ® . All Rights Reserved.
How to Downgrade MacOS
Do you want to downgrade macOS?
Did you install a new macOS and regret it? Maybe some of your most important apps don’t work, it’s glitchy on your MacBook, or you miss some of the features of your previous operating system. Maybe you even tried a macOS beta and want to return to a more stable version.
You’ll be pleased to know that you can undo the upgrade and roll back macOS . It’s not always the easiest thing to do, though, so we’ll walk you through the process.
In this article, we’ll look at whether you can downgrade macOS, what you should do to prepare, the steps you should take to roll back macOS on your computer, and how to use an older macOS without removing your current version.
In this article you will find the following:
Before we start: If you want to downgrade macOS to save space, there are other actions you can take first. It can be hard to find all the junk and duplicate files on your Mac, but deleting them can free up a surprising amount of storage space. If you’re struggling to find files to delete, MacKeeper’s Duplicates Finder can help—it finds duplicate files, similar photos, and unneeded screenshots, helping you save space on your Mac. How to use MacKeeper’s Duplicates Finder: Download MacKeeper and follow the on-screen instructions to install it. Open MacKeeper and choose Duplicates Finder from the sidebar. Click Start Scan . Choose the files you want to remove and click Remove Selected .
- Can you downgrade macOS
You can usually downgrade macOS—but Apple doesn’t make it as easy as upgrading. Sadly, you can’t download and install the older version of macOS. However, in most cases, you can roll back MacOS on your computer using a variety of other methods.
There may be times when downgrading your macOS is impossible—especially if you want to roll back to a very old version and use a more modern Mac, for example.
Note from our experts: If your Mac is experiencing performance issues, you may be tempted to downgrade to fix them. However, there may be other solutions. Check out our article to find out why is your Mac so slow ?
There are other options if you’d rather not roll back macOS and you’re running out of storage space. You could delete unnecessary files on your Mac, such as duplicates or similar photos. We know it can be difficult to find all these files, though— MacKeeper’s Duplicates Finder can help.
How to free up space with MacKeeper’s Duplicates Finder:
- Open MacKeeper and choose Duplicates Finder from the sidebar.
- Click Start Scan .
- Select the duplicates you want to remove and click Remove Selected .

- What you need to do before downgrading your macOS
Before you downgrade macOS, check whether your Mac will support the older version—although, if it recently ran the previous version, you should be alright. You’ll also want to back up your computer and decide which downgrade method you’ll use.
1. Check if your Mac supports an older version of macOS
If you want to roll back to a version of macOS that your computer has run in the past, it should be alright. However, if you want to install a version of macOS your Mac has never had before, you’ll need to check whether it’s compatible.
In general, your Mac will probably be able to run any macOS that was available when it was developed and those released in the years shortly after.
This is the case whether you use a MacBook Air or Pro, Mac mini, iMac, or other Apple computer.
If your Mac has an Apple silicon chip, you won’t be able to downgrade macOS to any version below macOS 11 Big Sur. This means that you can’t use Catalina, Mojave, Yosemite, or even older versions such as Snow Leopard or Mountain Lion.
Tip from our team: If your Mac is compatible with macOS 10.15 Catalina and you want to downgrade, check out our guide on how to downgrade from Big Sur to Catalina .
Unfortunately, Apple doesn’t have a compatibility checker, so you’ll need to check manually using their website:
- macOS 13 Ventura compatibility
- macOS 12 Monterey compatibility
- macOS 11 Big Sur compatibility
- macOS 10.15 Catalina compatibility
- macOS 10.14 Mojave compatibility
- macOS 10.13 High Sierra compatibility
- macOS 10.12 Sierra compatibility
- macOS 10.11 El Capitan compatibility
2. Back up your Mac
Before you roll back macOS, you should back up your Mac.
However, you can’t use Time Machine to create a backup. This is because Time Machine will back up everything—including your macOS. So, if you try to restore the backup after you’ve downgraded, you’ll also restore your current macOS.
Instead, we’d recommend just backing up your data. You can do this in several ways:
- Using an online cloud-based service, such as iCloud
- Using an external storage device
How to back up your files using iCloud:
- If you don’t already have an iCloud account, visit the iCloud website and follow the on-screen instructions to sign up. Otherwise, log in.
- Scroll down the page and click on the Drive icon.
- Click the Upload button and upload the files that you want to back up.

How to back up your files using an external hard drive or USB memory stick:
- Open Finder and choose the files or folders you want to back up.
- Insert the external storage device .
- Drag the data you want to back up into the external storage device and wait for the files to be copied.

3. Choose a downgrade method
There are a few different ways to roll back macOS on your computer.
The options are:
- Downgrade via macOS Recovery (only available for Intel-based Macs)
- Go back to your old macOS with Time Machine (only available if you have a Time Machine backup)
- Install the selected version of macOS using a bootable installer
Your situation might make this an easy decision. For example, if you’re running an Apple silicon chip and don’t have a Time Machine backup available, you’ll need to use a bootable installer to roll back macOS on your computer. However, if you have an Intel-based Mac, using macOS Recovery is the quickest and easiest way to downgrade macOS.
- How to downgrade macOS version
As we’ve mentioned, there are a few different ways to downgrade macOS.
1. Downgrade via macOS Recovery
macOS Recovery may allow you to reinstall earlier versions of macOS. However, this only works on Macs that are running an Intel processor.
How to find out whether your Mac has an Intel processor or an Apple Silicon chip:
- Go to Apple menu > About This Mac .
- Check whether it says Processor or Chip —if it says Processor , your Mac has an Intel processor, whereas if it says Chip , it’s running an Apple Silicon chip.

Downgrading using macOS Recovery lets you reinstall the macOS that shipped with your Mac—or, if that’s no longer available, the oldest version that is.
If your Mac has an Intel processor, you can follow these instructions to roll back macOS:
- Make sure that your Mac is connected to the Internet —either within range of Wi-Fi or connected via an Ethernet cable.
- Restart your Mac.
- Immediately hold down Option-Shift-Command-R . Release the keys when you see the startup screen.
- Enter your password when prompted, and follow the on-screen instructions to reinstall an older macOS version.
Important: Sometimes, entering Recovery Mode can be tricky. You need to get the timing exactly right for pressing the key combination. You need to press and hold the keys as soon as your Mac restarts or you hear the startup sound.
2. Go back to your old macOS with Time Machine
If your Mac has an Apple silicon chip, don’t worry. There’s still a fairly easy way to roll back macOS on your computer, as long as you have a Time Machine backup from before you upgraded.
To use a Time Machine backup to roll back macOS:
- Turn off your Mac.
- When your Mac is completely turned off, hold down the power button until you see the Volume indicator and an Options button.
- Click Options , then Continue .
- Enter your password if prompted.
- When the Recovery app opens, select Restore from Time Machine , and click Continue .
- Follow the on-screen instructions to restore your Mac from a Time Machine backup.
Note from us: These instructions are for Macs with an Apple Silicon chip only.
3. Install the selected version of macOS using a bootable installer
If the previous two methods don’t work for you, there’s another option to roll back macOS on your computer. It’s a little more involved, but we’ll explain all the steps as we go along.
Hint from the MacKeeper’s team: Before you start this method, you’ll need an external storage device to act as your bootable installer.
3.1 Prepare the external drive or USB flash drive
You’ll need to use the Disk Utility tool to format your external storage device before you can use it as a bootable installer. Here’s how:
- Attach the external storage device and open the Disk Utility app.
- Select your disk and click Erase .
- Confirm that you want to Erase the disk.

Our expert’s tip: Before you prepare your external storage device, make sure that it’s big enough to store the installation files— how much storage does macOS take up ?
3.2 Creating the installer
As part of this step, you’ll need to download older macOS —and decide which version you need.
- Download the appropriate macOS installer file.
- Open Terminal .
- Sonoma: sudo /Applications/Install\ macOS\ Sonoma.app/Contents/Resources/createinstallmedia --volume /Volumes/MyVolume
- Ventura: sudo /Applications/Install\ macOS\ Ventura.app/Contents/Resources/createinstallmedia --volume /Volumes/MyVolume
- Monterey: sudo /Applications/Install\ macOS\ Monterey.app/Contents/Resources/createinstallmedia --volume /Volumes/MyVolume
- Big Sur: sudo /Applications/Install\ macOS\ Big\ Sur.app/Contents/Resources/createinstallmedia --volume /Volumes/MyVolume
- Catalina: sudo /Applications/Install\ macOS\ Catalina.app/Contents/Resources/createinstallmedia --volume /Volumes/MyVolume
- Mojave: sudo /Applications/Install\ macOS\ Mojave.app/Contents/Resources/createinstallmedia --volume /Volumes/MyVolume
- High Sierra: sudo /Applications/Install\ macOS\ High\ Sierra.app/Contents/Resources/createinstallmedia --volume /Volumes/MyVolume
- El Capitan: sudo /Applications/Install\ OS\ X\ El\ Capitan.app/Contents/Resources/createinstallmedia --volume /Volumes/MyVolume --applicationpath /Applications/Install\ OS\ X\ El\ Capitan.app

3.3 Use the installer
Using a bootable installer with an Intel processor:
- Turn off your Mac, and connect the bootable installer.
- Turn on your Mac, and immediately hold down the Option key.
- When you see a screen with the available volumes, select the bootable installer.
- Follow the on-screen instructions to install macOS.
Using a bootable installer with an Apple Silicon chip:
- Hold down the power button until you see the Startup Options window. Choose the bootable installer.
- How to use an older version of macOS without changing the current one
You might want to downgrade macOS but still keep your current version as well. Maybe you don’t feel safe erasing your entire disk, or you need access to two operating systems. You may be able to run a second macOS on an external drive or a partition within your hard drive.
As part of these instructions, you’ll need to open the installer file for an older macOS version. However, some macOS versions will not let you open an older installer file if you’re currently running a more modern macOS.
I tested this out myself, using my MacBook Air, which currently runs macOS Sonoma. I downloaded the installer for macOS Ventura from the App Store. However, when I tried to open it, I got an error message: " This installer cannot be used from the version of macOS you are running. ”

If this happens to you, you may need to create a bootable installer and downgrade macOS.
1. Use an older macOS on an external drive
- Attach the external drive and open Disk Utility . Select the drive and click Erase .
- Under Format , choose Mac OS Extended (Journaled) .
- Confirm that you want to Erase the contents of the drive .
- Download the installer from the App Store.
- Open the installer file from your Applications folder . When you are asked to choose a destination, select the external drive that you formatted, and choose Install .

After the installation is complete, you can use the older macOS on your external drive whenever you want—simply connect the device when your Mac is turned off, press Option during startup (on an Intel-powered Mac), or hold down the power button when turning on (if using a Mac with Apple silicon). You’ll then be able to choose your external drive.
2. Install an older macOS in a partition or volume
Creating a partition allows you to run two macOS versions on the same disk:
- Open Disk Utility and select Partition .
- Click the + symbol to add a new partition, and choose its size and name . Its format should be Mac OS Extended (Journaled) . Click Apply .
- Download and install the older macOS on your new partition, following the instructions in the previous section—make sure that you choose the new partition as the location for installation.

Whatever your reasons, sometimes you might need to downgrade macOS on your computer. It’s not always easy, but it is possible.
However, depending on your reasons for rolling back your macOS, it might not be the best decision—it’s a complicated process, and if you’re doing it because you’re out of storage space, there are other options. To make sure you have the most storage space possible, check out our article on how to delete macOS update files . You can also use MacKeeper’s Duplicates Finder to remove unnecessary files from your Mac.
You’ll love exploring your Mac with us.
Oops, something went wrong.
Try again or reload a page.

- Delete unnecessary system files and caches
- Free up GBs of storage space
- Easily find and delete duplicate files

MacKeeper - your all-in-one solution for more space and maximum security.

We respect your privacy and use cookies for the best site experience.
Privacy Preferences Center
We use cookies along with other tools to give you the best possible experience while using the MacKeeper website. Cookies are small text files that help the website load faster. The cookies we use don’t contain any type of personal data meaning they never store information such as your location, email address, or IP address.
Help us improve how you interact with our website by accepting the use of cookies. You can change your privacy settings whenever you like.
Manage consent
All cookies
These cookies are strictly necessary for enabling basic website functionality (including page navigation, form submission, language detection, post commenting), downloading and purchasing software. The website might malfunction without these cookies.
Download MacKeeper when you're back at your Mac
Please enter your email so we can send you a download link
Check your email on your Mac
Install MacKeeper on your Mac computer to rediscover its true power.
Run Application

Click Continue

Click Install

Your macOS version is lower than OS 10.11. We’d like to offer you MacKeeper 4 to solve the cleaning, privacy, and security issues of your macOS.
You can make a difference in the Apple Support Community!
When you sign up with your Apple ID , you can provide valuable feedback to other community members by upvoting helpful replies and User Tips .
What does "Reinstall macOS" do, exactly?
This was seen on-line at Stack Exchange:-
//I was recently having some problems with iTunes, and decided to reinstall macOS Sierra. I held Command+R on startup and clicked on "Reinstall macOS" without erasing the hard drive in Disk Utility. Once the reinstall was complete, I started back up and all of my files and programs were still there, along with my settings, desktop wallpaper, and everything else. (The iTunes problems were fixed.)
What exactly does this "Reinstall" feature do, if it doesn't remove programs and change settings to default?//
Here are answers on-line:- https://apple.stackexchange.com/questions/276766/what-does-reinstall-macos-do-exactly
How would YOU have answered the OP's question?
MacBook Air (M1, 2020)
Posted on Aug 20, 2024 2:12 PM
Loading page content
Page content loaded

Aug 20, 2024 3:19 PM in response to WhiterthanWhite
That Stack Exchange question is very old and completely inapplicable to recent macOS versions. Unless you're still using Sierra you should probably just ignore it. Its shelf life expired long ago.
The answer to your question is "not very much" since recent Mac operating systems are inaccessible and protected from unauthorized alteration. Any changes to it, even one single solitary bit, will result in system shutdown. "Runtime corruption detected" was the wording I recall during testing but I do not want to be more specific lest malcontents hijack it and fool users into thinking something is wrong.
If you want to learn more begin with Apple Platform Security - Apple Support . There is an enormous amount of material to absorb if you are so inclined. Too much to even begin to summarize here.
However, reinstalling macOS is sometimes helpful if changes to the user space result in app misbehavior. Most apps rely upon data stored in a user's alterable space, and that data can become corrupted. That's not malware though.
Does Apple EVER check the whole of the hard-drive for malware?
Yes. Always. Continuously as well as periodically.
Known Mac malware is automatically blocked from loading. Unknown malware — potentially harmful, malicious, or just poorly written software due to developer ineptitude — generates a warning from macOS asking if the user really wants to install whatever it is. These warnings have to be deliberately dismissed, after which you're on your own, and presumably after reading the "terms and conditions" that invariably accompany "free" software. As a matter of fact I have yet to encounter a single example of Mac malware that does not do exactly what those "terms and conditions" state it's going to do.
However, even intentionally malicious software cannot alter macOS itself. It is quite literally impossible to do so. If you peruse the links within the above Apple Support document, you will find references to XProtect and Gatekeeper, so find out for yourself what they do and why.
So much for Apple's documentation; here's mine: Effective defenses against malware and other threats - Apple Community . It describes the basic principles that I have followed since the Macintosh's inception four decades ago. After finally publishing it to this site maybe fifteen years ago, it has required only minor updates to keep up with the latest threats. Most of them address phishing... which isn't malware at all, it's just the latest variant of a social exploit that predates computers by several millennia. Nevertheless it remains very much a threat. People succumb to those scams every day.
Aug 20, 2024 2:42 PM in response to WhiterthanWhite
Moving on from there if, somehow, malware had crept onto the hard-drive, and is resident elsewhere when macOS is installed, how would the user of the computer ever know about it?
Does anyone know?

Aug 20, 2024 3:16 PM in response to WhiterthanWhite
Reinstalling the Os does that - it refreshes the Operating System. It's good if there are glitches in the OS. It's not a security procedure. If the procedure fixed your issues with iTunes then it suggests that the issue you had was somewhere within the OS.
Apple don't check your hard drive for anything. Can you imagine the privacy and security concerns of users if they did? Their security is mostly aimed at preventing the installation of malware, and by putting the OS on a secure location that no one can access, making the OS as invulnerable to malware as possible.

Aug 20, 2024 4:19 PM in response to WhiterthanWhite
I don't know. I believe the Malware Removal Tool (MRT) runs when you reinstall, but I doubt it cares about your data.
From Catalina (maybe Big Sur), the OS is mounted on a read only volume from a sealed snapshot. The OS pretty much cannot get malware. Is it possible with nation-state capability? Probably.
You posted in the Ventura forum, but stated you installed Sierra. Sierra certainly could be vulnerable to malware you installed. I have never heard of any macOS malware that can infect macOS without an admin user installing it.
There is a lot of "legitimate" macOS software that acts like malware. Anti-virus software is all pretty much malware. Almost all can do nothing useful, and almost all cause problems. Much like a Trojan Horse, you installed it because you thought it would be useful, but it just causes problems in the end.
The simple solution is, "Don't install Malware." Sure they might trick you, but why did you just go ahead and enter you admin password? Almost all apps do not need your admin password to install. They just want to put a license checker or update checker in where it can run in the background. The update checker is completely useless as the app can check for updates when you run it. I figure if you need to run a license checker, you are probably charging way more for the app than it deserves.
COMMENTS
reinstall safari on my MAC. Hello. Did you delete Safari from your Mac? If you did and do not have a recent backup, you will need to reinstall macOS to get Safari back. If you do have a recent backup of Safari before it was deleted, you can restore it. If you haven't already, please also perform a Spotlight search for Safari to make sure that ...
Remove Safari Data: Open Finder and click on "Go" in the top menu. Select "Go to Folder" and enter "~/Library" in the dialog box. Locate the "Safari" folder and move it to the Trash. Next, navigate to "~/Library/Preferences" and find the file named "com.apple.Safari.plist." Move this file to the Trash as well.
Below are directions for uninstalling and reinstalling Safari on a Mac. Open Finder and click on "Applications.". Find the Safari icon and drag it to the Trash. Empty the Trash. Reinstall Safari by downloading it from the App Store or another trusted source. Install the program like you would any other Mac application.
3. Delete Safari history. Safari settings on Mac make it easy to delete history files from the Safari toolbar. Just do the following things. Launch Safari and click on the 'Safari' tab in the toolbar. Now click on 'Clear History'. When the drop-down menu opens, choose 'All History' and finally, click on 'Clear History'.
1. First, open Safari and click the Safari menu in the upper left corner of your screen. 2. Select Preferences from the dropdown menu to open the Preferences window. 3. In the General tab, click ...
Restart your computer and hold down "Cmd+R " together until you see gray Apple Logo. Make sure you're connected to the Internet, select "Reinstall OS X" and click "Continue.". Follow the onscreen instructions to install OS X. Hope you found it helpful and it helped you reinstall Safari on your Mac.
If a Safari update is available for your device, you can get it by updating or upgrading macOS, iOS, iPadOS, or visionOS. Get Safari updates for Mac, iPhone, iPad, or Apple Vision Pro. The most up-to-date version of Safari is included with the latest version of the operating system for your Apple device. To update Safari on Mac, update macOS.
When using a Mac with Apple silicon, Recovery installs the current version of the most recently installed macOS. Press and hold the power button on your Mac. As you continue to hold the power button, your Mac turns on and loads startup options. When you see Options, release the power button. Click Options, then click the Continue button that ...
I can answer your question.The way Safari is updated is by upgrading your computer's software. An upgrade is when you install a newer OS version, such as upgrading from Catalina to Big Sur. An update is to install a newer version of the same operating system. The reason for this is because Safari is installed as part of the operating system.
Step #2: Reinstalling Safari. In the next step, launch the Finder and drag the Safari app into the CleanMyMac 2. Click "Select" in the pop-up window and choose the "Uninstall" option. Finally, download Safari from the Apple Developer Program website, and browse for "Safari".
Library > Preferences > com.apple.Safari.plist. Right click on it and select "Move it to Trash". Restart. Relaunch Safari. If this doesn't help, "Put back" the com.apple.Safari.plist. Right click the Trash icon in the Dock and select "Open". Right click the com.apple.Safari.plist and select "Put Back".
Mountain Lion 10.8. Lion 10.7. Double-click the .dmg file to open it and see the package (.pkg) file within. Double-click the .pkg file, then follow the onscreen instructions to install the macOS installer into your Applications folder. Open your Applications folder and double-click the macOS installer, named Install [ Version Name ].
[1] Responsible: Safari [2245] User ID: 66702218 Date/Time: 2020-10-07 17:25:11.648 +0200 OS Version: Mac OS X 10.14.6 (18G2022) Report Version: 12 Bridge OS Version: 4.2 (17P2551) Anonymous UUID: F0A08E7C-38FB-79BF-A87B-5A4AE24494E5 Time Awake Since Boot: 280 seconds System Integrity Protection: enabled Crashed Thread: 0 Dispatch queue: com ...
Open Safari; Click Safari located in the menu bar in the top left hand corner of your screen; Click Clear History; You can choose different time period options: last hour, today, today and yesterday, all history. Select one. Click the Clear History button; Option # 1. Open Safari; Click Safari located in the menu bar in the top left hand corner ...
Three ways to clean install macOS. Option 1: Erase All Content and Settings (macOS Monterey and later) Option 2: Do a clean install via Recovery. Option 3: Do a clean install macOS using a ...
Reinstall macOS. Foundry. Follow these steps to reinstall the latest version of macOS installed on your Mac: In Recovery mode choose Reinstall macOS from the list of options. Click on Continue ...
Step 1: With Safari Open, click the Safari Menu and Settings…. Step 2: Click the Extensions tab at the top. Use the checkboxes on the left to enable or disable each extension (mine are all disabled - when they are enabled, you will see a checkmark in the box).
As stated in that article, you'll need to "reinstall macOS to put Safari back in your Applications folder. Reinstalling macOS doesn't remove data from your computer. Before reinstalling, you might want to use Spotlight to search for Safari. If you find it, but it's no longer in your Dock, just drag it to the Dock to add it back.".
To do this, boot up your Mac and go to Apple > About This Mac from the top-left corner of the menu bar. In the About This Mac window, you should see the specifications for your Mac. If it says Chip, followed by a chip name, then your Mac uses Apple silicon. And if it says Processor, followed by a processor name, then your Mac uses Intel.
If this seems to solve issues with Safari, is there a way "reinstall" safari where it would remove and overwrite anything that is causing continued repeted issues? ... Even latent issues with the OS, which seemed to be cured by putting Safari in "Safe Mode" by launching it while holding Shift. ... sudo rm -rf ~/Library/Containers/com.apple ...
Apple's advice is to run some basic checks: make sure your Mac is connected to power and that you're using a working power cable. (Try a different one or try the one you're using on a ...
Ok , with latest version as Mac OS high Sierra the safari latest version is automatically added , however if the user enter in user library macOS Sierra: Library folder. And find a folder preferences and from this folder , delete com.apple.safari.plist into the trash , restart the Mac and then empty the trash , the settings will go to default and has to set the home page once again see this ...
Right-click on Safari in the dock. Double left-click to bring Safari back to focus. Try interacting with the webpage (hover/click). OR. Open Safari, then switch to another app while keeping Safari visible. Right-click on Safari without switching back to it. Left-click on Safari to regain focus. Try interacting with the webpage (hover/click).
1⃣️ Shut down your Mac computer and wait for 10 seconds. 2⃣️ Press the power button to restart your Mac and simultaneously hold down the Shift key. 3⃣️ Release the Shift key when seeing the login window. Start a Mac with an Apple Silicon chip in Safe Mode: 1⃣️ Shut down your Mac computer and wait for 10 seconds.
3. Turn on your Mac for Intel Macs and immediately press Command-R until the Apple logo appears. Step 2. Remove macOS Sequoia Beta. 1. In Recovery Mode, you'll see several options: Restore From Time Machine Backup, Reinstall macOS, Safari, and Disk Utility. Choose "Disk Utility" and click "Continue." 2.
When the OS is upgraded to a newer OS, Safari may be also. Therefore, Safari may not normally be individually installed. If you are currently having problems, the following may be useful to you. There have recently been many reports of new problems with Safari. It seems that the recent Safari update has issues.
Step 1. Go to Apple menu > About This Mac Step 2. Check whether it says Processor or Chip. Downgrading using macOS Recovery lets you reinstall the macOS that shipped with your Mac—or, if that's no longer available, the oldest version that is. If your Mac has an Intel processor, you can follow these instructions to roll back macOS:
Once the reinstall was complete, I started back up and all of my files and programs were still there, along with my settings, desktop wallpaper, and everything else. (The iTunes problems were fixed.) ... Apple disclaims any and all liability for the acts, omissions and conduct of any third parties in connection with or related to your use of ...